|
"Purple"
MATERIAL AQUI
AlphaChannel "Purple"___Bylicacida
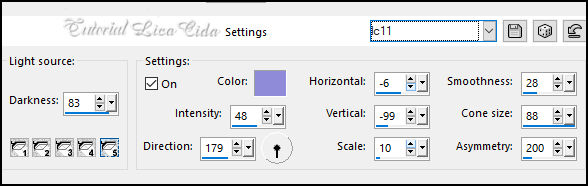
Preset Illumination\ Lights_lights \ lightlc11.. ( Guardar em sua
pasta de Presets My PSP Files).
Tubes: SuizaBella_Ref_AG-004270\Callitubes-303paisagens
6518-Luz Cristina
Decor:deco1lc\ deco2bylc\deco3bylc
(Agradeço)
Marca D'água .
Efeitos do PSP.
PLUGINS
Plugin MuRa's Seamless\Shift at Random
Alien Skin Eye Candy 5: Impact \ Glass:
Alien Skin Eye Candy 5: Impact \ Motion Trail.
Plugins \ AAA Frames \Foto Frame
UnPlugged-X v2.0 by VanDerLee_Interlace \45*Rectangle
Filters Unlimited 2.0&<BKg Designer sf10II> Picasso's Another
Word...
Plugin MuRa's Meister \ Perspective Tiling
Tutorial
1-Abra o material no PSP, duplique e feche o original.
Escolher duas cores para trabalhar.
Foreground #1f1d4c
Background #6a70aa
2- Abra o arquivo Alpha Channel_Purple__bylicacida.
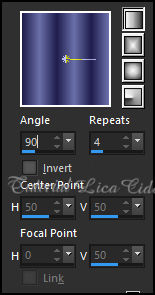
3-Layers \ New Raster Layer.
Pintar com o gradiente Linear, formado pelas cores em uso.
4-Effects\Geometric Effects\
Perspective - Horizontal.
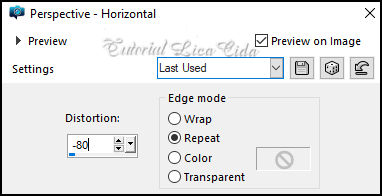
*Edit Repeat o efeito.
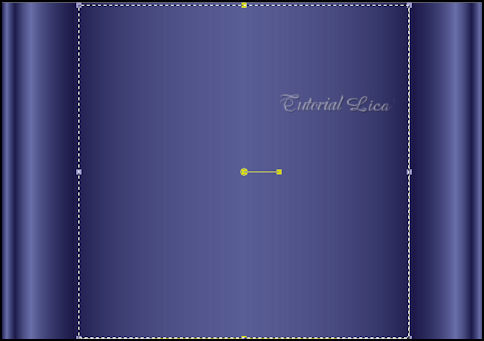
5-Effects\ Reflection Effects \ Rotating Mirror \0_180.
6-Selections \ Load/Save Selection \Load Selection From Alpha
Channel: Selection #1
Promote Selection to Layer
Effects \ 3D Effects \ Drop Shadow: 0, 0, 100, 40,00_ color #000000.
*Edit Repeat
_Aplicar o mesmo Shadow na Raster1
*Edit Repeat
layer topo( promoted selection _deve estar selecionado.
7-Edit Copy no Callitubes-303paisagens \
Edit Paste Into Selection .
Selections\ Select none.
Adjust\ Blur\ Gaussian Blur.28,00
8-Plugins MuRa's Seamless\Shift at Random...Default
255\16\0\0
Effects\ Edge Effects\ Enhance.
9-Plugins MuRa's Meister \ Perspective Tiling: Height 20.
10-Effects\ Reflection Effects \ Rotating Mirror \0_180
*Clica na parte transparente com a ferramenta Magic Wand Tool\
Tolerance 0 _ Feather 60
Aperte a tecla Delete do teclado 5_6 vezes.
Selections\ Select none.
Adjust\ Sharpness\ Sharpen More
11- Plugins \ AAA Frames \Foto Frame. Width 36, Opacity 50 ,demais
valores Default.
*Edit \Repeat.
12-Layer fundo ( background).
Effects\ Artistic Effects\ Halftone.

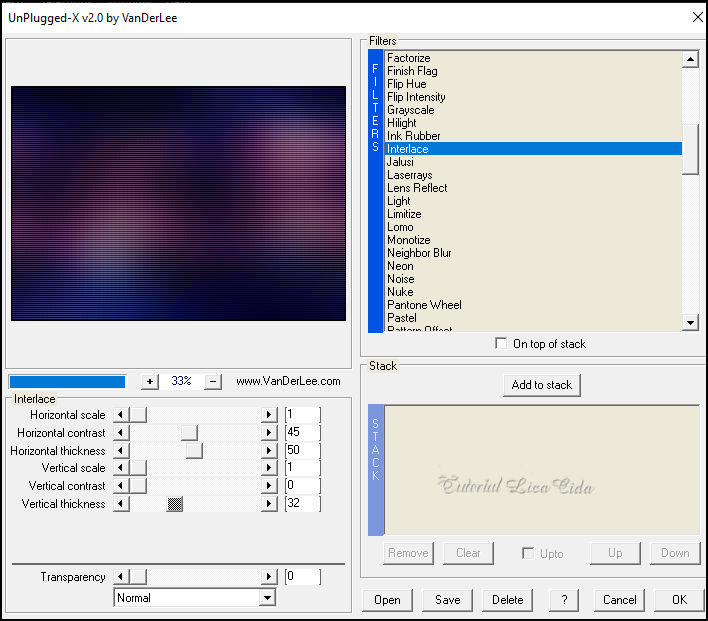
13- UnPlugged-X v2.0 by
VanDerLee\Interlace
( observe valores)
14- Ainda na layer fundo ... (
background).
Effects\ Illumination Effects\Preset Illumination\Lights\lightlc11.
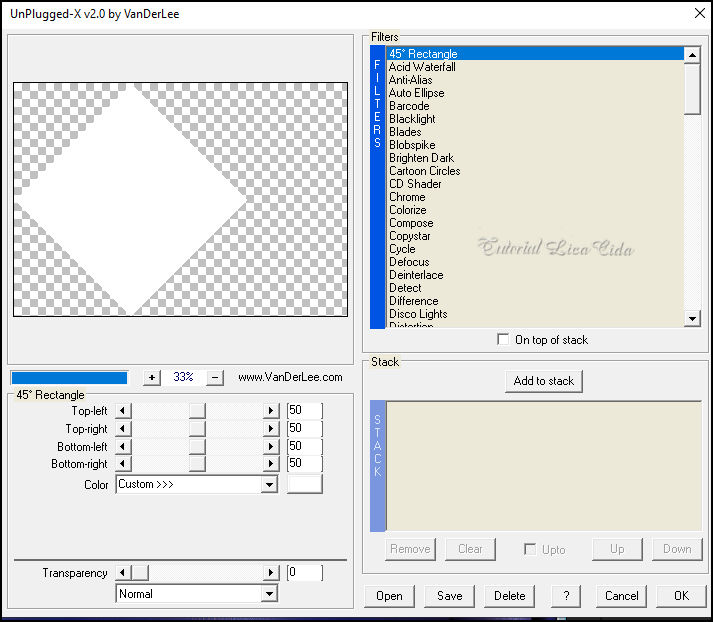
15-Layers \ New Raster Layer.
UnPlugged-X v2.0 by VanDerLee\45*Rectangle
16-Seleciona o retangulo com a
ferramenta Magic Wand_Default
17- Raster1_Promote Selection to Layer.
Layers\Arrange Bring to Top
Effects \ 3D Effects \ Drop Shadow: 0, 0, 100, 40,00_ color #000000.
18-Copy no Callitubes-303paisagens \Paste as New Layer
Posicione
Adjust\ Sharpness\ Sharpen
Layers\Merge\Merge Down
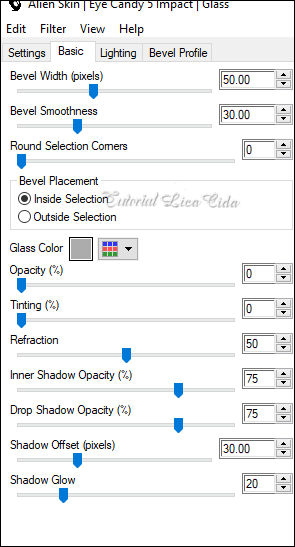
19- Plugins \ Alien Skin Eye Candy 5: Impact \ Glass \ Clear.
20- Effects\3DEffects\ Chisel
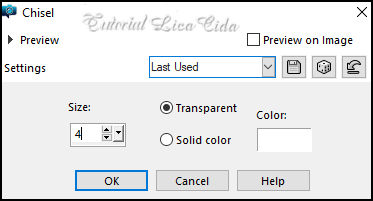
Selections\ Select none.
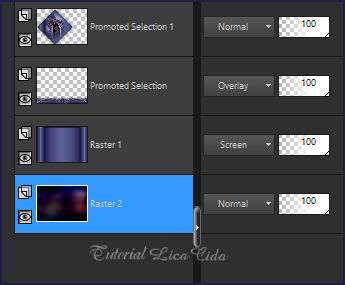
*Desabilita a raster2, ( triangulo branco)_ Delete a layer.
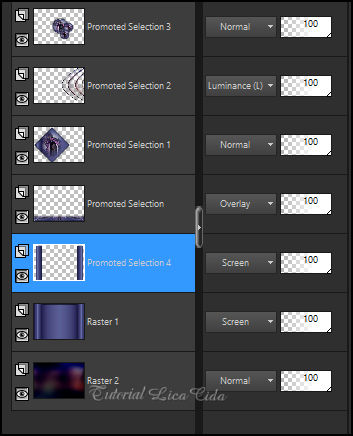
Conferir layers (blends usar a gosto)
Layer fundo ... (
background).
21-Selections \ Load/Save Selection \Load Selection From Alpha
Channel: Selection #2.
Promote Selection to Layer. Layers\ Arrange Bring to Top
22-Effects\3DEffects\Inner Bevel.
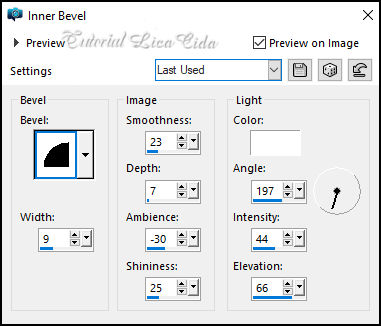
Selections\ Select none.
23- Plugins \ Alien Skin Eye Candy 5: Impact \ Motion Trail.
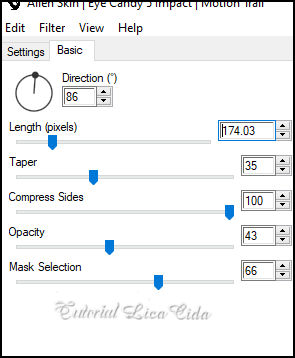
Layers \ Properties \ General \
Blend Mode_ Luminance( L )\ Opacity 100%.
Raster1.
24-Selections \ Load/Save Selection \Load Selection From Alpha
Channel: Selection #3.
Promote Selection to Layer. Layers\ Arrange Bring to Top
25-Edit Copy no Callitubes-303paisagens \
Edit Paste Into Selection .
Adjust\ Sharpness\ Sharpen
26-Edit Repeat_mesmos valores _Plugins \ Alien Skin Eye Candy 5:
Impact \ Glass \ Clear.
27-Edit Repeat_mesmos valores_ Effects\3DEffects\ Chisel.
Selections\ Select none.
Effects \ 3D Effects \ Drop Shadow: 0, 0, 100, 40,00_ color #000000.
28-Pick Tool: Position X: 322 - Position Y: 149
Layers Duplicate
Image Resize 60%
29-Layers Duplicate
Os circulos menores posicionar de acodo com seu tube, onde preferir.
Layers\Merge\Merge Down( aplicar tres vezes)
(unir os circulos)
Raster1
30-Selections \ Load/Save Selection \Load Selection From Alpha
Channel: Selection #4.
Promote Selection to Layer.
31-Filters Unlimited 2.0&<BKg Designer sf10II> Picasso's Another
Word...

Selections\ Select none.
Layers \ Properties \ General \ Blend Mode_ Screen\ Opacity 100%.
32-Effects\ Reflection Effects \ Rotating Mirror \0_180
Conferir layers (blends usar a gosto)
33-Edit \ Copy no deco1bylc\
Edit \ Paste as New Layer
Layers \ Properties \ General \ Blend Mode_ Luminance( L )\ Opacity
100%.
34-Pick Tool: Position X: 45 _ Position Y: 17
Effects \ 3D Effects \ Drop Shadow: 0, 0, 100, 40,00_ color #000000
35--Effects\ Reflection Effects \ Rotating Mirror \0_180
Layers\Duplicate
36-Unlimited 2.0 VM Stylise\Zoom Blur_Default (39\60)
Esse efeito hospeda-se em outros plugins.
Layers \ Properties \ General \ Blend Mode_ Overley\ Opacity 100%.
Layers\Duplicate
Effects \ Image Effects \ Seamless Tiling :Side by side
Layers \ Properties \ General \ Blend Mode_ Overley\ Opacity 100%.
37-Edit \ Copy no deco2bylc\ Edit \ Paste as New Layer
Layers \ Properties \ General \ Blend Mode_ Overley\ Opacity 100%.
Effects\ Edge Effects\ Enhance.
38-Edit \ Copy no deco3bylc\ Edit \ Paste as New Layer
Opacity use a gosto.
Objects\Align Left.U sar abaixo da layer do triangulo
39-Layer topo
Edit \ Copy no SuizaBella_Ref_AG-004270\ Edit \ Paste as New Layer..
Use a gosto, posicione
50-Edit \ Copy no 6518-Luz Cristina\ Edit \ Paste as New Layer..
Use a gosto, posicione
Borders
_Image \ Add Borders \ 2 pxls color #1f1d4c
_Image \ Add Borders \ 10 pxls color #ffffff
_Image \ Add Borders \ 2 pxls color #1f1d4c
_Image \ Add Borders \ 20 pxls color #ffffff
_Image \ Add Borders \ 2 pxls color #1f1d4c
_Image \ Add Borders \ 30 pxls color #ffffff
_Image \ Add Borders \ 2 pxls color #1f1d4c
Resize _Width 1024pxls.
Aplicar a marca d'água.
Assine e salve.
File \ Export \ JPEG Optimizer.
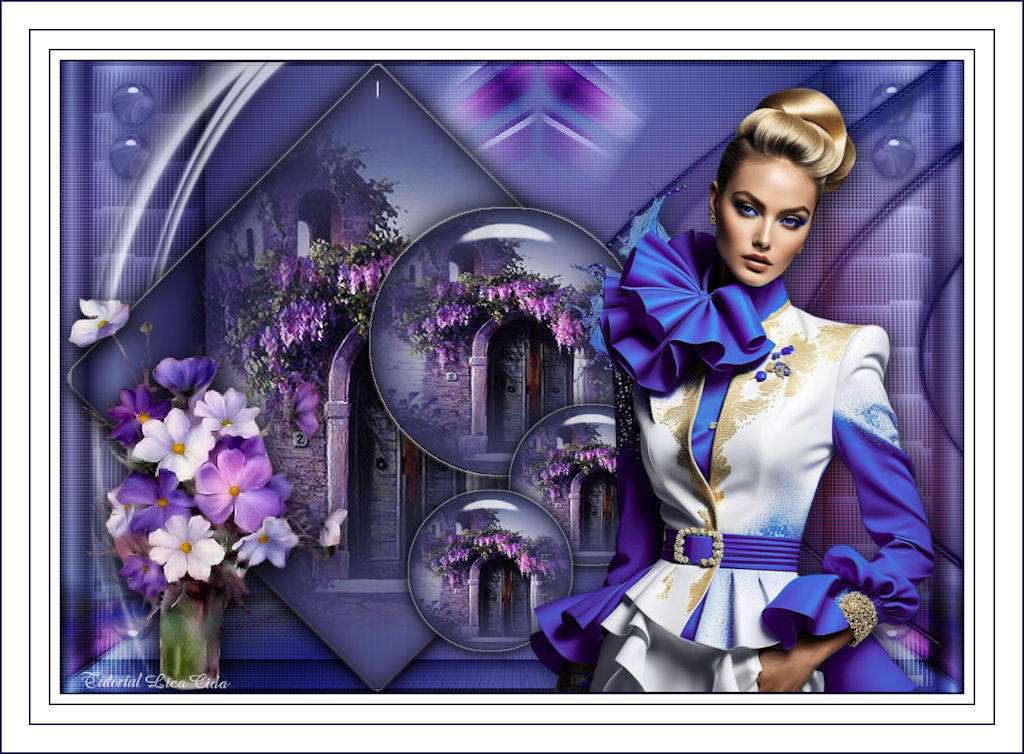
Aparecida\lica _Julho de 2024.

:::...VOLTAR...:::
|