|
Lynnette
Carinhosamente.
MATERIAL AQUI
backgroundby lc
Preset _ AirBrush \ 3d _mp ( salve em sua paste de presets_ airbrush
my psp files)
Tubes
MULHERES_1973\MISTED_NMCRIACOES_118\TUBE_NAISEM_FLORES_122.TUBE_NAISEM_FLORES_122
decorarquivonet\decorretangulolc\
avesarquivo net
Obrigada!!!.
(Agradeço)
Marca D'água .
Efeitos do PSP.
PLUGINS
Plugin VM Instant Art
Plugin Mehdi\ Edges FX.
Plugin Graphics Plus
Plugin Mura's Meister
Convolution Filter
Plugin \ AAA Frames \Foto Frame
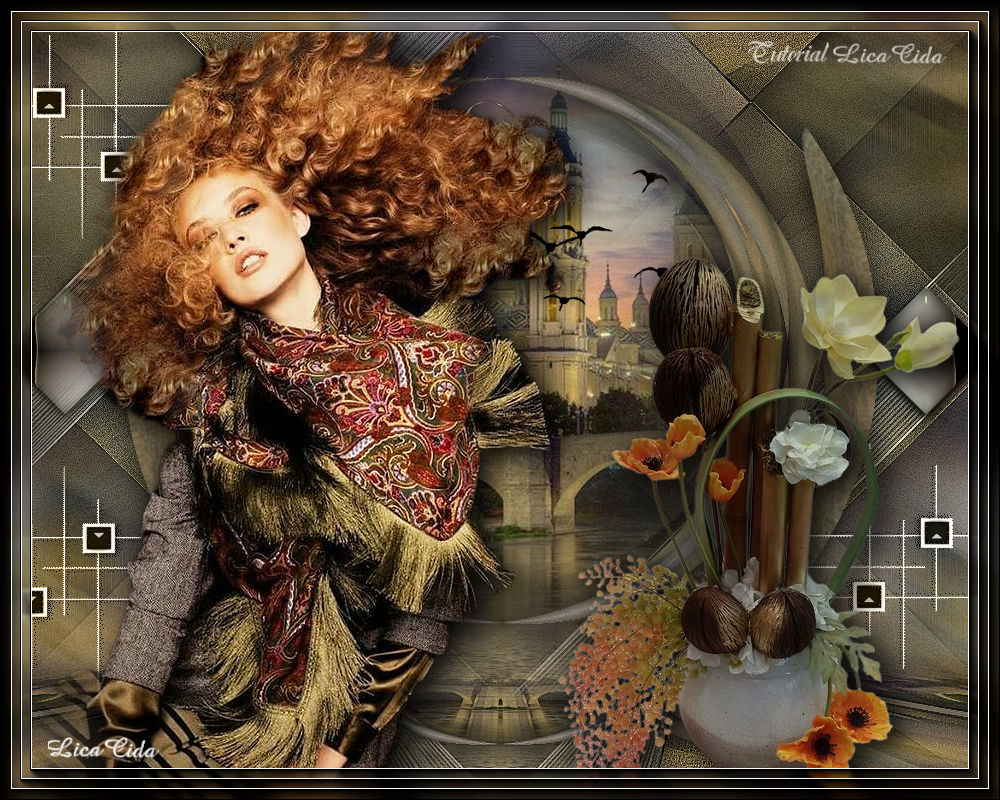
Tutorial
Abra o material no PSP, duplique e feche o original.
1-Abra o backgroundby- lc anexado, e\ou use outro do seu agrado,
inclusive cores.
2-Layers \ New Raster Layer.
Select All. Edit Copy no
MISTED_NMCRIACOES_118 \ Edit Paste Into Selection. Selections\
Select none.
3-Effects\ Image Effects\ Seamless Tiling: Transition\ 100.
4-Adjust\ Blur\ Motion Blur. A= 300\ S= 100 .( aplicar duas vezes)
Layers\ Merge\ Merge Down.
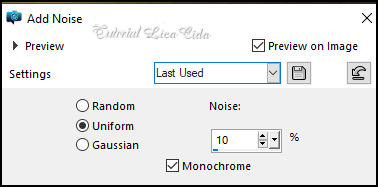
5-Adjust \ Add/Remove \ Add Noise.
*Layers Duplicate\ Fechar a Layer original .
Vamos trabalhar na cópia.
6-Plugin VM Instant Art \Tripolis_Default.
7-Plugin Mehdi\ Edges FX.
(Color=#000000)
Adjust \ Sharpness \ Sharpen
8-Ativar a ferramenta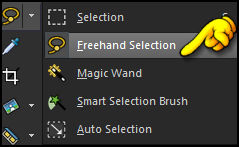
Configurar:

_Selecionar como mostra o print . DELETE.
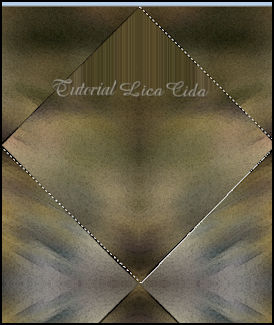
_Ativar a layer background. Promote Selection to
Layer.
_Selections\ Select none.
Layers
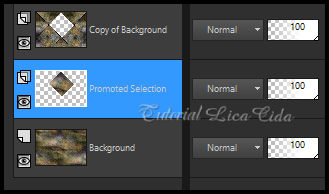
Delete a layer Promoted Selection .
9-Ativar a layer do topo\ copy of background.
Plugin Graphics Plus\ Vertical Mirror_Default.
10-Effects\ Image Effects\ Seamless Tiling: Transition\ 100 .
Effects \ 3D Effects \ Drop Shadow: 0, 0, 80, 40,00, color #000000.
Layers Duplicate
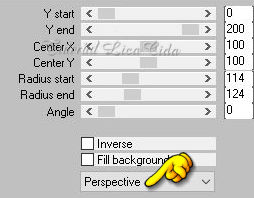
11-Plugin Mura's Meister\ Pole Transform
12-Convolution Filter ( Emboss (light)
Emboss 191.
Effects \ 3D Effects \ Drop Shadow: 0, 0, 80, 40,00, color #000000.
13-Plugin Graphics Plus\ Vertical Mirror_Default.
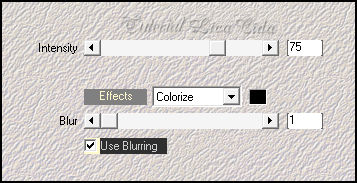
14-Ativar o AirBrush.
_Foregraund color=#ffffff e Background color=TRANSPARENT.
_ Procurar o Preset_Airbrush_ 3d ou configure: ( use de baixo para
cima.

Aplique onde indico no Tutorial.
( *fechar a layer do topo para trabalhar melhor)
Effects\ Edge Effects\ Enhance.
15-Edit \ Copy no MISTED_NMCRIACOES_118
Edit \ Paste as New Layer. Resize 80%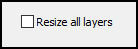 , aplicar duas vezes.
Adjust \ Sharpness \ Sharpen More.
Layers\ Arrange\ Move Down
(*Ativar a layer do topo)
16-Edit\ Copy Special\ Copy Merged.
Edit\Paste as New Layer.
17_ Image \ Canvas Size .1000 x 800, bottom 100.
18-Plugin MuRa's Meister \ Perspective Tiling: Height 20.
Effects \ Reflection Effects \ Rotating Mirror: Default.
19-Clica na parte transparente com a ferramenta Magic Wand Tool\
Tolerance 0 _ Feather 60
Aperte a tecla Delete do teclado 4 _6 vezes.
Selections \ Select None.
Adjust \ Sharpness \ Sharpen More.
20-Edit \ Copy no decortriangulolc\
Edit \ Paste a New Layer. Posicionar ao lado esquerdo como modelo.
21-Effects \ Reflection Effects \ Rotating Mirror: 0\180
22-Edit \ Copy no decorarquivonet.Edit \ Paste a New Layer.
Posicionar como modelo ou a gosto.
23-Edit \ Copy avesarquivo net .Edit \ Paste a New Layer.
Posicionar como modelo ou a gosto
o back
24-Edit \Copyno tube MULHERES_1973.
Edit \ Paste a New Layer. Posicionar.
25-Edit \Copyno TUBE_NAISEM_FLORES_122
Edit \ Paste a New Layer. Posicionar.
*Aplique Drop Shadow como desejar
26-Layers \ Merge \ Merge Visibile.
27 - Effects \ Plugin \ AAA Frames \Foto Frame. Width 30,
Matte1demais valores Default
28 - Effects \ Plugin \ AAA Frames \Foto Frame. Width 20,
Matte1demais valores Default
29 - Effects \ Plugin \ AAA Frames \Foto Frame. Width 10,
Matte1demais valores Default
30-Layers \ Merge \ Merge All.
Aplicar a marca d'água.
Assine e salve.
File \ Export \ JPEG Optimizer.
Aparecida, Setembro de 2023.

:::...VOLTAR...::: |