|
|
|
"Angel Star" Com Carinho!!!
Preset
Illumination\Lights_ steampunk (marapontes) ( Guardar em sua
pasta de Presets My PSP Files).
Tubes:
5031-luzcristina\5054-luzcristina.
Deco_decolc
Texture:Corel_15_001.
(Agradeço)
Marca
D'água . Efeitos do PSP.
Versão usada PSPX8.
Plugins
Plugin
penta.com
Plugin
Toadies
Plugin
\ AAA Frames
Plugin Nick
Software
Tutorial _Roteiro
Configurar:
 Background #292b41 \ Background #292b41 \
 Foreground#4d709d Foreground#4d709d1-Abrir uma nova imagem
transparente de 1024 x 800 pxls.
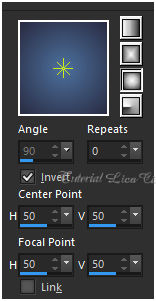
Preencher
com a gradiente formada pelas cores acima. Configurar Sunburst
\ Repeats 0. Invert marcado.
CP e FP\ H e V =50.
 2-Plugin penta.com\ VTR _Default ( 33\ 1\ 30\ 4
).
Emboss3.
Layer
Duplicate \ Resize 80%.
3-Plugin Toadies\ Ommadawn... _Default (17\ 16\
234\17 ).
View\
Rulers . Ativar a régua .
Usar a ferramenta Pick Tool ( mode
perspective )
300 a
720 pxls.
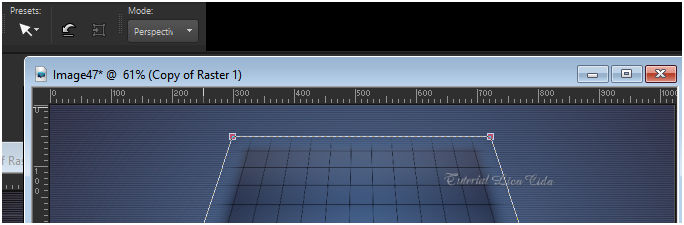 ( mode scale ) desçer o
efeito a 600 pxls.
( confira )
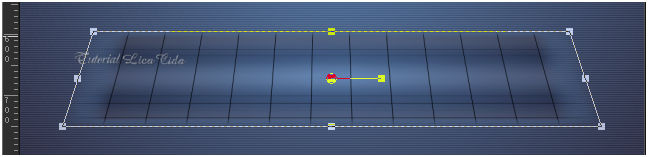 Desativar a régua
.
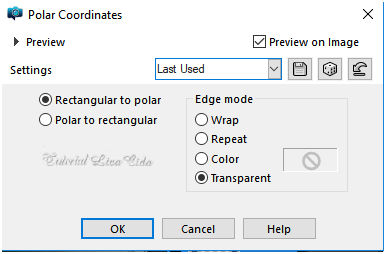
4- Effects\ Distortion
Effects\ Polar Coordinates.
 Layer Duplicate\ Image Mirror Vertical.
Layer\Merge\ Down . Resize 80%.
Effects\3D Effects\
Drop Shadow. 20\ (menos)-2\ 50\ 30,00 . (Color=#000000).
Ativar a
raster1.
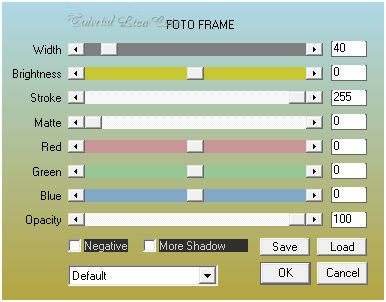
5- Plugin \ AAA Frames_ Foto
Frame.
 6-Effects\ Image Effects\
Seamless Tiling:
 Layer Duplicate\ Image
Mirror Horizontal.
Blend
Mode=Overley. Layer\Merge\
Down.
O Blend Mode ficará
Normal.
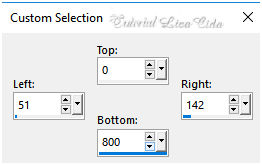
7- Seleção
Personalizada (
tecleS).
 Nova Layer
Flood Fill_Opacity 30% _
Preencher com a mesma gradiente formada no ítem
1.
Selections\ Select
none.
8-Plugin Toadies\
Ommadawn... _Default (17\ 16\ 234\17
).
Layer Duplicate\ Image
Mirror Horizontal.
Layer\Merge\ Down.
Blend Mode=Overley.
Layer
Duplicate
9-Plugin Toadies \
Weaver... _Default (59\ 48\ 222
)
Blend
Mode=Screen. Emboss3.
.
Layer
Duplicate
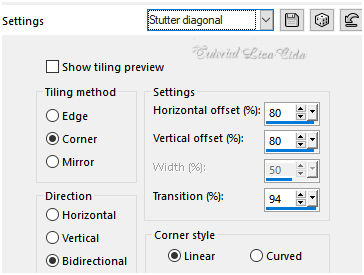
10-Plugin MuRa's Meister \Perspective
Tiling .
_Default.
Repetir: Plugin MuRa's Meister
\Perspective Tiling . Height 20 \ demais valores
_Default.
Emboss3. Opcional repetir
o emboss3.
Blend
Mode=Screen.
11-Ativar a Copy of Raster
2
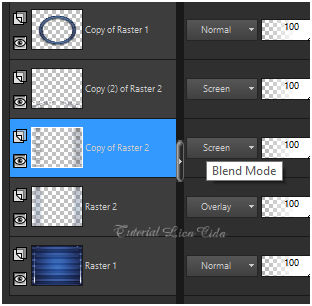 Layer
Duplicate
Effects\ Geometric Effects\ Circle_
Transparent.
Blend Mode=
Normal.
12-Effects\ Distortion Effects
\Pinch_S=100%.
Emboss3.
13-Ativar a Raster1. Layer
Duplicate
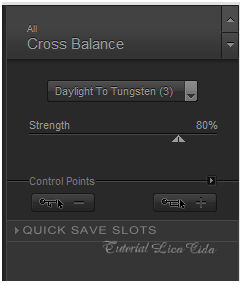
Plugin Nick Software\ Color EfexPro 3.0\ Cross Balance.
( use a gosto)
Blend Mode=Overley
 Nessa
layer _**Plugin AAA Filters\ Custom_Landscape ( Default). )
Opcional.
*repetir na layer circle transparent.
_Plugin Nick Software\ Color EfexPro 3.0\ Cross Balance ( veja
print acima ).
(Copy (2) of Raster
2).
Layers\ Blends\
Opacitys.
observe que a layer superior o blend
mode=luminane(l).
 14-Edit Copy no decolc\ Paste As New
Layer.
Layer\Arrange\ Bring to
Top.
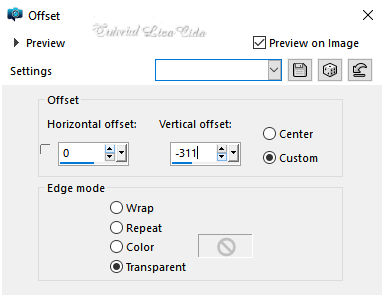
_ Effects\ Image Effects\
Offset.
 Layer Duplicate\ Image Mirror Vertical.
Layer\Merge\ Down . Raster3.
Effects\3D Effects\
Drop Shadow. 20\ (menos)-2\ 50\ 30,00 . (Color=#000000).
15-Edit Copy no misted
5054-luzcristina\ Paste As New
Layer.
Resize
80%.
Adjust \ Sharpness\
Sharpen.
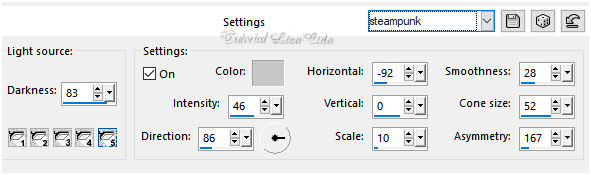
16-Effects\ Illumination
Effects\ Preset Illumination\ Lights\
steampunk.
 17- Adjust\ Smart Photo
Fix .
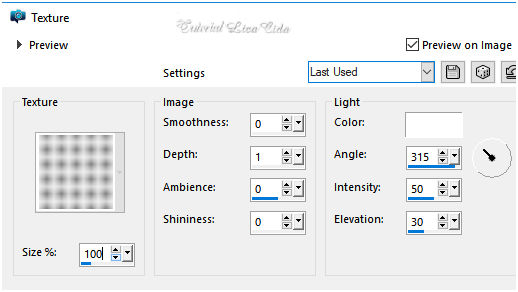
 18-Effects\ Texture
Effects\Texture.
 19-Adjust\ Brightness/
Contrast.
 *a layer \ Circle_
Transparent \ usar acima do
misted.
(Copy (2) of Raster
2).
20-Ativar a copy of
raster1 .
Effects\ Illumination Effects\ Preset
Illumination\ Lights\ steampunk ( print ítem 16
).
_ Adjust\ Smart Photo
Fix ( item
17).
_Adjust\ One Step Photo
Fix. 21-Edit
Copy no tube 5031-luzcristina\ Paste As New
Layer.
Adjust \ Sharpness\
Sharpen. Posicione
.
Layers\ Blends\
Opacitys.
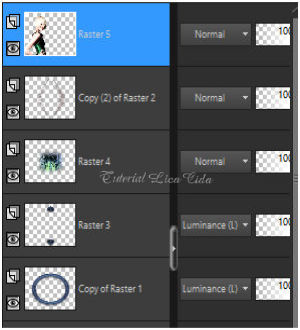
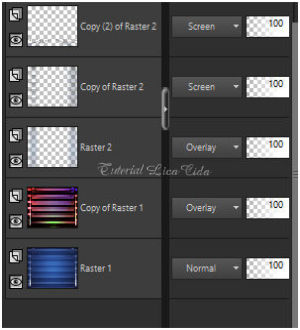
Image \ Add
Borders \ 1 pxl color
=#ffffff.
Edit
Copy
Image \ Add
Borders \ 40 pxls color =#clara
(#c0c0c0)
Selecione.
Edit Paste Into
Selection. Adjust\ Blur\ Gaussian
Blur...R=30,00.
Plugin\ Graphics Plus\ Cross Shadow
_Default.
Invert.
Effects\3D Effects\ Drop Shadow 0\ 0\
80\ 40,00.Color=#000000.
Selections\ Select none
. Aplicar a Marca D'agua.
Assine e
salve.
Aparecida \ licacida , setembro de
2018.
Espero que gostem.
Obrigada!
  |