|
|
|
Desafio do mês de abril para o grupo "Café, Chocolate e PSP"
"Strange Hair"
Back:Riet_342_161117mail_back1.
Seleção: sel3952_aliciar.PspSelection. ( Salve em sua pasta de seleções
My PSP Files ). Preset
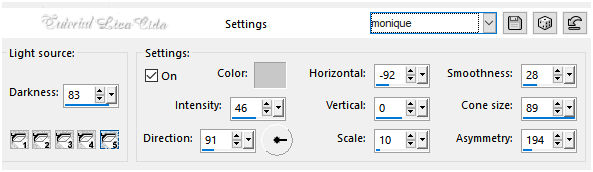
Illumination\Lights_monique \ mp ( Guardar em sua pasta de
Presets My PSP Files). Tube:
Yoka-StrangeHair-6418\CAL-2649-041018.
Deco:decodesafiolc
(Agradeço)
Marca
D'água . Efeitos do PSP.
Versão usada PSPX8.
Plugins
Plugin
Toadies
Plugin
MuRa's Meister
Plugin
Flaming Pear
Plugin
VM Toolbox Tutorial _Roteiro
1-Abrir uma nova imagem
transparente de 900 x 700 pxls.
Selections\ Select All.
Edit
Copy no Riet_342_161117mail_back1 \ Edit Paste Into
Selection . Selections\ Select none.
2-Selections \Load \ Save Selection \
Load Selection From Disk \ Load \sel3952_aliciar.PspSelection.
Configurar: Foreground
 #403e5a \ bacground #403e5a \ bacground
 #a0.9dbc #a0.9dbc3-Nova Layer .
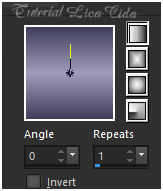
Preencher a seleção com o gradiente formado
pelas cores acima. Configurar Linear \ Angle 0 e Repeats 1.
Invert desmarcado.
 Selections\ Select none. Objects\ Align\
Left.
Layer
Duplicate . Image\ Mirror Horizontal.
Layer\ Merge\ Down.
4-
Plugin Toadies Weaver _Default. ( 59\ 48\ 222 ).
Layer
Duplicate . *Blend Mode=Multiply.
Layer\ Merge\ Down.
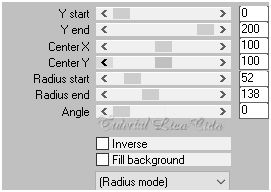
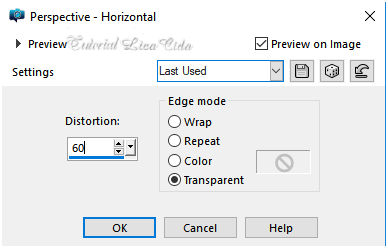
5-Plugin MuRa's Meister\Pole
Transform.
 Layer
Duplicate . Image\ Mirror Vertical.
*Blend Mode=Multiply. Layer\ Merge\
Down.
6-Plugin Flaming Pear\ Flexify2...
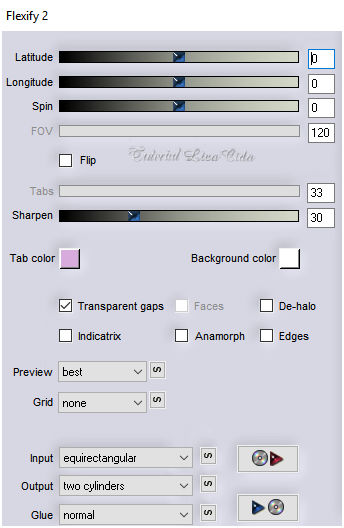 Layer
Duplicate . *Blend Mode=Multiply.
Layer\ Merge\ Down.
Effects\3D Effects\ Drop Shadow. 0\
0\ 80\ 40,00 . (Color=#000000). 7-Nova
Layer \ Send to Bottom.
Preencher com o mesmo gradiente formado no ítem3.
(
mudar o *Blend Mode da Raster1 para Overley).
_Estou
na Raster3.
Selections\ Select All. Selections\ Modify\
Contract 100 pxls\ Invert.
Promote Selection to Layer.
8- ( ainda selecionado)
Plugin
VM Toolbox .
 *Blend
Mode=Multiply. Selections\ Select none.
Layer\
Arrange\ Move Up.
9-
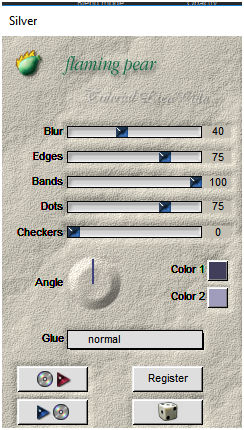
Ativar a Raster1\ Plugin Flamind Pear \Silver...
Color1=foreground
Color2=background
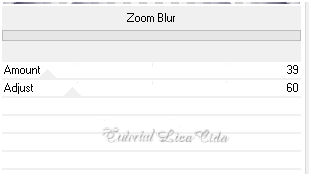
10- Effects\ Geometric Effects.
 Adjust\ Sharpness\ Sharpen More.
Layer
Duplicate . Image\ Mirror Horizontal.
Layer\ Merge\ Down.
Effects\3D Effects\ Drop Shadow. 0\
0\ 80\ 40,00 . (Color=#000000). 11-Volto a ativar
a Raster3. Selections\ Select All.
Edit
Copy no misted CAL-2649-041018 \ Edit Paste Into
Selection . Selections\ Select none.
Adjust\ Sharpness\ Sharpen More.
12-
Adjust\ Blur\ Gaussian Blur...R=24,00.
Layer
Duplicate.
13-
Effects\ Geometric Effects.
 Layer\
Arrange\ Move Up. Resize 80%.
(clique com a ferramenta magic wand_default, na
parte externa do cículo\ invert )
_Edit
Paste Into Selection ( o misted CAL-2649-041018 , deverá estar na
memória ) . Selections\ Select none.
Adjust\ Sharpness\ Sharpen
More.
Effects\3D Effects\ Drop Shadow. 0\
0\ 80\ 40,00 . (Color=#000000). 14-Volto a ativar a Raster3.
Plugin
AAA Frames
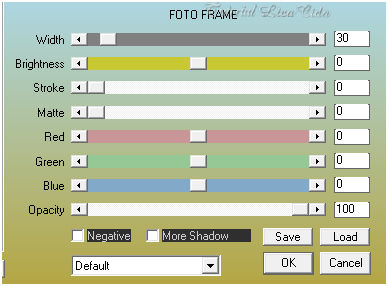 *Plugin AAA Filters\ Custom_Landscape \Default . Aplicar o plugin
também na Copy of raster3.
15-
Ativar a Raster 1.
Effects\
Illumination Effects\ Preset Illumination\ Lights\ monique.
 16-Edit Copy no decodesafiolc\
Paste As New Layer.
Layer\ Arrange\ Move Down.
Layers\ Blends\ Opacitys.
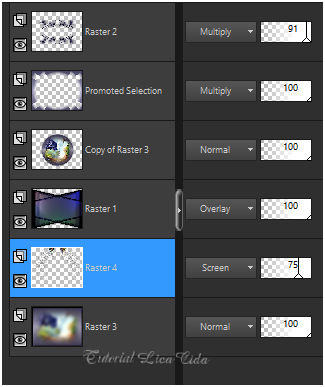 17-Ativar a
layer superior, raster2.
Edit Copy no
tube Yoka-StrangeHair-6418\ Paste As New Layer.
Adjust\ Sharpness\ Sharpen More.
Effects\3D Effects\ Drop Shadow. 0\
0\ 80\ 40,00 . (Color=#000000). Image \ Add
Borders \ 2 pxls color
=#foreground.
Image \ Add
Borders \ 30 pxls color
=#background.
Selecione.
18-Repetir ítem 15:
Effects\ Illumination Effects\ Preset Illumination\ Lights\
monique.
Invert
Effects\3D Effects\ Drop Shadow. 0\
0\ 80\ 40,00 . (Color=#000000). Selections\ Select none.
Aplicar a Marca D'agua.
Assine e
salve. Aparecida \ licacida , abril de 2018.
Espero que gostem.
Obrigada! 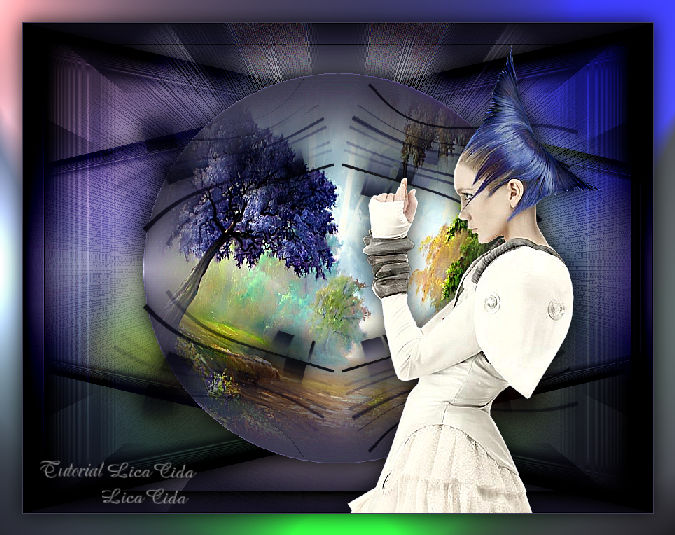  |
