|
|
|
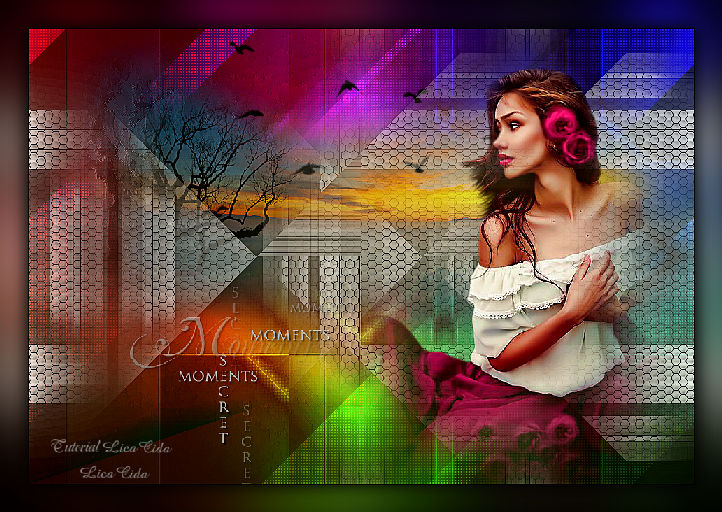
" Secret Moments "
Preset
Illumination\Lights_palco (mp) ( Guardar em sua pasta de
Presets My PSP Files). Tubes:
4162-luzcristina \ Mina@.paesaggio01.09.15 \
bird_brushes_II_by_lpdragonfly_3\ text1_672_L.
Mask:sg_misted-swirl-box
(Agradeço)
Marca
D'água . Efeitos do PSP.
Versão usada PSPX8.
Plugins
Plugin kiwi's
Oelfilter.
Unlimited2 &<BKg Designer sf
10II>
Unlimited2 &<BKg
Kaleidoscope>
Plugin UnPlugged
Effects
Plugin VM Experimental
Tutorial _Roteiro
Configurar : #dea7a0 _foreground
\ #8a1214 _background.
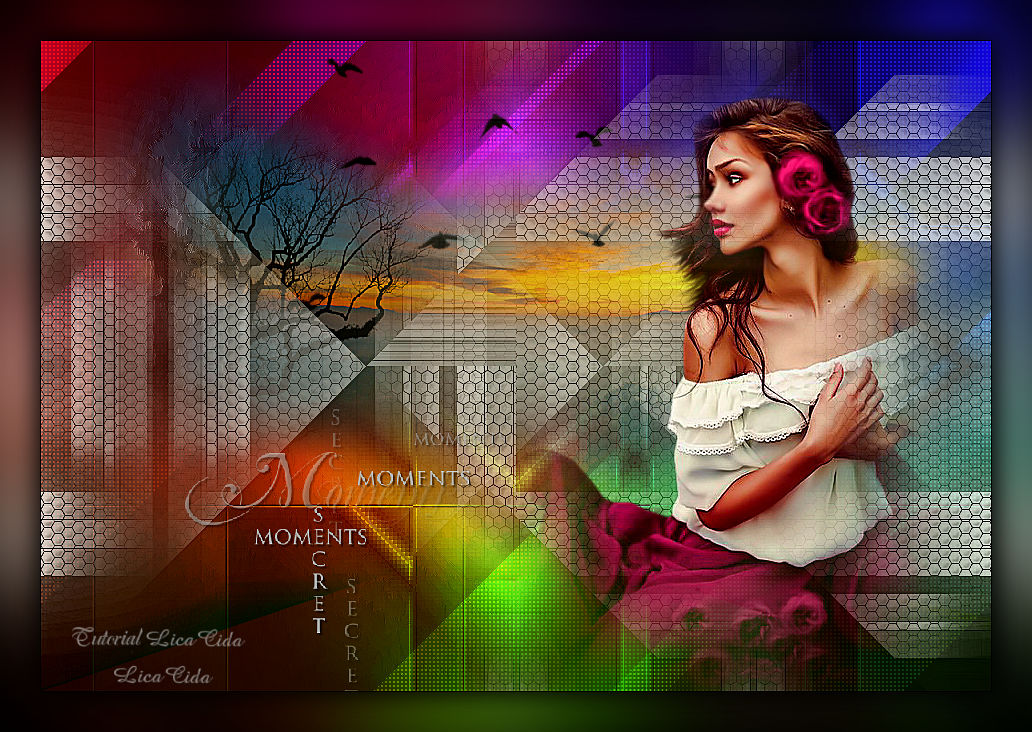
1-Abrir nova imagem transparente 950
x 650. Preencher com o gradiente formado
pelas cores selecionadas acima. Configurar: Radial \ A=45 e Repeats
=5.Invert desmarcado. CP=H e V=50. 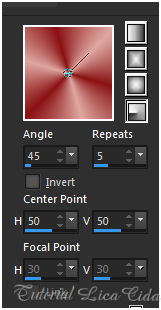 Plugin kiwi's Oelfilter\Zig-
Zack.
Effects \Reflection
Effects \ Rotating Mirror . H = 0 \ R=
180 \ Repeat.
Effects\ Edge Effects\ Enhance
More.
Unlimited2 &<BKg Designer sf
10II> \ Dis
Refractor1.
Unlimited2 &<BKg
Kaleidoscope>\ 4 QFlip
UpperL.
Effects \ Image Effects \
Seamless
Tiling.
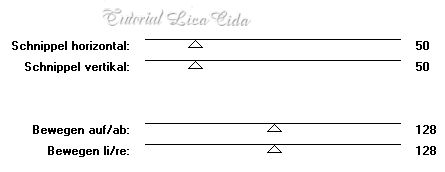
 2-Nova Layer. Preencher color=#fffff
.
Aplicar a
mask sg_misted-swirl-box.
 _Layer\Merge
Group
Effects \ Image Effects \
Seamless Tiling ( print acima
).
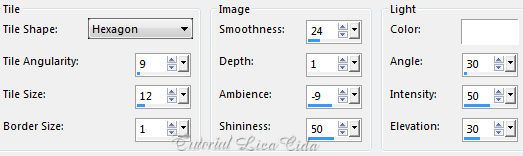
Effects\ Texture
Effects\ Tiles
Unlimited2 &<BKg
Kaleidoscope>\ @Blue Berry
Pie.
Effects \ Image Effects \
Seamless Tiling ( print acima
).
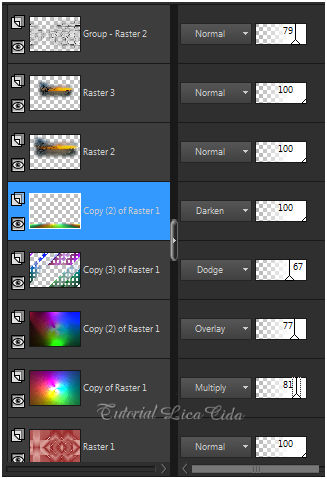
Adjust\ Sharpness\ Sharpen
More.
Effects \ 3D Effects \ Drop
Shadow 0\ 0\ 60\ 30,00. Color=000000. Opacity
79%.
3- Duplicar a Raster1.
Plugin UnPlugged
Effects\ Disco Lights... Default ( 0-128-0)
Effects\
Art Media Effects\ Brush
Strokes...Default.
Layer
duplicate.
4-Plugin MuRa's Meister \Perspective Tiling. Height 20.
Demais valores_Default.
Com a Ferramenta Magic Wand \ Feather 70 \ Clique na parte transparente . Deletar ( quatro \ cinco vezes _não deixar marca ). Selections \ Select none. Emboss3. 5-Edit Copy no tube
Mina@.paesaggio01.09.15\ Paste As New Layer. Objects\ Align\ Top.
Adjust\ Sharpness\ Sharpen
More.
Effects\ Art Media Effects\ Brush
Strokes...Default.
6-Edit Copy no tube5Mina@.paesaggio01.09.15\ -\ Paste As New
Layer.
( deverá estar na memória) Objects\ Align\
Top. Resize 80%.
Adjust\ Sharpness\ Sharpen
More
7-Duplicar a Copy of Raster1
.
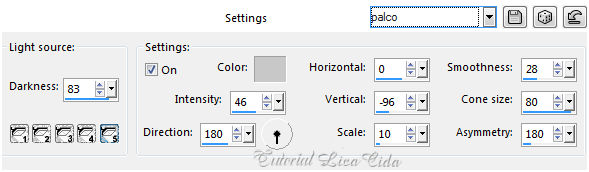
Effects\
Illumination Effects\ Preset Illumination\ Lights\ palco
 8-Duplicar essa
layer.
Plugin
VM Experimental \Guess What ( 92\110\59\107\0 )
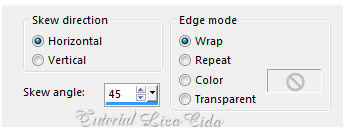
Effects\
Geometric Effects\ Skew.
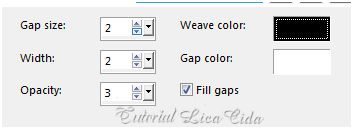
 Effects\ Texture
Effects\ Weave.
Effects \ Image Effects \
Seamless Tiling ( print acima
).
Layers\ Blends\
Opacitys
(
opcional)
 9-Edit Copy no tube
4162-luzcristina\ Paste As New Layer. Mirror.
Adjust\ Sharpness\ Sharpen More.
Posicione.
10-Edit Copy no text1_672_L\ Paste As New
Layer. Posicione a gosto.
Image\ Negative Image.
11- Edit Copy no bird_brushes_II_by_lpdragonfly_3\Paste
As New Layer. Posicione.
12-Image add borderes 1
pxl \ color= #000000.
Plugin
AAA Filters\ Custom_Landscape . ( opcional). Edit Copy
13-Image add borderes 40
pxls \ color= #ffffff.
Selecione.
Edit Paste Into
Selection.
Adjust \ Blur\ Gaussian Blur.
R=42,00\
Plugin Graphics Plus\ Cross Shadown_default.
Invert Effects \ 3D
Effects \ Drop Shadow 0\ 0\ 80\
40,00. Color=000000. Selections\ Select
none. Aplicar a Marca D'agua.
Assine e
salve. Aparecida \ licacida , julho de
2017.
Espero que gostem.
Obrigada!
  |