|
|
|
Tubes:TUBES-NAISEM_MULHERES_156\ Mina@.mist.paesaggio2.23.6.15\Nubes en capa
_luzcristina
passaros_arquivonet.
Deco:decolc \deco_naisem.
 (Agradeço)
Marca
D'água . Efeitos do PSP.
Versão usada PSPX8.
Plugins
Plugin
VanDerLee.
Plugin Graphics Plus.
Plugin
Simple.
Plugin
Nick Software\ Color EfexPro 3.0.
Tutorial
_Roteiro
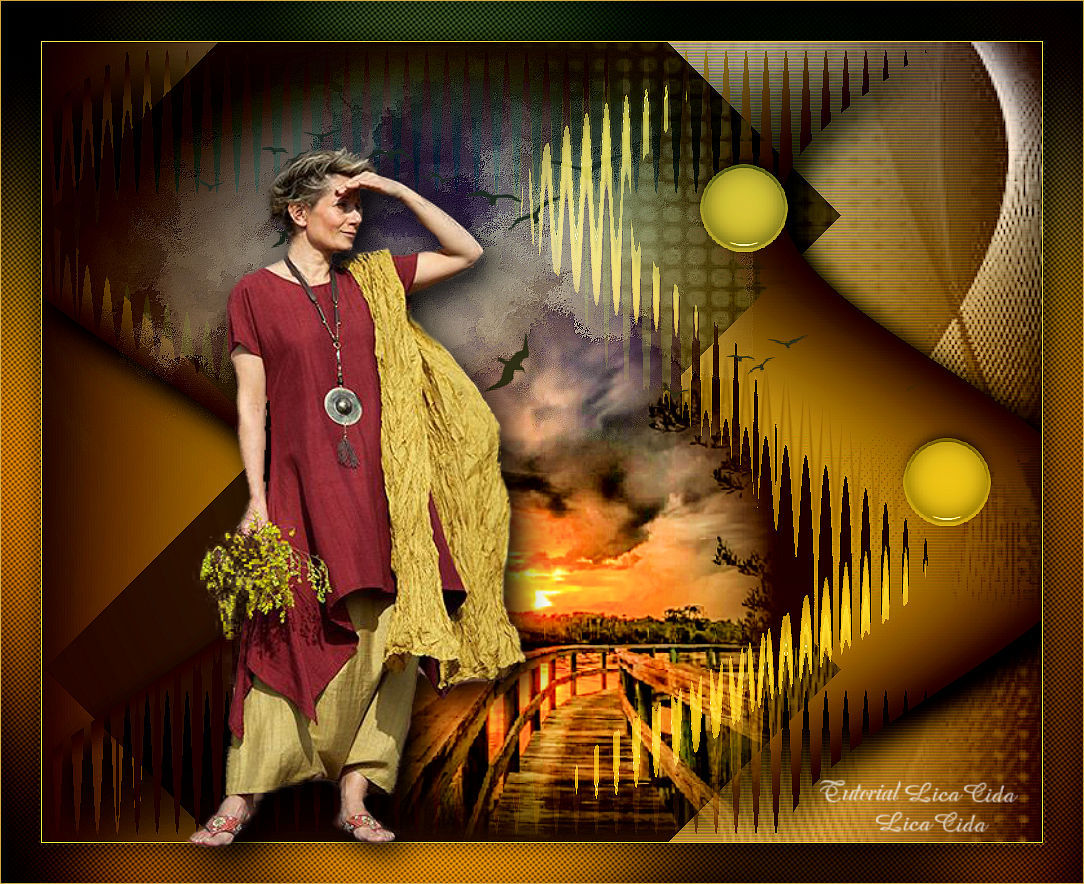
1-Abrir nova imagem transparente de 1000
x 800 pxls.
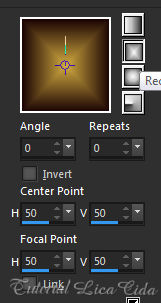
_Preencher com o gradiente formado
pelas cores #d2aa40 e
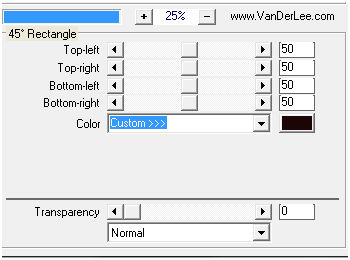
#1b0505. Configurar Rectangular :
Angle 0
\ Repeats 0. Invert desmarcado. CP \H e V=50 .
FP\H e V=50.
 2-
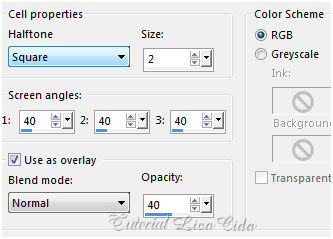
Effects\ Artistic Effects \Halftone .
3-Plugin VanDerLee\ UnPlugged-X... ( color=#1b0505
).
 4-
Plugin Graphics Plus \ Vertical Mirror. V= 200
\ T=0.
_Layer
Duplicate. Resize 80%.
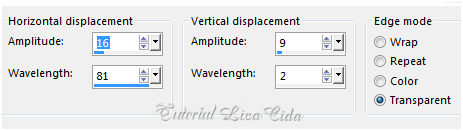
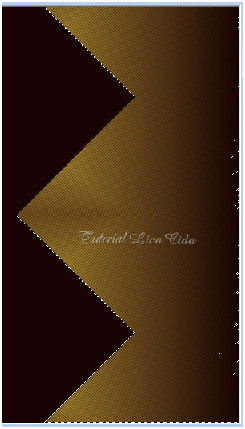
5-Effects\ Distortion Effects\
Wave.
 _Layer\ Arrange \ Move Down.
6-
Ativar a Raster1 .Selecionar a lateral direita do top com a ferramenta
Magic Wand_Default.
 _Promote Selection to
Layer.
_ Plugin Simple \ Horizontal Grain
. Selections\ Select none.
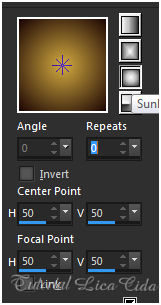
7-
Nova Layer\ Send to Bottom. Preencher com o gradiente ( mudar para
sunburst ).
 8-Ativar a Copy of Raster1. Layer\ Arrange\ Bring
to Top.
* Plugin Alien Skin Eye Candy 5 : Impact\
Perspective Shadow_Blurry.
Layers\
Blends\ Opacitys. 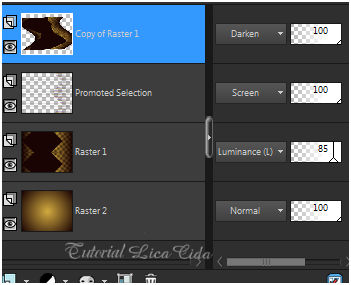 9-Edit Copy no decolc\ Paste
As New Layer .
_Objects\ Align\Right.
_Layer\ Arrange\ Move Down.
( a
layer deverá estar com o Blend Mode em Luminance
(L).
_Adjust\ Sharpness\ Sharpen More.
10-
Volto a ativar a Copy of Raster1.
_Edit Copy no Mina@.mist.paesaggio2.23.6.15\ Paste As New Layer . Resize
80%.
_Adjust\ One Step Photo Fix. Adjust\
Sharpness\
Sharpen.
Posicione a
gosto.
11-
Edit Copy nas nuvens ( raster4 )
\ Paste As New Layer .
Resize 90%.
_Blend Mode = Hard Light . Adjust\ Sharpness\
Sharpen.
_Opacity
57%.
( sua paisagem ficando bem
posicionada , desnecessario o uso das nuvens
).
12-Edit Copy nos pássaros \ Paste As
New Layer. Posicione a gosto.
13-Edit Copy no deco_naisem ( raster
3) \ Paste As New Layer. Posicione como o print.
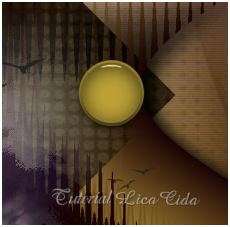 _Layer\ Duplicate. Image Mirror\ Mirror Vertical.
_Layer\ merge\ Merge Down.
14- Repetir ítem 5\
Effects\ Distortion Effects\ Wave.
_Blend
Mode=Screen.
15-Edit Copy no deco_naisem (
raster 4 ) \ Paste As New Layer. Duplique \Posicione como modelo ou
use a gosto.
_Image add
borderes 1 pxl cor #d2aa40.
_Layer
Duplicate.
16- Plugin
Nick Software\ Color EfexPro 3.0\ Bi-Color Filters\ Color Set \
Cool/Warm1.
_Opacity
32%.
_Image add borderes 40 pxls cor #ffffff \ Selecione e preencha com o gradiente formado no ítem 7.
17-
Repetir ítem 2 . ( Effects\ Artistic Effects \Halftone) .
_Plugin Graphics
Plus\ Cross Shadow _Default.
_Repetir ítem 16. (
Plugin Nick Software\ Color EfexPro 3.0\ Bi-Color Filters\ Color Set
\ Cool/Warm1).
_Invert. _Effects\3D Effects\ Drop Shadow. 0\ 0\ 80\ 40,00 . (Color=#000000) . _Selections\ Select none.
**Plugin AAA Filters\ Custom_Landscape
.
_Adjust\ One Step Photo Fix.
18-Edit Copy no
TUBES-NAISEM_MULHERES_156\ Paste As New Layer.
_ Mirror . Use a gosto.
_Image
add borderes 1 pxl cor #d2aa40.
Aplicar a Marca D'agua.
Assine e
salve. Aparecida \ licacida , março de 2017.
Espero que gostem.
Obrigada!!
  |