|
|
|
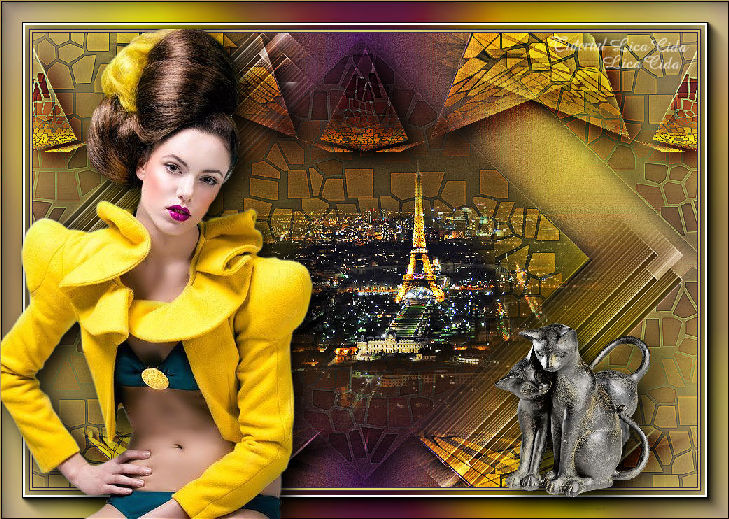
" Paris "
Seleção: selparislc. PspSelection ( Salve em sua pasta de seleções My PSP Files ) . Tubes:
tube OBG_1468\ tube 243_paysage_p3_animabelle\tube
186_divers_p2_animabelle.
Deco:ildiko_deco_2016_09.
(Agradeço)
Marca
D'água . Efeitos do PSP.
Versão usada PSPX8.
Plugins
Plugin
Simple.
Plugin
Alien Skin Xenofex 2.
Plugin
MuRa's Meister \Perspective Tiling.
Tutorial _Roteiro
1-Abrir nova imagem transparente de 950
x 650 pxls.
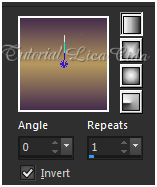
_Preencher com o gradiente formado
pelas cores #b5985f e
#452e4e. Configurar Linear :
Angle 0
\ Repeats 1. Invert marcado.
 2-Plugin Simple \ Blintz .
_Image \ Mirror\
Mirror Vertical.
* Repetir_ Plugin Simple \ Blintz.
3-Plugin Simple \ Top Left Mirror.
_Emboss 4.
_Adjust\ Add/ Remove Noise \ JPEG Artifactal
Removal... ( Maximum\ C=80) .
_Plugin FMTT\ Blend
Emboss. 4-Selections \Load \ Save Selection \ Load Selection From Disk \ Load \selparislc.PspSel. _Promote Seletion to Layer.
Selections\ Select none.
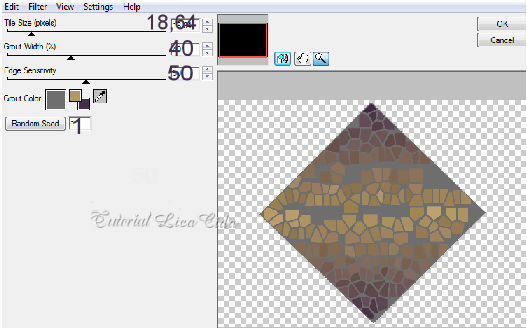
5-Plugin \ Alien Skin Xenofex
2 \ Classic Mosaic...
 _Effects\
Edge Effects\ Enhance .
_Adjust\ Sharpness\
Sharpen More.
6-Effects\ Image Effects\ Seamless
Tiling:
 7- Effects\ Photo Effects\ Retro Lab...
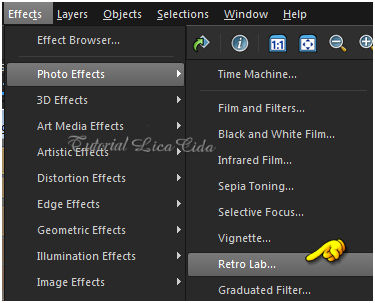  8- Adjust\ Sharpness \ Unsharp Mask.
 _Layer\Duplicate
9-Effects\ Geometric Effects\
Perspective Vertical. D= ( menos ) -90 \ Transp.
_Layer\Duplicate. Image\ Mirror \
Mirror Vertical.
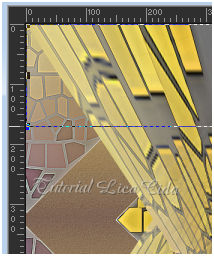
_Suba o efeito a 170 pxls. Usar a
ferramenta Pick Tool.
 10-Effects\ Image Effects\ Seamless
Tiling:
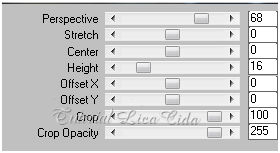
 * Plugin Alien Skin Eye Candy 5 : Impact\
Perspective Shadow_Blurry.
11-Ativar a layer inferior ( copy of
promoted selection).
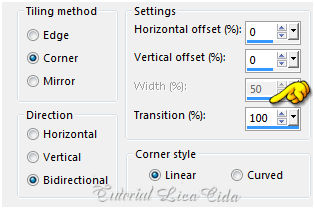
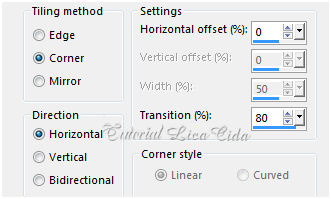
_ Plugin MuRa's Meister
\Perspective Tiling.
 *Repetir: Effects\ Image Effects\
Seamless Tiling ( ítem 10
).
* Plugin Alien Skin Eye Candy 5 : Impact\
Perspective
Shadow_Blurry.
12-Ativar a Ferramenta Magic Wand \Veja configuração :
_Clicar no centro do
efeito
 _ Deletar
( varias vezes , suavizar o
efeito ). Selections \ Select
none.
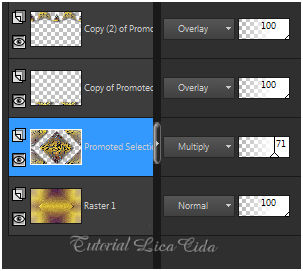
_Emboss3. 13- Ativar a raster1 e repetir ítem 7. ( Effects\ Photo Effects\ Retro Lab... ) 14- Na layer Promoted Selection aplicar : * Plugin Alien Skin Eye Candy 5 : Impact\ Perspective Shadow_Blurry. Layers\ Blends\ Opacitys.
15-Edit Copy no
ildiko_deco_2016_09\ Paste As New Layer.
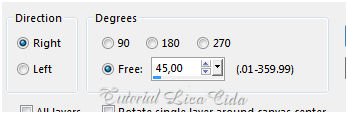
_Image\ Free Rotate.
 _Effects \Image Effects \Offset... H= ( menos ) -244 \
V=120. Custom e Transp. _Layer Duplicate \ Image Mirror\
Mirror Vertical.
_Image Mirror\ Mirror
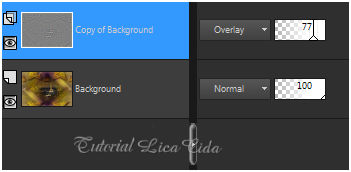
Horizontal. Layer\Merge\Merge Down.
_ Blend Mode= Luminance (L). Adjust\
Sharpness\ Sharpen More.
(Essa layer deverá estar acima da
Promoted Selection )
16-Edit Copy no tube 243_paysage_p3_animabelle\ Paste
As New Layer.
Resize
80% . Posicione a gosto.
_Adjust\
Sharpness\ Sharpen. Adjust\ One Step Photo
Fix.
_Layer\
Arrange\ Bring to Top.
17- Image
add borderes 1 pxl \ color= #452e4e
(escura)
_Image add
borderes 3 pxls \ color=
#b5985f
(clara)
_Image add
borderes 1 pxl \ color= #452e4e
(escura)
_Layer Duplicate
18- Effects\ Edge Effects\ High
Pass.
 _Layer\ Merge\ Merge
All.
*Edit Copy.
19- Image
add borderes 40 pxls \ color=
ffffff.
_Selecione. Edit Paste Into Selection.
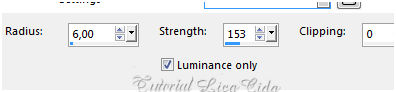
20- Adjust\
Blur\ Gaussian Blur . R= 29,00.
*Repetir ítem
7. ( Effects\ Photo Effects\ Retro Lab...
)
_Invert.
Effects \ 3D Effects \ Drop
Shadow 0\0\80\40, Color=000000.
_Selections \
Select
none. 21- Plugin \ AAA Frames
.
 22-Edit Copy no tube OBG_1468 \ Paste As New Layer.
Posicione.
_Adjust\ Sharpness\ Sharpen
.
23-Edit Copy no tube 186_divers_p2_animabelle\
Paste As New Layer. ( raster2
) Posicione.
(Opcional nos dois tubes ) * Plugin Alien Skin Eye Candy
5 : Impact\ Perspective
Shadow_Blurry.
_Image add borderes 1
pxl \ color= a gosto (clara ou
escura).
 Aplicar a Marca D'agua.
Assine e
salve. Aparecida \ licacida , março de 2017.
Espero que gostem.
Obrigada!!  |