|
|
|
"In Blue" Preset Illumination\Lights\memories-marapontes ( Guardar em sua pasta de Presets My PSP Files). Imagem
anexadalc.
Tubes: 3829-2-luzcristina \
3815-luzcristina\Nubes en capa\jd-vase5.
Mask:
Mask gradientedworisch.
Marca
D'água . Plugins
MuRa's
Meister \Pole Transform \Copies.
Plugin
Virtual Painter.
Plugin
AAA Filters \ Plugin AAA Frame.
Plugin
Nick Software\ Color EfexPro 3.0\ Bi-Color Filters.
Tutorial
_Roteiro 1-Abrir a
imagem anexada.
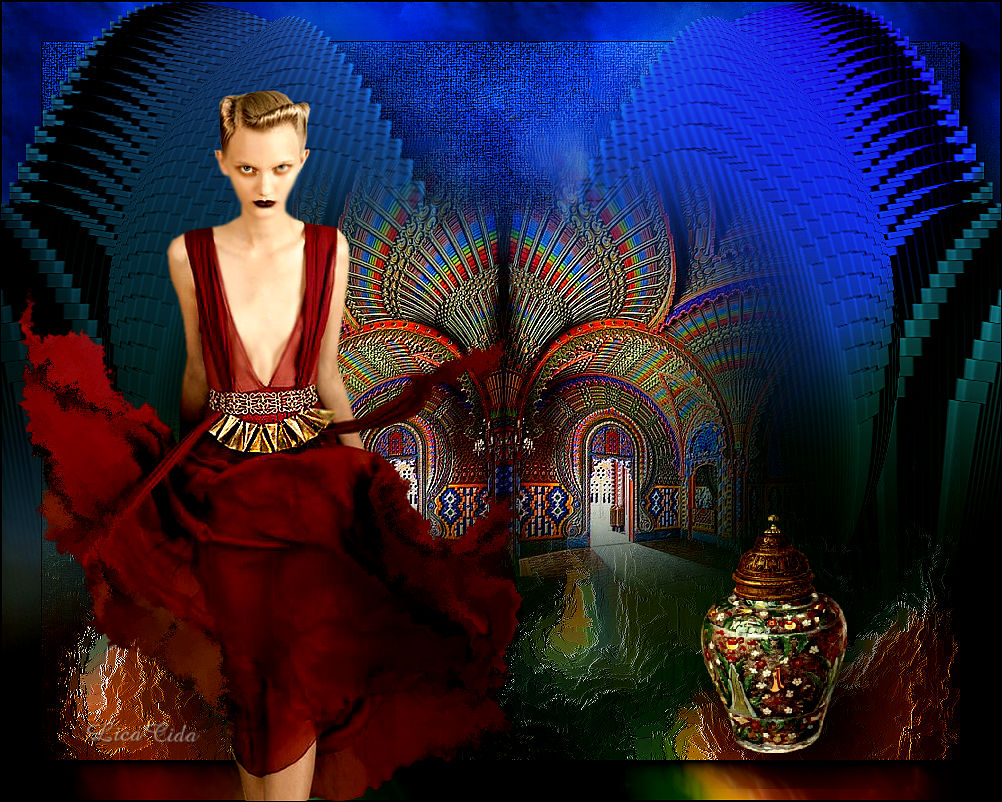
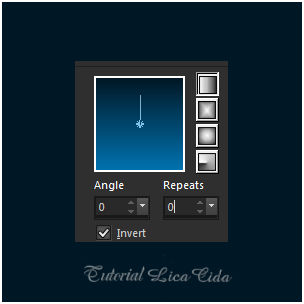
_ Preencher com o gradiente formado pelas cores
#001826 e #0072ae
. Configurar Linear : Angle 0
e Repeats 1. Invert marcado.
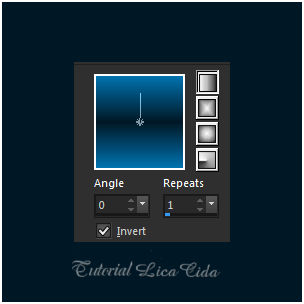
2- Effects\ ED Effects\ Inner
Bevel .
 _ Selections\ Select
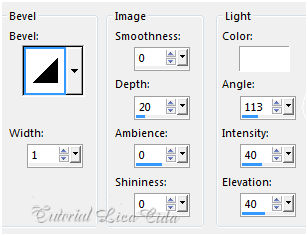
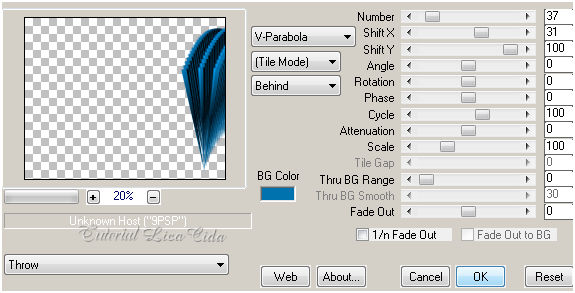
none. 3- Plugin MuRa's
Meister \Pole Transform.
 4-Plugin MuRa's Meister \Copies.
 _Image\ Mirror Horizontal. Repetir o
ítem 4\ Copies. ( mesmos valores).
_Adjust\ Sharpness\ Sharpen More.
*Layer\ Duplicate. Image\ Mirror
Horizontal.
Layer\
Merge\ Merge Down.
5-Aplicar a Mask gradientedworisch. Duplicar .
Layer\ Merge\ Merge Group.
6- Effects\
Geometric Effects\ Spherize . Circle \
S=100.
_Objects\ Align\
Top.
7- Nova Layer\ Send to bottom. Preencher com o gradiente formado acima
. Mudar Repeats 0.
 8-Select All. Edit Copy
no tube 3815-luzcristina \ Edit Paste Into
Selection.
(
tirar a visibilidade da layer superior)
_Effects\ Image Effects\ Seamless Tiling:Default.
(
deixar selecionado )
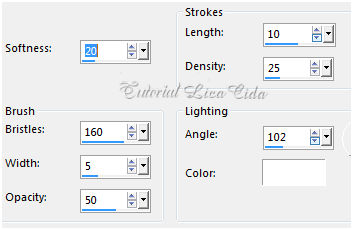
9-Ativar a Ferramenta Warp Brush.
Configurar.
 _
Aplicar ( integrar) o tube nessa layer .
_Adjust\ Blur\ Gaussian Blur: R=22,00.
_Nova aplicada do Warp Brush. Selections\ Select
none.
10- Plugin DC Layer\ SideMerge.
147\ 203\ 79.
_Layer
Duplicate\Image\Mirror Vertical.
*Layer\ Arrange\ Move Down.
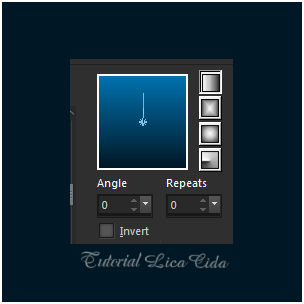
11- Nova Layer\ Send to bottom.
Preencher com o gradiente formado
acima
. Mudar Invert desmarcado.
 _Ativar a superior: Copy of Raster1.
_Layer\ Merge\ Merge Down.
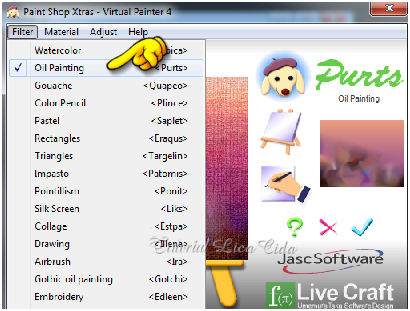
12- Plugin Virtual Painter \ Virtual
Painter4...
 13-Effects\ Art Media Effects\ Brush
Strokes.
 _Layer
Duplicate
14-Plugin Nick Software\ Color EfexPro 3.0\
Bi-Color Filters\ Color Set \ Cool Warm 2.
_Blend Mode =Multiply
. *Layer\ Merge\ Merge
Down. _Ativar a Raster1 e repetir: Plugin Virtual Painter
\ Virtual Painter4... ( veja print ítem 12)
( Se
marcar o efeito , não tem problema )
15-Edit Copy nas nuvens _luzcristina\ Paste As New
Layer.
_ Objects\ Align\ Top.
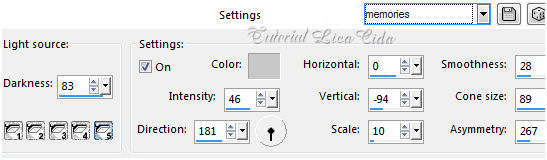
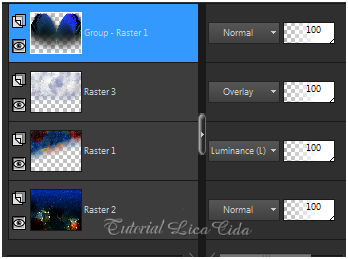
16- Ativar a layer superior : Group-Raster 1. \
Effects\ Illumination Effects\ Preset Illumination\ Lights\
memories.
 _A
seguir: Plugin Nick Software\ Color EfexPro 3.0\
Bi-Color Filters\ Color Set \ Violet\Pink4. _
Plugin Alien Skin Eye Candy 5:Impact\Perspective Shadow ... Blurry.
Layers\Blends\ Opacits.
 17-Ativar a Raster1 e 2 e aplicar o Plugin AAA
Frame\ Foto Frame...default.
18-Edit Copy no tube 3815-luzcristina\ Paste As New
Layer.
_Edit
Copy no tube 3829-luzcristina\ Paste As New Layer.
_Edit
Copy no tube jd-vase5\ Paste As New Layer. Use a gosto.
_Image add border 1 pxl cor #000000.
**Plugin AAA Filters\ Custom_Landscape .
Aplicar a Marca D'agua.
Assine
e salve.
Aparecida \ licacida , agosto de
2016.
Espero
que gostem. Obrigada!! 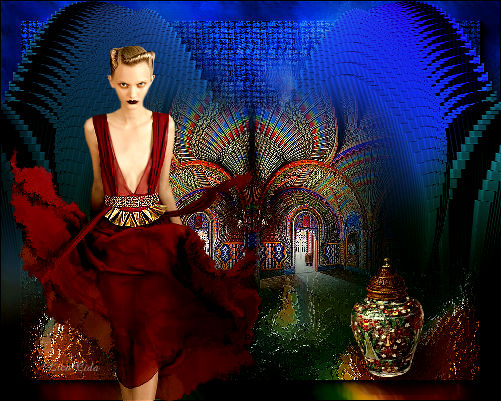 |