![]()
" Charm"
Script_ azulmara_marapontes ( Guardar em sua pasta de Scripts Restricted ).
Tubes: 4245-luzcristina \3425-luzcristina \tube calguisvasecoquillage12122011Mask:
gradientedworisch.
Marca
D'água .
Efeitos do PSP.
Versão usada PSPX8.
Plugins
Plugin
&<Sandflower Specials V >
Plugin
VanDerLee \ UnPlugged-x...
Plugin
MuRa's Meister \ Perspective Tiling.
Plugin AAA Frame.
Plugin
Nick Software\ Color EfexPro 3.0\ Bi-Color Filters.
Tutorial
_Roteiro
1-Abrir uma nova imagem transparente de 1000 x 800
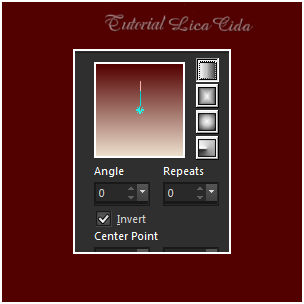
.Preencher com o gradiente formado pelas cores #520100 e
#ecdecc . Configurar Linear Angle 0 \ Repeats 0.
Invert marcado.
2-Plugin &<Sandflower Specials V
>
(
deverá estar importado no Unlimited 2 ).
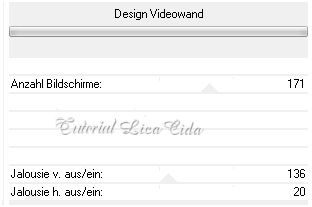
_Com
a ferramenta Magic Wand _ Default , selecione a parte lisa .
Delete.
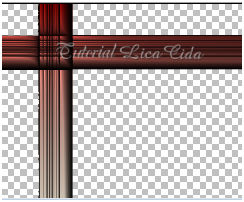
( seu
back deverá ficar assim)
3-
Effects\ Distortion Effects\ Warp.
_
Layer\ Duplicate. Image \Mirror Horizontal. Blend Mode=
Overley.
_Layer\ Merge\ Merge Down.
_Aplicar uma mask gradientedw . Duplica duas
vezes . Layer\ Merge\ Merge Group.i
4-Plugin VanDerLee \
UnPlugged-x...Defocus_Defocus5.
_Effects\ Edge Effects\ Enhance
More.
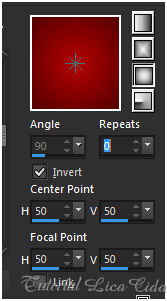
5- Nova layer. Send to Bottom.
_Preencher com o gradiente formado
pelas cores #520100 e #b60003 . Configurar
Sunburst \ Repeats 0. Invert marcado. CP=H e
V\50. FP=H e V\50.
6- Select All \ Edit Copy no
tube 3425-luzcristina \Edit Paste Into Selection.
Selections\ Select none.
_Effect\ Image Effects\ Seamless Tiling...
Default.
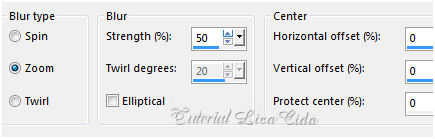
7- Adjust\ Blur\ Radial
Blur...
8-Effects\ Distortion Effects\
Pixelate...
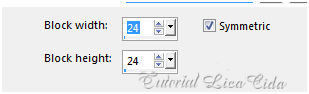
_Effects\ Edge Effects\ Enhance More.
9- Nova Layer. Select All \ Edit Copy no
tube 3425-luzcristina ( deverá estar na memória )
\Edit Paste Into Selection. Selections\ Select none.
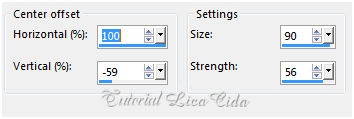
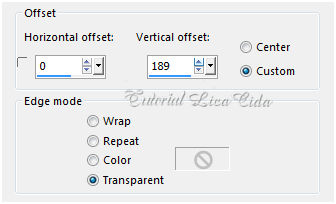
_Adjust\ One Step Photo Fix.
_Effects\ Image Effects\ Offset...
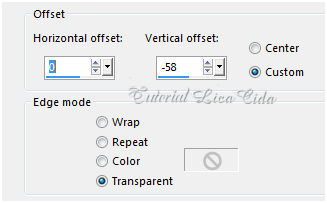
10-
Nova layer. Layer\ Arrange\ Move Down.
_Correr o Script azulmara.
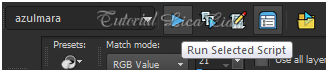
*Procurar o script azulmara.
*
Clique para corrê-lo em Run Selected Script .
(
estará anexado nos materiais)
_
Layer\ Duplicate. Image \Mirror Vertical. Layer\ Merge\ Merge
Down.
11-
Adjust\ Hue and Saturation _Hue Map.
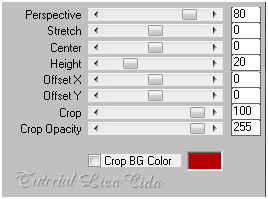
12-Plugin MuRa's Meister \ Perspective
Tiling.
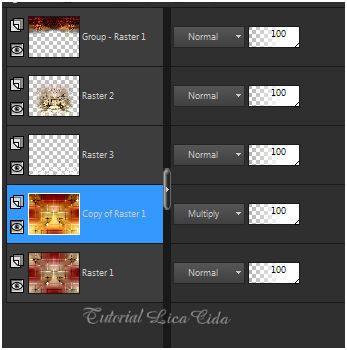
13-
Ativar a layer superior. Group- Raster1.
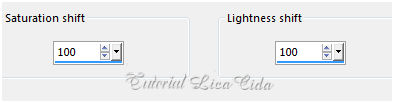
_Effects\ Distortion Effects\ Pinch...
S=100.
_Layer\ Duplicate.
14-Plugin Nick Software\ Color EfexPro 3.0\
Bi-Color Filters\ Color Set \ Brown1.
_Plugin Graphics Plus\ Cross
Shadow_Default.
_Layer\ Merge\ Merge Down.
_Effects\ Image Effects\ Offset...
(Use
de acordo com seu tube)
15-Duplico a raster
1 e repito: Plugin Nick Software\ Color EfexPro 3.0\
Bi-Color Filters\ Color Set \ Brown1.
_Layers\ Blends\
Opacitys
16-Edit Copy no tube 4245 luzcristina\ Paste As New Layer.
Posicione
17-Edit Copy no tube calguisvasecoquillage12122011\ Paste
As New Layer. Acomode a gosto.
18-Image add
border 1 pxl cor foreground.
_Image add
border 2 pxls cor background.
_Image add
border 1 pxl cor foreground.
_Image add
border 30 pxls cor #ffffff.
_Selecione.
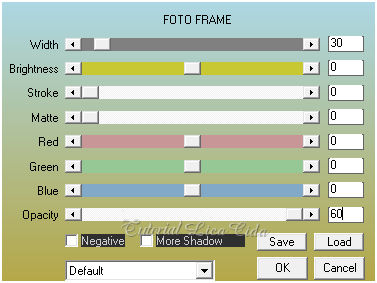
_Plugin AAA Frame\ Foto Frame...
_Selections\ Select none.
_Image
add border 1 pxl cor #000000.
_Image add border 40 pxls cor
#ffffff.
_Selecione \ Invert.
_Effects \ 3D
Effects \ Drop Shadow 0\ 0\ 80\
40,00. Color=000000.
_Selections\ Select
none.
_ Resize 1024 pxls\
Width .
Aplicar a Marca D'agua.
Assine
e salve.
Aparecida \ licacida , julho de 2016.
Espero
que gostem. Obrigada!!