 | |
|
Versões Amigas
" Only
"
Selecões: Imagem " alphachannel" - Seleção1 - Seleção2- Seleção3- Seleção4. Guardadas em Canal Alpha a Imagem " alphachannel". Tebe: tube2447_mulher_mara_pontes. Imagem: stairway_to_titania___stock_by_thy_darkest_hour-d4x80be ( raster1) Texture _Woodgrain . Marca
D'água.
Efeitos do PSP
Versão usada
PSPX7
Tutorial
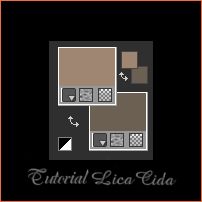
Configurar: #9f8672 Foreground e
#6b6052 Background.
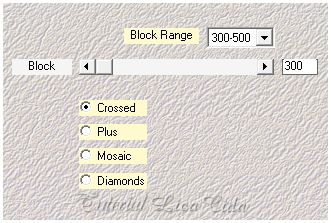
 1- Abra a imagem " alphachannel" copiar e minimizar a original. _ Pintar com o gradiente formado pelas cores acima. Configurar Linear : Angle 0 \ Repeats 0 . Invert desmarcado ( escuro acima). 4-Effects\ Reflection Effects\ Rotating Mirror. H=0 \ A=0\
Reflect.
_Layer\ Duplicate.
Image\ Mirror\ Mirror Vertical ( flip) .
_Opacity 50%.
Blend Mode= Overley. Layer\ Merge \ Merge
Down.
5-Effects\
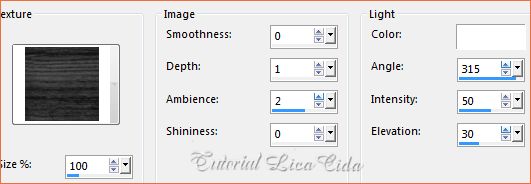
Texture Effects\ Texture _Woodgrain .
 _Adjust \
Sharpness\ Sharpen More.
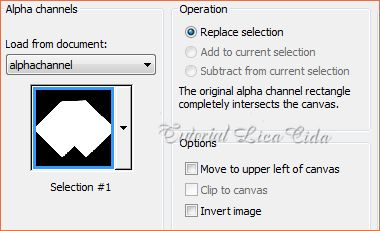
6-Selections \ Load \Save
Selection \ Load Selection From Alpha Channel \
Selection#1.
 _Promote Selection
to Layer.
_Effects \ 3D
Effects \ Drop Shadow 0\0\80\49,00. Color=#000000
.
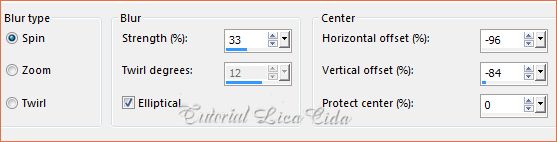
7-Adjust\ Blur\ Radial Blur.
 _ Selections \ Select
none.
_ Layer \
Duplicate . Image\ Mirror\ Mirror Vertical ( flip)
. 8-Plugin
VanDerLee\ UnPlugged-X... Flip Intensity.
9- Plugin VanDerLee\
UnPlugged-X... Defocus. Defocus 16.
10-Repetir
ítem 5 :Effects\ Texture Effects\ Texture
_Woodgrain .
_Adjust \ Sharpness\
Sharpen More.
_Layer\Merge\ Merge
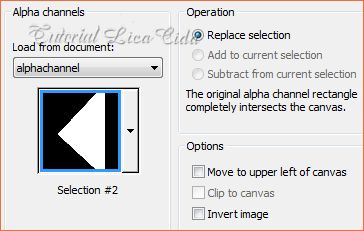
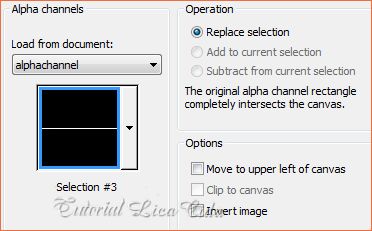
Down. 11-Selections \ Load
\Save Selection \ Load Selection From Alpha
Channel \ Selection#2.
 _Promote Selection to
Layer.
_Effects \ 3D
Effects \ Drop Shadow 0\0\80\49,00. Color=#000000
. _ Selections \ Select
none.
12-Effects\ Reflection Effects\ Rotating Mirror.
H=0 \ A=0\ Reflect.
13-Effects\ Geometric Effects\
Perspective-Horizontal ... D=90\
Transparent.
14- Effects\ Distortion \
Effects\ Pinck...S=100.
_Layer\ Duplicate.
Image\ Mirror\ Mirror Horizontal ( mirror).
_Layer\ Merge \ Merge
Down.
_Repetir: Effects\
Distortion \ Effects\ Pinck...S=100.
15-Plugin MuRa's Meister
\ Pole Transforme _Default.
_ Image Resize
90%. Blend Mode=Screen.
16-Effects\ Geometric Effects\
Spherize_S=100\ Ellipse.
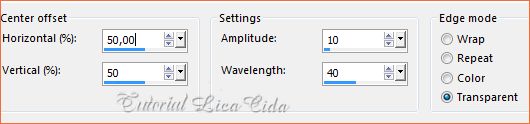
17-Effects\ Distortion Effects\
Ripple.
 18-Ativar a layer Promoted Selection .
Edit Copy na paisagem
stairway_to_titania___stock_by_thy_darkest_hour-d4x80be (
raster1).
Paste As New Layer.
19-Voltar a layer superior. (
Promoted Selection 1) .
_Selections \
Load \Save Selection \ Load Selection From Alpha
Channel \ Selection#3.
 _Nova Layer.
Preencher color #9f8672 (
foreground).
20- Effects\
3D Effects\ Inner Bevel.
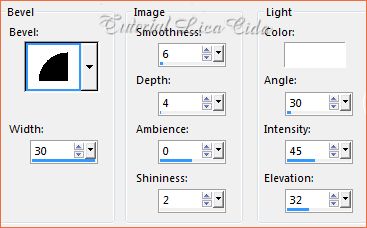 _ Selections \Select
none.
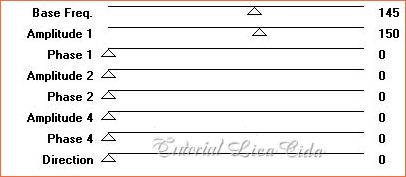
21-Plugin MuRa's
Seamless\ Shift at Wave.
 _Effects \ 3D Effects \ Drop
Shadow . 1\ 1\ 100\ 1,00.
Color=#000000.
22-Selections \ Load \Save
Selection \ Load Selection From Alpha Channel \
Selection#4.
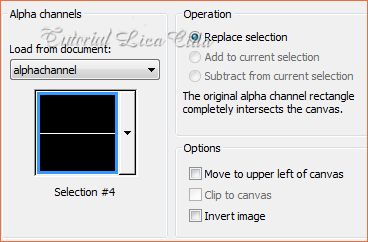 _Nova
Layer. Preencher color
#ffffff.
_Repetir os
ítens20 , 21 e usar o mesmo drop shadow.
Layers\ Blends\
Opacitys
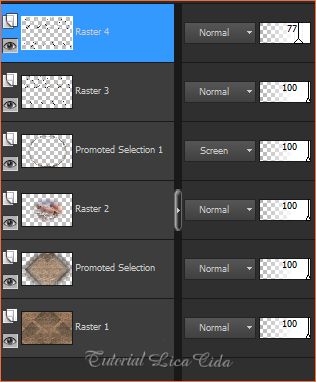 (
Raster4)
_ Layer\ Merge\ Merge
Down
23- Selections\Select All. Selections \
Modify \ Contract 30 pxls. Invert\
Delete .
Invert.
24- Nova
layer.
_ Effects\ 3D Effects\ Cutout...V e H=2 \
Opacity:100 \ Blur :85,00.
Color=#000000\ Fill
desmarcado.
_ Selections \ Select
none.
25-Edit
Copy no tube2447_mulher_mara_pontes. Paste As New Layer.
Posicione , Resize.
_Adjust \ Sharpness\ Sharpen More
.
26-Ativar a Raster1 .
Plugin nik
Color Efex Pro!1.0 \ Graduated User Defined.
(Color #9f8672 usada no
foreground).
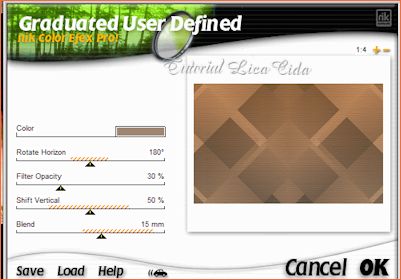 Layers\Blends\ Opacitys.
(Opcional) 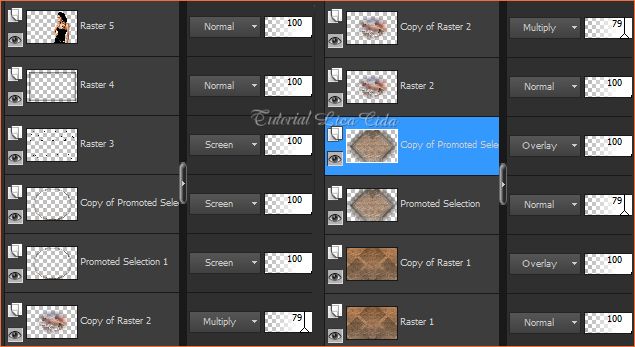 Arrume a
gosto.
Acabamento.
27-Image \
Add Borders \1 pxl symmetric marcado. Color#6b6052 (usada no
background)
_Edit Copy no back
formado.
_Image \ Add Borders \40 pxl symmetric marcado.
Color=ffffff. Selecione.
_Edit Paste
Into Selection . Repetir ítem 7( Adjust\ Blur\ Radial Blur).
_Repetir
ítem 5 (Effects\ Texture Effects\ Texture
_Woodgrain ).
_Adjust \
Sharpness\ Sharpen More . _ Plugin Graphics Plus\ Cross
Shadown_Default.
_Invert . Nova
Layer.
_ Effects\ 3D Effects\ Cutout...V e H=2 \
Opacity:100 \ Blur :85,00.
Color=#000000\ Fill
desmarcado.
_ Selections \ Select
none. Aplicar a Marca D'agua.
Assine e salve.
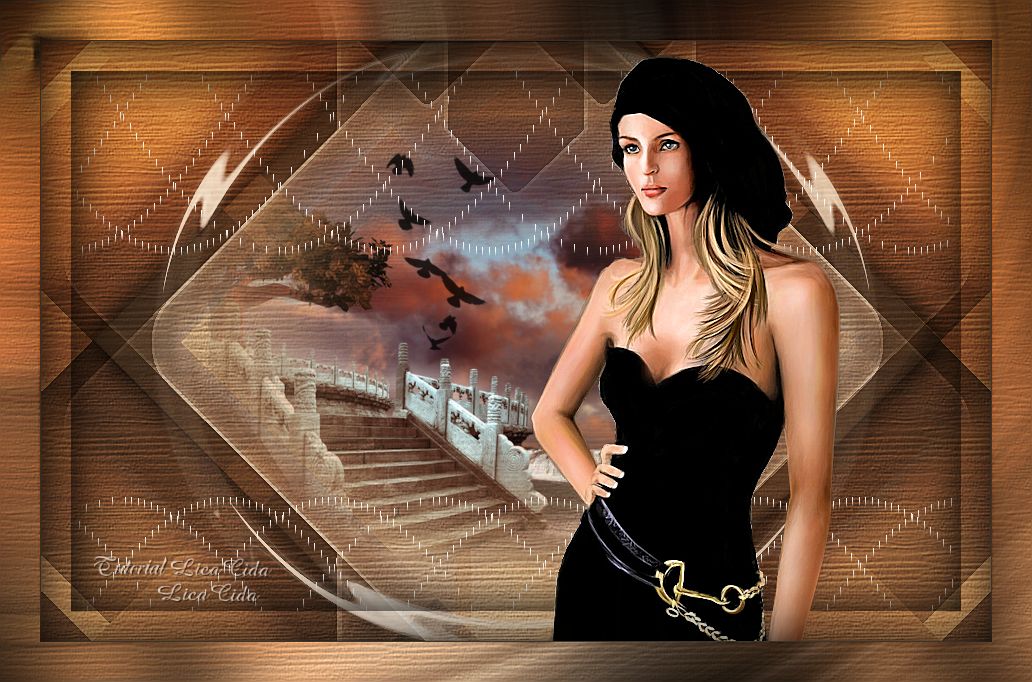
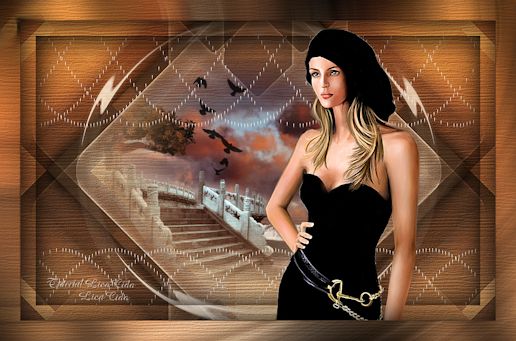 Espero que gostem. Aparecida / licacida, junho de
2015.
|