|
Versões Amigas
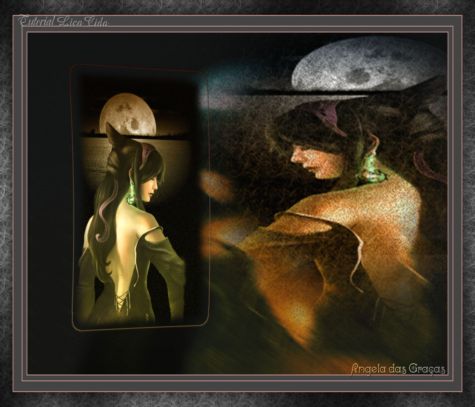
"Gothic Woman" Preset
_ AirBrush \ pintarlc ( salve em sua paste de presets_ airbrush my
psp files)
Imagem jpg_
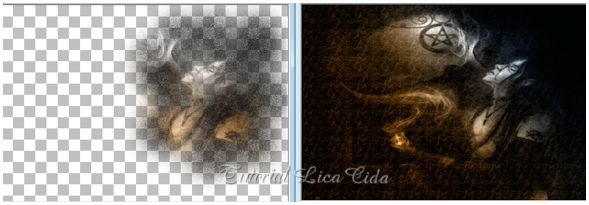
the_last_rite_by_wyldraven-d8mpp4v .
Marca
D'água. Efeitos do PSP.
Versão usada PSPX7
Plugins
Plugin
Unlimited 2\ Paper Textures.
Plugin
Nik Software\ Color EfexPro 3.0 .
Tutorial
_Roteiro 1-Abrir uma nova imagem transparente 1024
x 700 pxls.
_Select All. Edit Copy na imagem jpg
the_last_rite_by_wyldraven-d8mpp4v ( usar uma imagem jpg de
preferência preta e branca )
\ Edit Paste Into Selection. Selections\
Select none.
2-
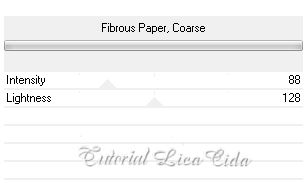
Plugin Unlimited 2\ Paper Textures.
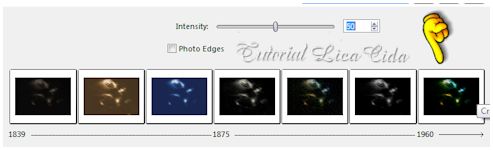
 3-Plugin Nick Software\ Color EfexPro 3.0\ Bi-Color
Filters. Color Set\ Cool\Warm4.
_Layer\ Merge\ Merge All.
4-Coloque na paleta de cores, no Foregound, como
pattern, a imagem formada.  _ Reserve ao lado minimizando
40%.
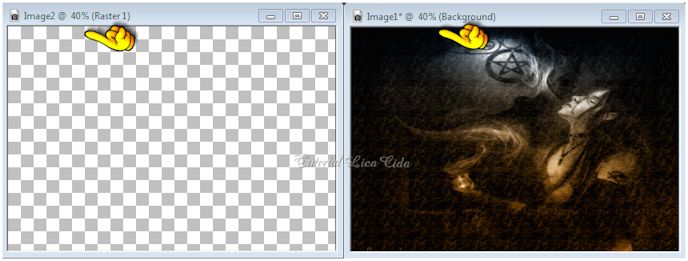
5-Abrir uma nova imagem transparente 1024 x 700
pxls. Minimize 40% e coloque ao lado da
imagem reservada.
 6-Ativar o AirBrush,. Procurar o
Preset_Airbrush_ pintarlc .
( ou \
observe configurações no print ) 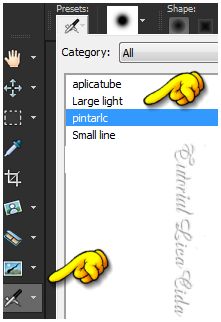  _Clicar na parte superior direita do top como
mostra o print.
 * Vamos continuar a trabalhar nessa layer em
proporção desejada ( deixar a imagem reservada ).
7-Nova
layer.
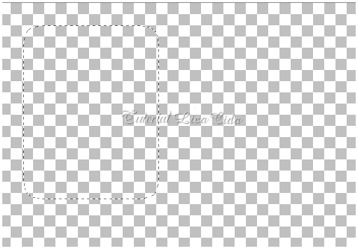
_Selection Rectangle\ Feather 20 , fazer retângulo
como print .
( não
importa medida, mais ou menos desse tamanho)
 _Ativar a imagem jpg
the_last_rite_by_wyldraven-d8mpp4v . Image \Mirror\ Mirror
Horizontal.
_Edit
Copy \ Edit Paste Into Selection.
7-Effects\ 3D
Effects\ Chisel _4 \ Transparent\ Color#2e2d18
.
_Selections\ Select none.
8-Effects\
Distortion Effects\ Lens Distortion.
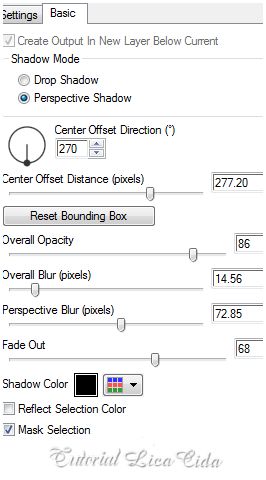
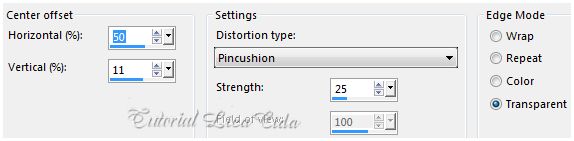 9- Plugin
Alien Skin Eye Candy 5: Impact\ Perspective Shadow...
 10-Plugin Nick Software\ Color EfexPro 3.0\
Bi-Color Filters. Use a gosto.
_Ativar a imagem reservada. Edit\
Copy.
11-
Voltar a imagem que estou trabalhando.
_Nova layer\ Send to Bottom. Select All. \ Edit Paste Into Selection. Selections\
Select none.
*
Minimize a imagem reservada ou delete.
12-Adjust\ Blur\ Motion Blur. A=300 \
S=100.
13-Effects\ Photo Effects\ Time
Marchine...
 _Opacity 73.%.
14-Nova layer\ Send to Bottom. Preencher com a
Color=#444444.
Layers
 15-Image \Add Borders \2 pxls
symmetric marcado.
Color= #795929.
( usar uma cor predominante do
seu trabalho)
_Image \Add Borders \10 pxls
symmetric marcado. Color=#444444.
_Image \Add Borders \2 pxls
symmetric marcado.
Color= #795929.
16-_Image \Add Borders \20 pxls
symmetric marcado.
Color=#444444.
_Image \Add Borders \2 pxls
symmetric marcado.
Color= #795929.
17-Image \Add Borders \30 pxls
symmetric marcado.
Color=#444444.
_Selecione\ Repetir: ítem
2 \ Plugin Unlimited 2\ Paper Textures ( veja print)
.
18- Plugin Graphic Plus\ Cross
Shadow_Default.
_Invert .
_Effects \ 3D Effects \ Drop Shadow . 0\ 0 \80 \40 .Color=#000000. Selections \ Select None.
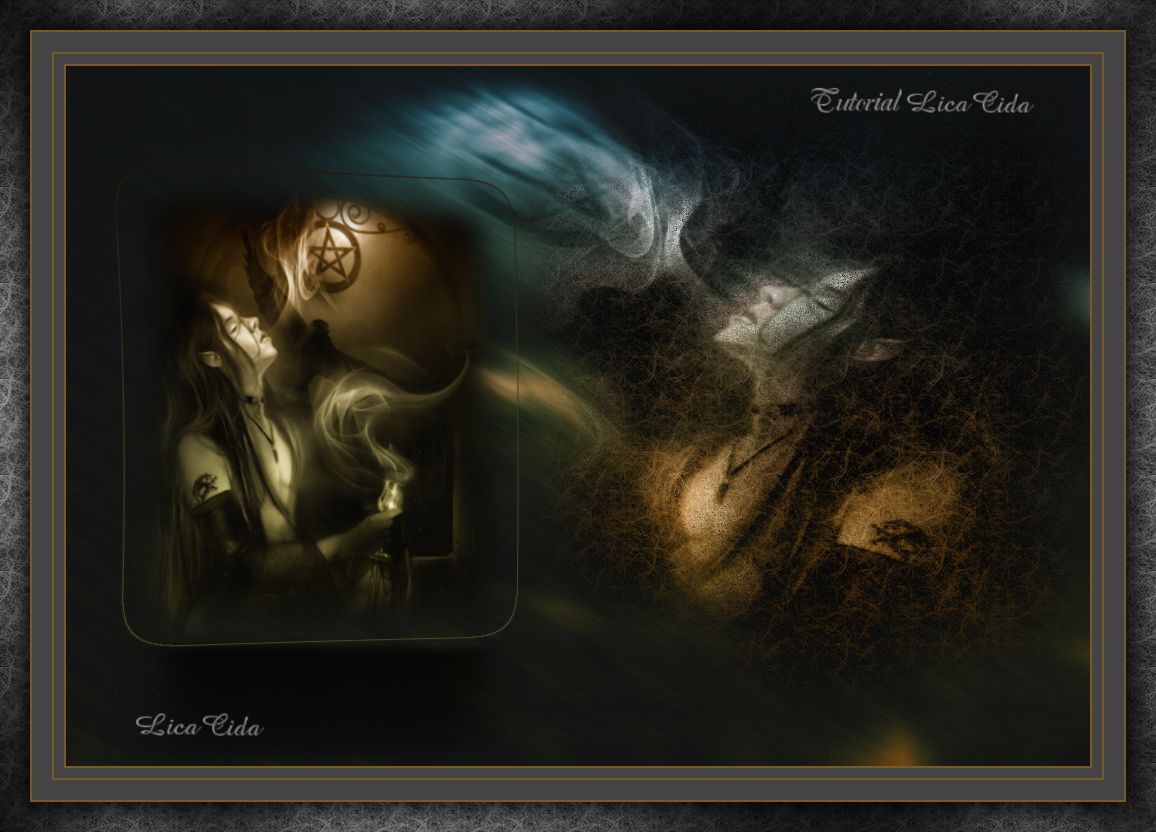
Aplicar a marca
D´água. Assine e salve.
Espero que
gostem. Aparecida /
licacida, junho de 2015.
Rio de Janeiro_Brasil. Variações:

 |