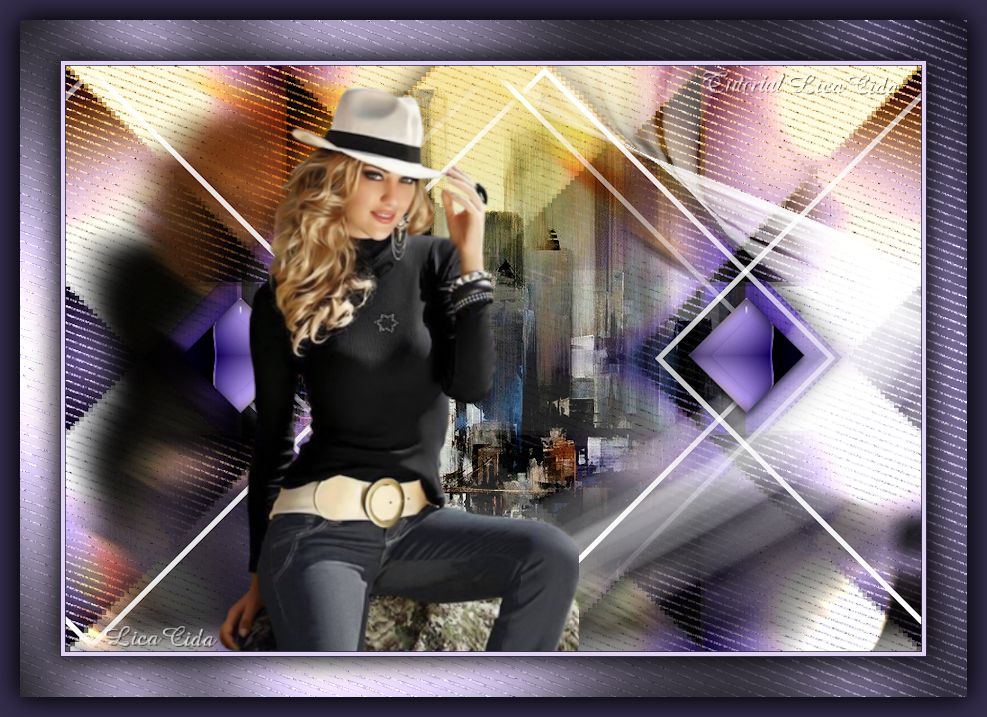
Versões Amigas
"Ousada"
"Presets" _guardar em sua pasta
de Presets My PSP Files ( Corel Paint Shop \My
Documents) .
*."Preset_ColorAdjustLevels_lcd3.PspScript"
.
* "Preset_ColorAdjustBrightness/
Contrast_lcd2.PspScript" .
 Tube:PgutPV4s7BxLnkV-6RTsSd_7woE@325x450
( agradeço)
Tube:misted_manhattan_tubed_by_thafs.
Decô: decô1lc\decô2lc.
Brush:Abstract Aura VI_11.
Marca D'água. Efeitos do PSP.
Versão usada PSPX7
Plugins
Plugin Unlimited 2.0 &<Bkg
Kaleidoscope>
FFG \A .
VanDerLee\ UnPlugged-X...
Tutorial
_Roteiro
1-Abrir uma nova imagem transparente de
950 x 650 pxls.
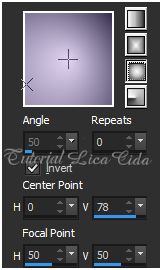
Preencher com o gradiente
formado pelas cores #332c4b e
#e1d4f3 . Configurar Sunburst. Repeats 0. Invert
marcado.
CP=H \0 . V\ 78
FP=H\50. V\50.
 2- Plugin Unlimited 2.0 &<Bkg
Kaleidoscope> \ @Mirrored & Scaled .
3- FFG \A .
 _Repetir ítem 2.
( Plugin Unlimited 2.0
&<Bkg Kaleidoscope> \ @Mirrored & Scaled ) . 4- Adjust \ Brightness and Contrast \
Levels. _Aplicar o
"Preset_ColorAdjustLevels_lcd3.PspScript" . 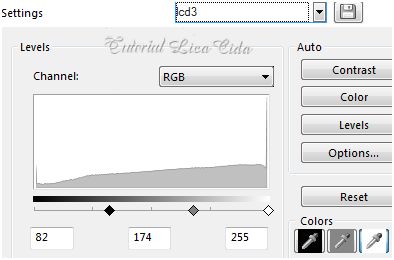 _ Effects \ Edge Effects \
Enhance.
5-Nova layer.
_VanDerLee\ UnPlugged-X...Color=#ffffff.
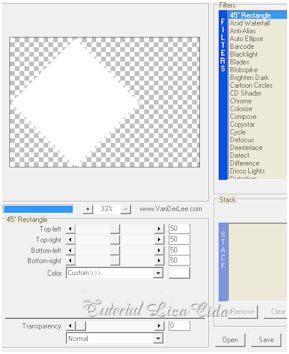 _Edit \ Cut. Edit\ Paste As New Layer.
_Selecionar o efeito formado com a Ferramenta
Magic Wand_Default.
6-Ativar a Raster1.
_Promote Selection to Layer. Resize
120%.
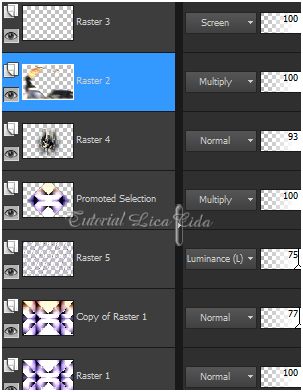
7- Voltar a Raster3.
_ Selections\ Modify Contract 6.
Delete.
_ Selections\ Invert.
8-Ativar a Raster2.
_ Edit Copy no tube PgutPV4s7BxLnkV-6RTsSd_7woE@325x450 \ Edit Paste Into Selection.
Selections\ Select
none.
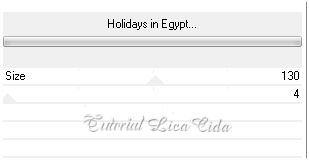
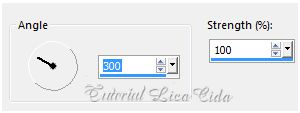
9-Adjust\ Blur\
Motion Blur.
_Aplicar duas
vezes.
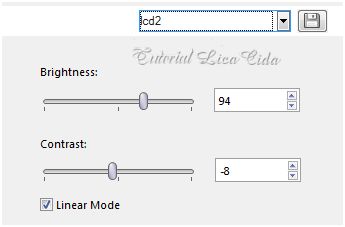
 10-Adjust \
Brightness and Contrast\Brightness/ Contrast. Aplicar o
"Preset_ColorAdjustBrightness/
Contrast_lcd2.PspScript" .
 11- Repetir ítem 4.
Adjust / Brightness and Contrast / Levels.
_Aplicar o
"Preset_ColorAdjustLevels_lcd3.PspScript" .
( veja
print )
12-Ativar a layer inferior (Promoted
Selection ).
_Effects\ Distortion
Effects\Pixelate.
 _ Effects \ Edge Effects \
Enhance.
_Effects \ 3D Effects \ Drop Shadow 0\
0\ 80\ 40,00. Color=000000.
13-Edit Copy no
misted_manhattan_tubed_by_thafs \ Paste As New Layer.
Resize 80%.
14-Repetir ítem 4. Adjust /
Brightness and Contrast / Levels.
_Aplicar o
"Preset_ColorAdjustLevels_lcd3.PspScript" .
( veja
print ) 15-Ativar a Raster1 . Repetir :
_Effects\ Distortion Effects\Pixelate ( print ítem
12).
_ Effects \ Edge Effects \
Enhance.
_ Layer\ Duplicate.
16- Plugin Nick Software\ Color EfexPro
3.0\ Graduated Filters \ Color Set \ Orange1.
17-Edit Copy no decô2lc. Paste As New
Layer.
18-Ativar a Promoted Selection .
_Repetir: Plugin Nick Software\ Color EfexPro
3.0\ Graduated Filters \ Color Set \
Orange1.
19-Ativar a Raster3.
_Effects\ Image Effects\ Seamless Tiling .Side by
side
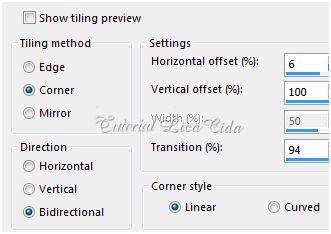 _Repetir o ítem 19.
Layers\Blends\Opacitys.
(use de acordo com as cores escolhidas)
 20-Edit Copy no brush \Abstract Aura VI_11.Paste
As New Layer.
( use a gosto)
21-Edit Copy no decô1lc. .Paste As New
Layer.
22-Edit Copy no tube PgutPV4s7BxLnkV-6RTsSd_7woE@325x450 \Paste
As New Layer.
Resize e posicionamento a gosto.
23-Image \ Add Borders \1 pxl
symmetric marcado. Color= #332c4b( foreground) .
_Resize90%.
24-Image \ Add Borders \4 pxl
symmetric marcado. Color=#e1d4f3( background).
_Image \ Add Borders \1 pxl
symmetric marcado. Color= #332c4b( foreground) .
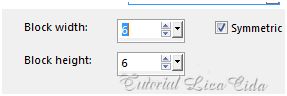
25-Image \ Add
Borders \40 pxls symmetric marcado. Color=#ffffff
.
_Selecione.
26- Preencher com o gradiente formado no
ítem1.
_Edit Copy no decô2lc. \Edit Paste Into
Selection.
27- Plugin Tramages\ Pool
Shadow_Default.
28- Invert\ Effects \ 3D Effects \
Drop Shadow 0\ 0\ 80\ 40,00. Color=000000.
_Selections\ Select none. Aplicar
a Marca D'agua.
Assine
e salve.
Aparecida
/ licacida, julho de 2015
Espero
que gostem. 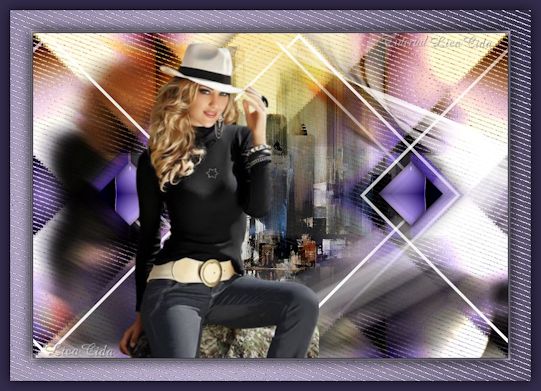  |