Seleção:tagverdelc. Salve em sua
pasta de seleções My PSP Files.
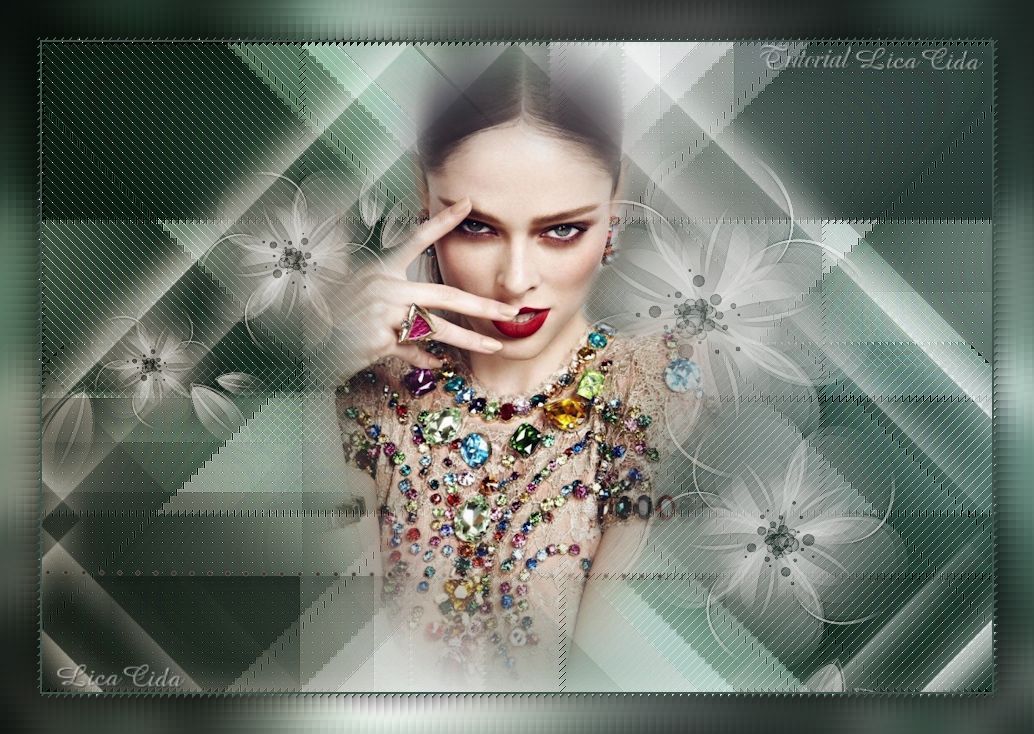
Tube:TubeNaraPamplona 1501.
Brushes :
Cherry_Flower_corners_by_Lileya_4.
Efeitos do PSP.
Versão usada PSPX7
Plugins
Plugin Toadies
Plugin kiwi's
Plugin AP ( Lines )
Lines-SilverLining...
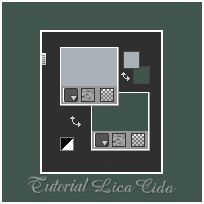
Configurar: Foreground #aab2b8 e
Background #40554c.
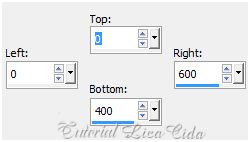
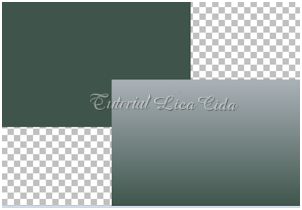
1-Abrir uma nova imagem transparente de
950 x 650 pxls.
_ Seleção
Personalizada.
_Preencher color #40554c\ usada no
background.
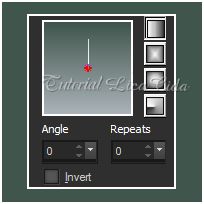
2-Layers \ New Raster Layer.
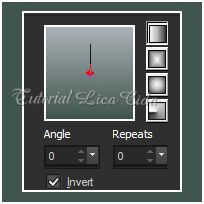
_Preencher com o gradiente formado pelas
cores acima. Configurar Linear. Angle 0 e
Repeats 0. Invert desmarcado.
_Selections\ Select none.
_Image\ Mirror\ Mirror
Horizontal
_Image\ Mirror\ Mirror Vertical.
_Layer\ Merge\ Merge Down.
3-Plugin Toadies\ What Are You?
...
x- 30\ y- 20.
_Repetir :
_Plugin Toadies\ What Are
You?...
x- 20\ y- 20.
4- Plugin Toadies\Weaver... 70\ 70\
0.
5-Plugin kiwi's
Oelfilter .
_Adjust \ Sharpness \
Sharpen.
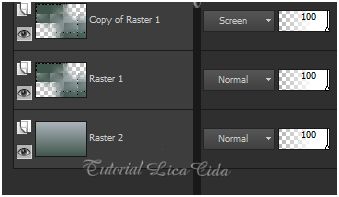
_Layer\ Duplicate.
6-Effects\ Geometric Effects\ Skew.
Horizontal\ (menos)-45\ Transparent.
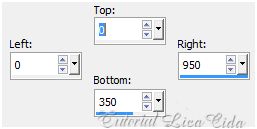
7- Seleção Personalizada.
_Promote Selections to
layer.
_Selections\ Select none.
8- Effects \ Reflection Effects \ Rotating Mirror.
0\180\ Reflect.
_Layer\ Duplicate. Image\ Mirror\ Mirror
Vertical.
_Layer\ Merge\Merge Down.
9- Plugin AP ( Lines )
Lines-SilverLining...
_Adjust \ Sharpness \
Sharpen.
_Layer\Arrange\Move
Down.
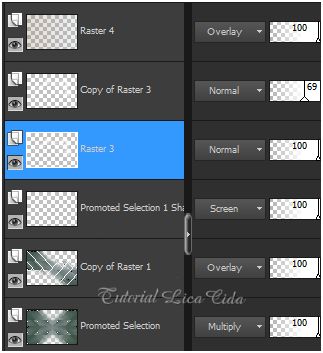
10-Ativar a Copy of Raster1.
_Plugin AP ( Lines )
Lines-SilverLining...
11-Layers \ New Raster
Layer. Layers\ Arrange\ Send to Bottom.
_Preencher com o mesmo gradiente formado
acima. Modificar invert marcado.
12- Selections \Load \
Save Selection \ Load Selection From Disk \ Load
\tagverdelc.
_Promote Selections to
layer.
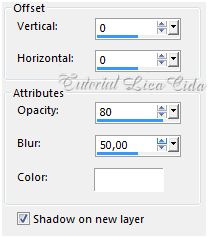
13- Effects \ 3D Effects \ Drop
Shadow.
( Shadow on new
layer_marcado)
_Selections\ Select none.
_Layer\ Arrange\ Bring to
Top.
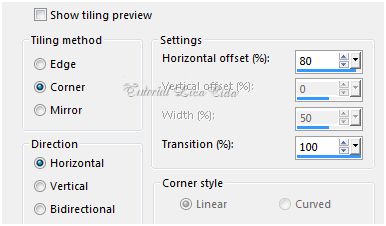
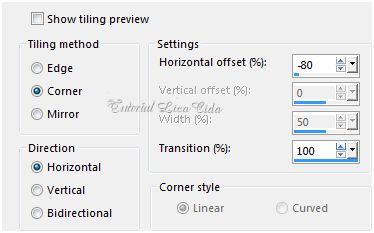
14-Effects\ Image Effects\ Seamless
Tiling.
Repetir:
_Blend Mode=Screen.
15-Edit Copy no
Cherry_Flower_corners_by_Lileya_4\Paste As New
Layer.
_Image\ Free Rotate.
_Image\ Mirror\ Mirror
Horizontal.
_Rezise e posicionamento a gosto ( proporção
ao tube usado).
_ Escolha uma cor do seu tube
que combine com a cor usada no foreground_ #7a5c3e, use-a no
background.
16-Layers \ New Raster Layer.
Formar um gradiente formado pelas
cores do foreground e a escolhida para o background
.
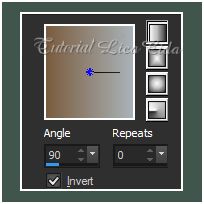
Modificar: Angle 90 . Mude
Opacity para 20% e preencha a layer.
Blend Mode= Overley.
*( Delete a Layer Promoted Selection
1).
Layer\ Blends\ Opacitys
17-Ativar a layer superior_Raster4 .
_Edit Copy noTubeNaraPamplona 1501 \Paste As New
Layer.
_ Resize 90%. Layer \
Duplicate.
18- Ativar a Raster5.
_ Adjust\ Blur\ Gaussian
Blur...R=20,00. Blend Mode=Multiply.
19-Image \ Add Borders \2 pxls
symmetric marcado. Color=#40554c ( background).
_Edit Copy .
20-Image \ Add Borders \40 pxls
symmetric marcado. Color=#aab2b8 ( foreground).
_Selecione. Edit Paste Into Selection.
_Adjust\ Blur\ Gaussian Blur...R=20,00.
21- Plugin Graphics Plus\ Cross Shadow.
22-Plugin kiwi's
Oelfilter_Default (Print ítem5).
_Selections\ Invert.
23-Effects \ 3D Effects \ Drop
Shadow 0\ 0\ 80\ 50,00. Color=000000.
_ Selections\Select none.
Aplicar a Marca
D'agua.
Assine e
salve.
Aparecida /
licacida, julho de 2015
Espero que
gostem.