|
|
|
|
|
Versões Amigas
"Mara
Pontes"
*
Muitos abraços especiais pelo seu aniversario. Com carinho, dedico o
tutorial!!
Script _ "Airbrush and ink" ( do proprio psp ) ou (Guardar em sua pasta de Scripts Restricted). Preset Illumination\ Lights \ Preset_Lights_lightlc5. (salve em sua pasta de Presets My PSP Files).
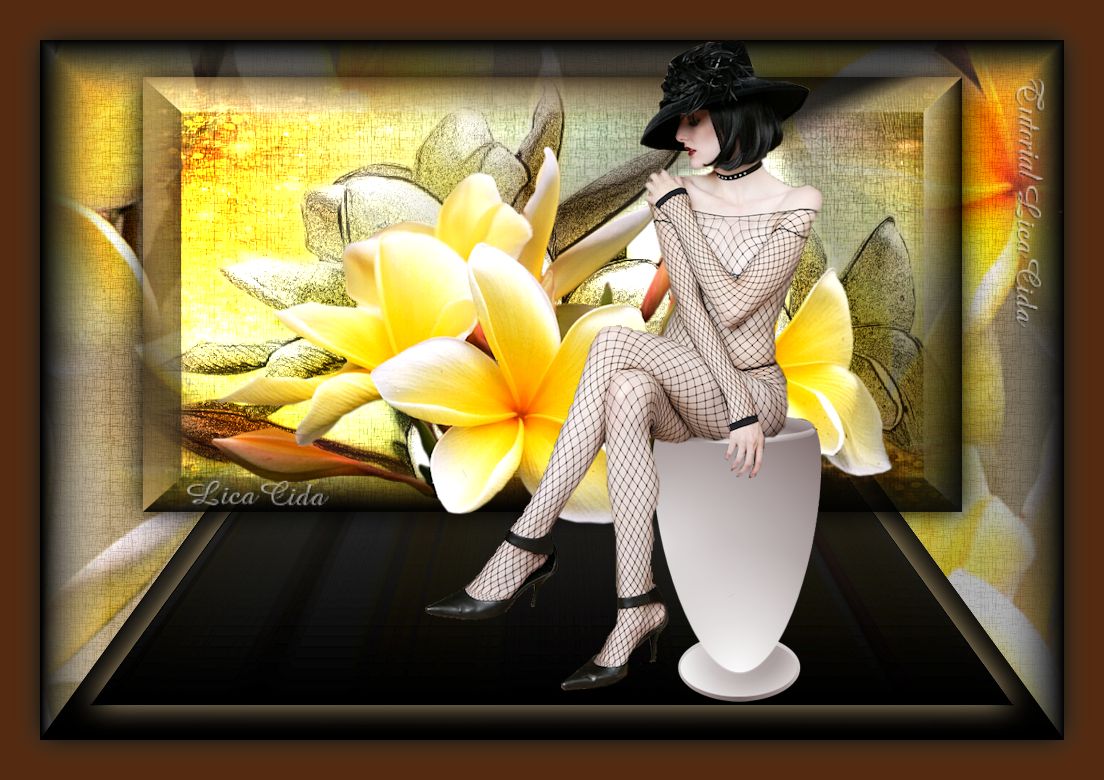
Tubes: Flores_0118 \ AnaRidzi1832.
Marca
D'água.
Efeitos do PSP.
Versão
usada PSPX6.
Tutorial _ Roteiro
1-Abrir uma imagem transparente de 1024x 600 pxls.
Select
all \ Edit Copy na trama2 ( Soniatubesflores0118 ) \ Edit
Paste Into Selection .
*Ou criar seu back ( cor ( mais)
+ Plugin Unlimited 2.0\ Paper Textures\ Papyrus _Default
(print ítem 10) ) .
2-New
Layer .
Edit Copy na trama1 _ as
flores ( Soniatubesflores0118 ) \ Edit Paste Into Selection
.
Selections \ Select none.
3-Correr o Script "Airbrush and ink".
( do
próprio psp_segue anexo)

*Procurar o script "Airbrush and ink"
.
*
Clique para corrê-lo em Run Selected Script .
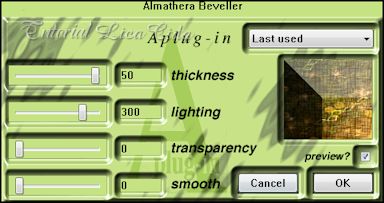
4-Plugin Almathera\ A Beveller...
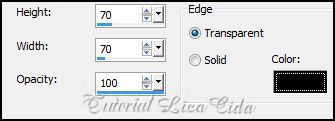
5-Effects\ 3D Effects\ Buttonize... ( Usei color=#b59f78 )
.
*Usar
a gosto_usar a cor mais clara que a cor usada no segundo
efeito Butonize...
*Promote Background Layer. Resize 80%.
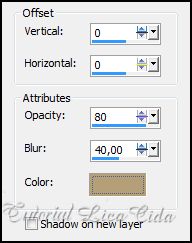
6-Effects \
Image Effects \Offset: H= 0 V= 20. Custom e
Transparent marcados.
*Effects \ 3D Effects \ Drop Shadow.
Color= #000000. 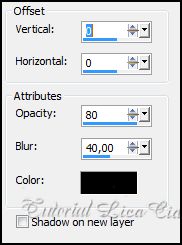 7-Image \Canvas Size _1024 x 700_Bottom
100.
8-New Layer . Layers\ Arrange \Send to Bottom. Pintar color =#b59f78.
( a
mesma cor clara usada no ítem 5 ).
9-Select all \Edit Copy na trama1 _ as flores
(Soniatubesflores0118) \ Edit Paste Into Selection .
Selections \ Select none.
*Effects\ Image Effects\ Seamless
Tiling... Default. 10-Plugin Unlimited 2.0\ Paper Textures\ Papyrus.
Default.

11-Effects\ 3D Effects\
Buttonize...
(
color=#000000 ou uma cor escura que combine com seu
trabalho).
 *
Layer\Duplicate.
12-Effects\
Geometric Effects\ Perspective -Vertical . Distortion ( menos)
-100.
* Com a Erase
Default, Size : 150, retirar a ponta do efeito formado.
 *Layer\
Duplicate.
*Resize
90%.
*Effects \
3D Effects \ Drop Shadow,
Color=#b59f78.
( A cor escolhida
no ítem 5
).
 *
Adjust\One Step Photo Fix. Layer\ Merge\ Merge
Down.
13-Ativar a
Raster1. Usar a Ferramenta Pick . Traga o efeito a 500 pxls.
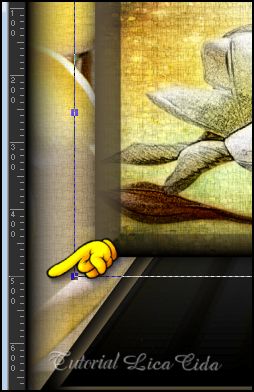 *Effects
\Illumination Effects \ Preset Illumination\Lights\
Lightlc5.
14-Ativar a Raster2 . Layer Duplicate.
Plugin Nik Software \Color EfexPro 3.0
\ Graduated Filters . Color Set _
Coffee1 .
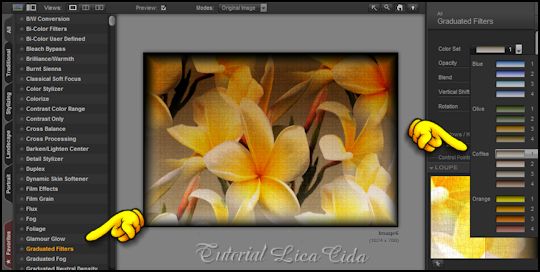 *Effects \Illumination Effects \
Preset Illumination\Lights\
Lightlc5.
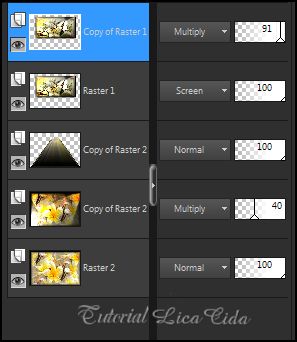
Layers\Blends\Opacitys.
(use a
gosto)
 OBS:
Usei a Eraser Default, Size 100 ,no efeito
Perspective -Vertical , retirei a sombra da
moldura.
15-Edit Copy na trama1 _ as flores (
Soniatubesflores0118 ) Paste As New Layer.
*Resize 90%. Posicione . 16-Edit Copy no tube AnaRidzi1832\ Paste As
New Layer. Posicione.
OPCIONAL.
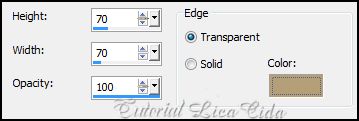
*Image \ Add Borders \40 pxls symmetric marcado. Color=# 542a10.
*Selecionar com a Ferramenta Magic
Wand_Default .
*
Selection Invert.
*Effects \ 3D Effects \ Drop Shadow.
Color= #b59f78.
Repetir: *Effects \ 3D Effects \ Drop Shadow.
Color= #000000.
( mesmos
valores
acima). Aplicar a Marca D'agua.
Assine
e salve em JPG.
Espero
que gostem .
Rio de
Janeiro , agosto de 2014.
Aparecida/Licacida
Brasil. 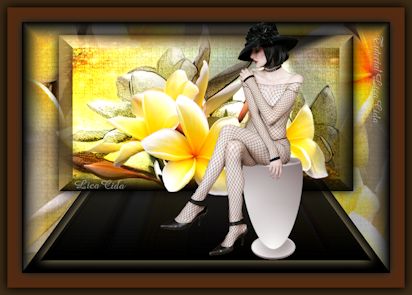 |