
|
|
|
Versões amigas
"Dushi"
Seleção:
Narah_Seleccion1_Black_White. ( Salve em sua pasta de
seleções My PSP Files ).
Mask:Narah_mask_0483.
Tubes:
calguismistedautomne1399 \ AR740_AnaRidzi.
Marca
D'água.
Efeitos do
PSP.
Versão usada
PSPX6 Plugin
Plugin dsb
flux
Plugin Alien Skin
Eye Candy 5: Impact.
Plugin
Galaxy.
Plugin Flaming Pear
.
Plugin &<BKg Designer sf
10I>.
Plugin
BorderMania .
Tutorial
Baseado em um
desafio proposto por Dushi, para o grupo café, chocolate e
psp.
1- Abrir nova
imagem transparente 900 x 600 pxls.
2-Selections
\Load \ Save Selection \ Load Selection From Disk \ Load
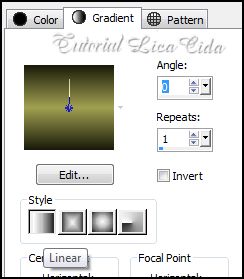
Narah_Seleccion1_Black_White. 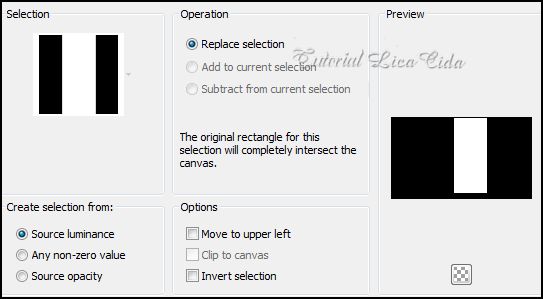 3-Preencher com a gradiente
formada pelas cores: #1a1b0b e #a1a050.
Configurar Linear :
Angle
0\ Repeats 1. Invert desmarcado.
 *Selections \ Select
none. Edit\Cut. Edit\Paste As New Layer.
*Layer\ Merge\
Merge Down.
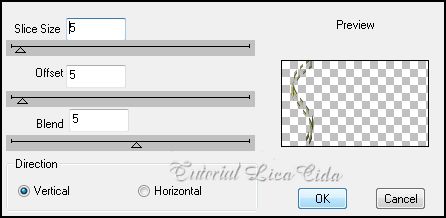
4- Effects\ Distortion Effects\
Warp.
 *Repetir o ítem 4. Mesmos
valores.
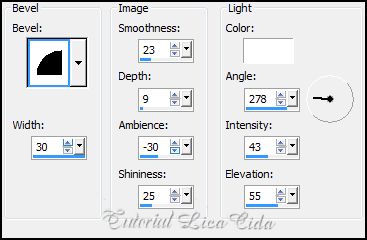
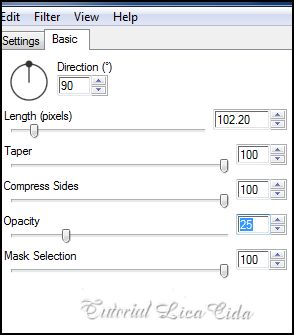
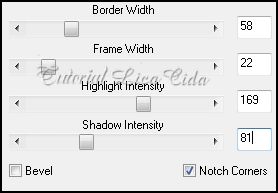
5- Effects\ 3D Effects\ Inner
Bevel...
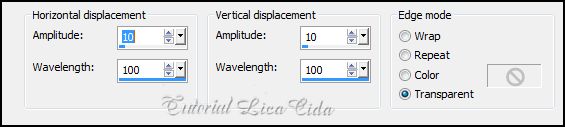
 6-Effects\ Distortion
Effects\ Wave.
 *Layer\Duplicate.
7- Plugin dsb flux\ Linear
Transmission...
 *Layer\ Merge\ Merge
Down.
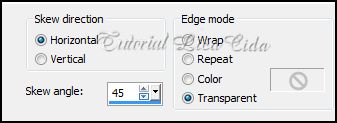
8- Effects\ Geometric Effects\
Skew .
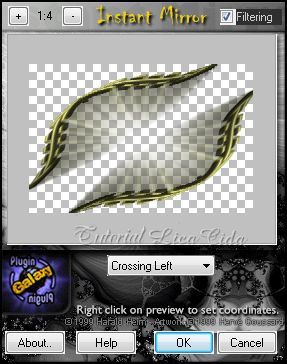
 9- Effects\ Reflection Effects\
Rotating Mirror ...
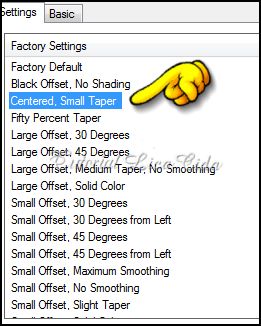
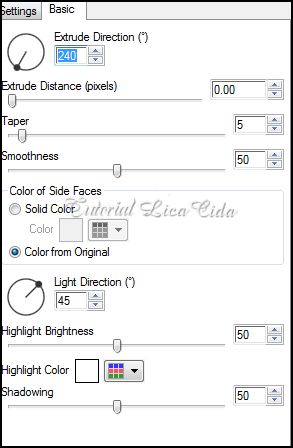
 10- Plugin Alien
Skin Eye Candy 5: Impact \ Extrude...
 11-Plugin Alien Skin
Eye Candy 5: Impact \ Motion Trail...
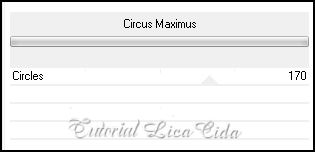
 12- Plugin
Galaxy.
 13-Nova
layer.
Pintar
com a mesma gradiente formada no ítem 3. Select all \ Edit Copy
no tube calguismistedautomne1399 \ Edit Paste
Into Selection . Selections \ Select none.
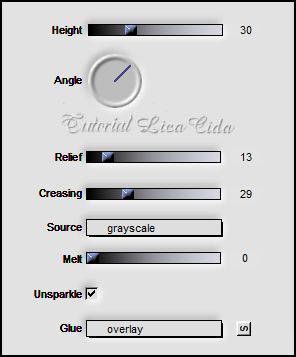
14- Plugin Flaming
Pear \ Boss Emboss.
 15-Plugin &<BKg Designer sf
10I> .
 16-Plugin
BorderMania \ Frame #2.
 *Layer\ Arrange\
Send to Bottom.
17-Nova layer.
Pintar com a cor #a1a050, usada no Background..
*Layers\ New Mask Layer\ From Image . Invert mask data desmarcado. 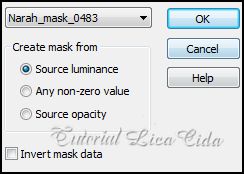 *Effects \ Edge
Effects\ Enhance More. Layer \ Merge \ Merge
Group.
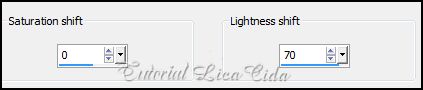
18- Adjust\ Hue and
Saturation\ Hue Map...
 19-Effects \ 3D
Effects \ Drop Shadow: 2 \ 2 \ 100 \ 2,00 .
Color=
000000.
20-Edit Copy
no tube calguismistedautomne1399 \ Paste As New Layer.
Resize 80%.
21-Nova layer.
Layer\ Arrange\ Send to Bottom.
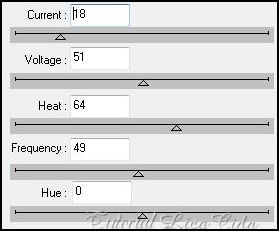
*Plugin dsb
flux\ Electrosphere.
 22-Adjust\ Blur\
Gaussian Blur. R=100,00.
O tutorial\
layers.
 Layers\Blens\Opacitys.
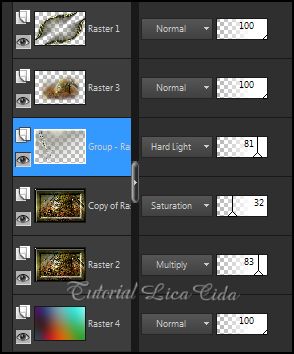 23-Ativo a Raster1. Copy no tube
AR740 . Paste As New Layer. Posicione a
gosto.
Aplicar a Marca
D'agua.
Assine e
salve.
Espero que
gostem. Aparecida /
licacida, agosto de 2014.
Rio de Janeiro_Brasil 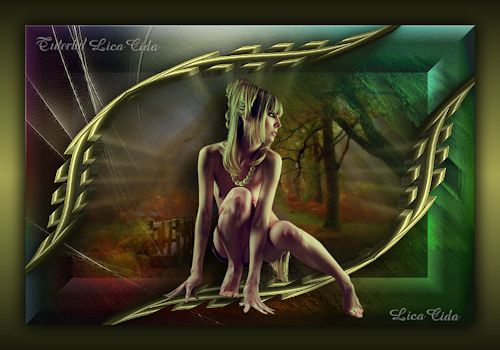  |