 |
|
Versões amigas
Top "Wait"
*Dedico a querida amiga, Eliana
Chamon.
Preset Illumination\ Lights \ circuloslc1
(guardar em sua pasta de Presets My PSP
Files)
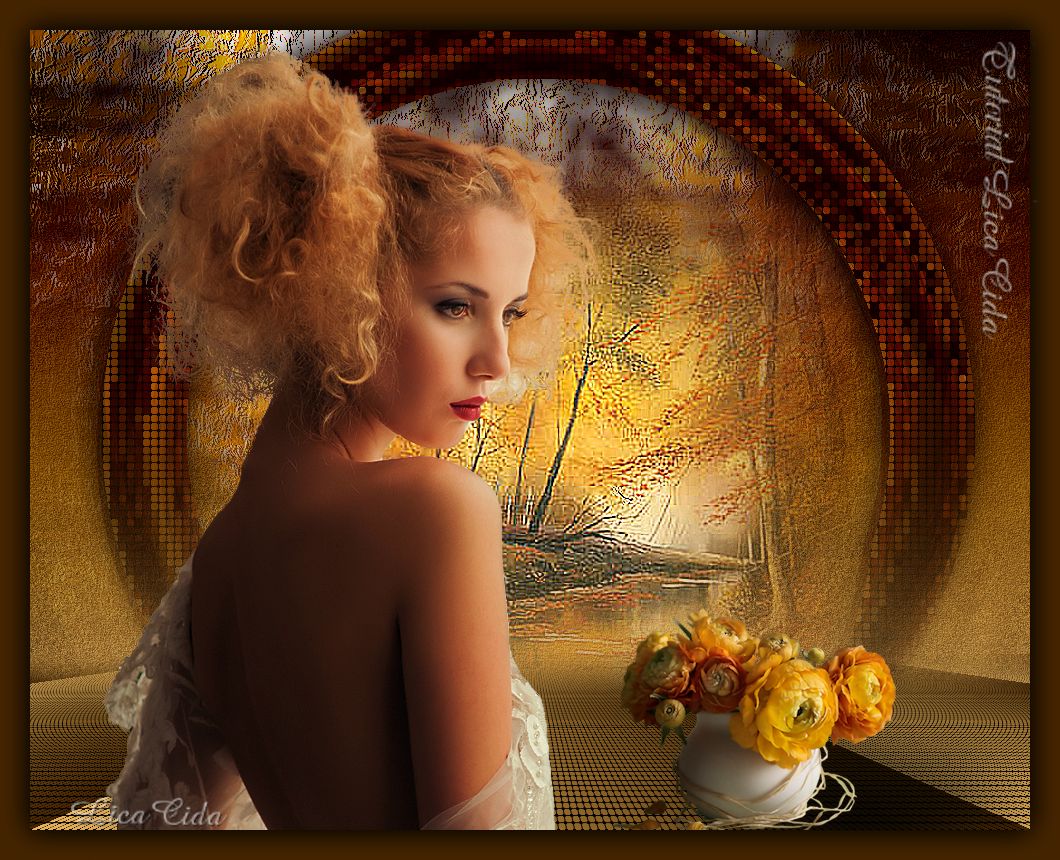
Tubes: tube1883-mulher-mara-pontes \
radi_paisaje_026\ mtfp_254.
Elementos: decolc1
\decolc2.
Mask Gradiente: DW
Marca D'água.
Efeitos do PSP.
Versão usada
PSPX6.
Plugins
Plugin Galaxy \Feedback
.
Plugin MuRa's Meister \ Pole Transform ... e Perspective Tiling.
Plugin Richard Rosenman \
Halftone.
Plugin I -Decay\ Spiral
Difuse...
Plugin nik Color Efex Pro!1.0 \ Graduated User Defined. Tutorial \
Roteiro
1- Abrir uma imagem
transparente de 1000 x 700 pxls.
Pintar com o gradiente formado pelas cores: #442400 e #e8b258 . Configurar Linear : Angle 90\ Repeats 0. Invert desmarcado.  2-New Layers .
Select all \ Edit Copy no
tube1883-mulher-mara-pontes\ Edit Paste Into Selection
.
Selections \ Select none.
3-Effects\ Image Effects\Seamless Tiling:
Default.
4-Plugin Galaxy
\Feedback .
(aplicar tres
vezes)
 5-Adjust \Add
/Remove Noise \Add Noise . Uniform e Monochrome marcados. Noise
10.
Layer\
Merge\ Merge Down.
6-Image \Canvas Size . 1000 x 800
_Bottom 100.
7-
Effects\ Geometric Effects\ Perspective Vertical (menos) -40.
Transp.
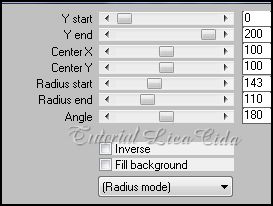
8-Plugin MuRa's Meister \ Pole Transform
...
 9-Aplicar
a Mask !!!!gradientedworisch \ duplicar. Layer \Merge \
Merge Group.
10- New
Layers . Layers\ Arrange \ Move Down.
Pintar com o gradiente formado no ítem 1
e modificar : Invert marcado.
 11-Plugin
Richard Rosenman \ Halftone.

12-Plugin MuRa's Meister\ Perspective
Tiling.  *Com a Ferramenta Magic Wand _Default_
selecionar a parte transparente.
Selections \ Modify \
Feather 60 pxls - Deletar (tres a quatro
vezes).
13- New Layers .
Pintar com o gradiente formado
no ítem 1 e modificar : Angle
0.
 14- ((
Repetir ítem 5))
Adjust \Add /Remove Noise \Add Noise . Uniform e Monochrome
marcados. Noise
10.
15- Plugin
FMTT\ Blend Emboss_Default.
16-Copy
no elemento decolc1 .Paste As New Layer
.
17-Plugin I -Decay\ Spiral
Difuse...
 Layer\
Merge\ Merge Down.
Layer\
Arrange\ Send to Bottom.
18- Copy
no elemento decolc2 .Paste As New Layer
.
19-Copy no tube radi_paisaje_026 .Paste As
New Layer . Resize de acordo com o tube
usado.
(( Usei
120%))
20-Ativar a ferramenta Sharpen e usar sobre a
paisagem.
 Configurar_Default.
Caso
queira alterar as configurações, mude em Density e Opacity de acordo com o
tube usado.

21- Duplico a layer superior (( Group- Raster1)).
Repito
:
Plugin
Richard Rosenman \ Halftone.

22-Effects \ Image Effects \Offset... 8\0 . Custom e Transparent marcados.
Layer\ Arrange \ Move Down.
23-Effects \ 3D Effects \ Drop Shadow: 20\17\50\20,00. Color=#000000. ((Use nos dois circulos))
24- Ativar a Raster2. Plugin nik Color Efex Pro!1.0 \ Graduated User Defined. Color=#442400 ( cor usada no
foregound).
Usar nos efeitos o Plugin e reversar as
cores: #442400 e #e8b258. Dar preferencia ao tom
escuro para maior
realce.
Layers\ Blends\ Opacitys.
25-Ativar a Raster3. Effects \ Preset Illumination\Lights\ circuloslc1.
25-Ativar a Layer superior. Copy no tube1883-mulher-mara-pontes .Paste As New Layer . Posicione.
26-Copy no tube decomtfp_254. .Paste As New Layer . Posicione.
Opcional mudar os blends e
opacitys.
Acabamentos a
gosto.
Aplicar a Marca
D'agua.
Assine e salve.
Espero que
gostem. Aparecida / Licacida, maio de
2014.
Rio de Janeiro_Brasil
 |