|
Versões Amigas
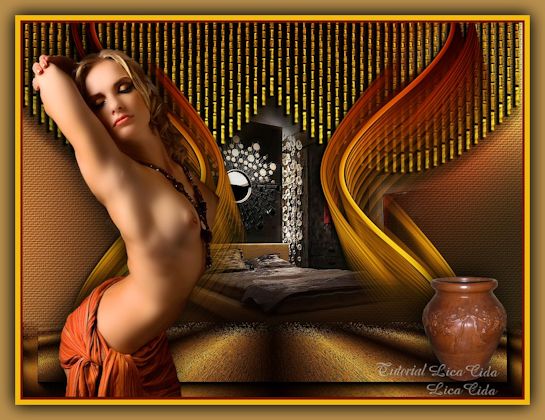
"Devaneios"
Com carinho dedico a amiga
Itaci.
Seleção : sel002lc ( salve em sua
pasta de seleções My PSP Files).
Preset Illumination\ Lights \ Preset_Lights_surrealreginabarbeiro. (salve em sua pasta de Presets My PSP Files). Obrigada Regina pela permissão do uso do Preset. Textura: miniteladw Arquivo: cortinalc1 Mask : Mask!!!!.mask.ket-fadesuave
Tubes: tube1844_mulher_mara_pontes \
3141-luzcristina\Grisi_Tube_Decoration_363.
Marca D'água.
Efeitos do PSP.
Versão usada PSPX6.
Tutorial _Roteiro
1-Abrir uma imagem transparente de 1000 x
600 pxls.
2- Selections \Load \ Save Selection \ Load
Selection From Disk \ Load seloo2lc.
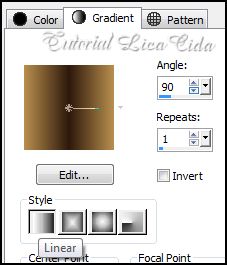
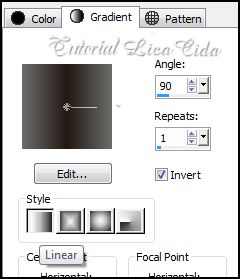
3- Pintar com a gradiente
formada pelas cores #b78e4d e #2e180c .
Configurar Linear
A=90\R=1 . Invert
desmarcado.
 4- Effects\ ED Effects\ Inner Bevel
...
 Selections \ Select
None.
5- Plugin Flaming
Pear\ Flexify2.
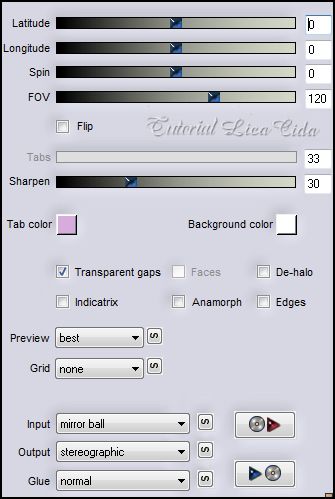
*Layer\ Duplicate. Image
\Mirror. Layer\ Merge\ Merge
Down.
6-Effects\ Image Effects\ Seamless
Tiling... Default.
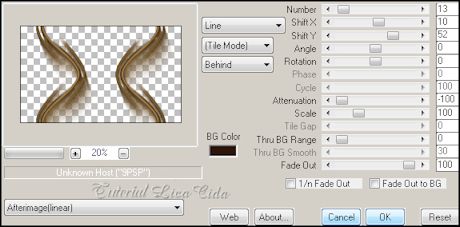
7- Plugin MuRa's Meister
\Copies...
 8-Aplicar a Mask
!!!!.mask.ket-fadesuave . Layer \Merge \ Merge
Group.
9-Image \Canvas Size _1000 x 750 _Bottom
150.
10-Nova Layer.
Layers\ Arrange \Send to Bottom.
Pintar com a mesma gradiente formada no ítem
3.
*Layer\ Duplicate.
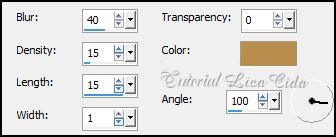
11- Effects\Texture Effects\ Straw
Wall. Color=#b78e4d.
 12-Plugin MuRa's Meister\ Perspective
Tiling.
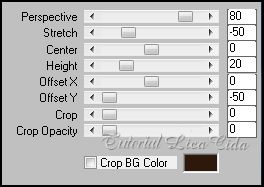 *Com a Ferramenta Magic Wand \ Feather 50 \ Clique na parte transparente . Veja configuração :
Deletar ( quatro\cinco vezes ).
*Selections \ Select none. 13-Plugin AAA Frames\ Foto Frame. Width 30 \demais valores_default.
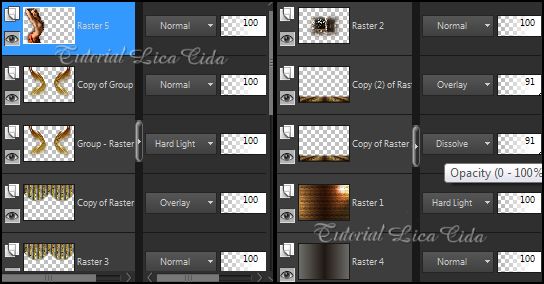
\\\\*Blend Mode = Dissolve . Opacity 91% (( veja print)).
14-Edit copy no tube 3141-luzcristina\Paste As New Layer.
15- Edit copy no arquivo cortinalc1\Paste As New Layer. Posicione e use a gosto.
16-Plugin Nik Software \Color EfexPro 3.0 \ Bi-Color Filters . Color Set _Brown1.
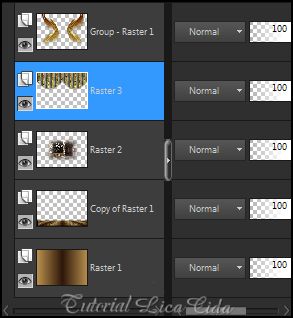
*Effects \ 3D Effects \ Drop Shadow: 5\-5\100\5,00 .Color= #000000.
17- Repetir o Plugin Nik Software \Color EfexPro 3.0 \ Bi-Color Filters . Color Set _Brown1, (( Na layer superior-Group-Raster1 )).
*Effects \ 3D Effects \ Drop Shadow: 5\-5\50\15,00 .Color= #000000.
O Tutorial
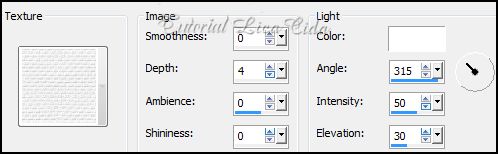
18-Ativar a layer (( Raster1 )) . Effects \Illumination Effects \ Preset Illumination\Lights\ surrealregina.
19- Adjust\ Blur\ Gaussian Blur. R=70. *Image\ mirror . 20-Effects\ Texture Effects\
Texture.
21- Nova
Layer. Layers\ Arrange \Send to Bottom.
Pintar com a gradiente formada pelas
cores #211813 e #6c6c68
. Mesma
configuração ítem 3. (Linear
A=90\R=1) .
Modificar: Invert
marcado.
.
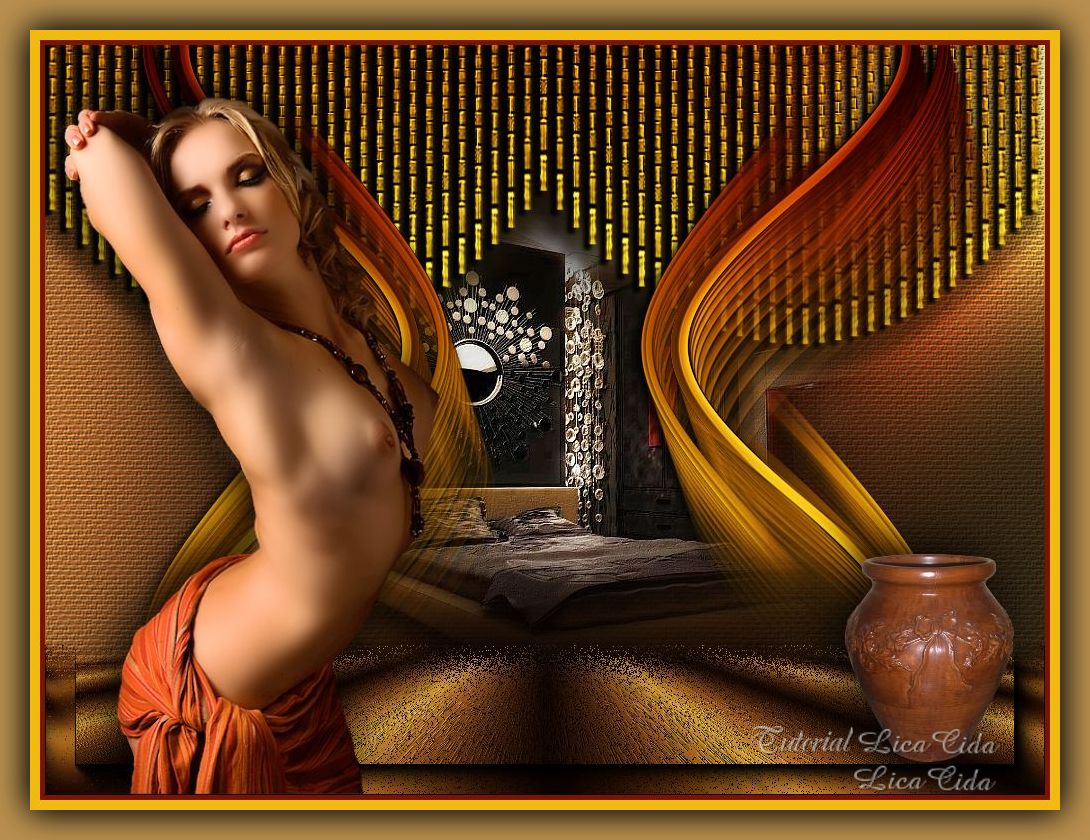
 22-Edit copy no
tube1844_mulher_mara_pontes\ Paste As New Layer.
Posicione.
 23-Edit copy no tube1844_mulher_mara_pontes\
Paste As New Layer. Posicione. Decore a
gosto. Aplicar a
Marca D'agua.
Assine e
salve. Formate a gosto.
Espero que
gostem. Aparecida / licacida, julho de
2014.
Rio de Janeiro_Brasil
 |