Roteiro_Tutorial
1-Abrir uma nova imagem transparente
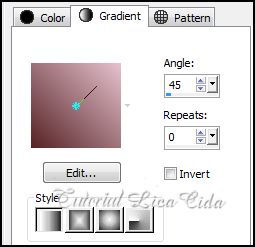
988x600. Pintar com o gradiente
formado pelas cores: #552324 e #e6c1ce .
Configurar Linear : Angle 45\ Repeats 0. Invert
desmarcado.

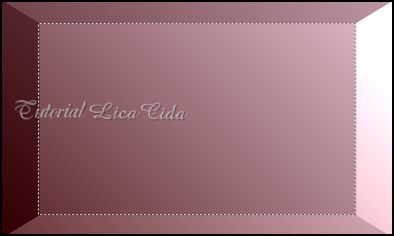
2-Plugin FFG\ G Beve1. Default (
51\24\53)
3-Seleciona o efeito
formado.


Select all \ Edit copy no TubeNaraPamplona
1441.\ Edit Paste Into Selection .
4-Promote Selection to Layer.
Effects \ 3D Effects \
Drop Shadow: 0\0\80\40. Color= 000000 .
Repetir.
5-Plugin AFS Import /Difinoise.
Default.
((128-0-0-0-0-0-0-0)).
Selections \ Select
none.
6-Plugin
VanDerLee\ UnPlugged-X...Zoomlens.

7-Repetir:
Plugin VanDerLee\
UnPlugged-X...Zoomlens.
(mesmos valores)
.
8-Nova Layer. Rodar o Script
darklica.
Image\Mirror.
9-Image\ Negative
Image.
10- Effects\ Distortion
Effects\Pinch... S=100
11-Effects \ Image Effects Offset.
(menos)-184\ 0.
12-Edit Copy no elemento
deco1-arquivonet\Paste As New Layer.
BM=Luminance (
L).
13-Effects \ Image Effects Offset.
(menos)- 184\ 0.
14-Edit Copy no elemento deco2-arquivonet\Paste As New Layer.
BM=Luminance ( L ).
Use a
gosto.
15-Ativar a Raster1.
Effects\ Texture
Effects\ Texture:
16-Image\Add Borders\30 pxls
marcado. Color=#ffffff . Selecione \
Invert.
17- Effects \ 3D
Effects \ Drop Shadow: 0\0\80\40. Color= 000000
.
Selections \ Select
none.
18-Edit Copy no TubeNaraPamplona 1441. \Paste As
New Layer.
Posicione.
19- Image\Add Borders\1 pxl
marcado. Color=#000000.
Aplicar a Marca
D'agua.
Assine e salve em
JPG.
Espero que gostem
.
Rio de Janeiro , Maio de
2014.
Aparecida/Licacida


:::VOLTAR:::