|
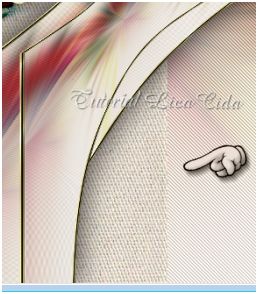
 Top "Bordado Primaveril" **Dedico a querida amiga Gigi Galvão, com carinho! Material Selecões: Imagem "Bordado Primaveril" . Seleção1 - Seleção2. Guardadas em Canal Alfa a Imagem "Bordado Primaveril". Preset Illumination\ Lights 2bllc (guardar em sua pasta de Presets My PSP Files) Tubes: 874_ mulher_marapontes\ pétalas calguispetales25012012 Imagem
JPG : foto Isaura ( arquivo net ) .
Pattern: Pattern Gold (22)
Marca
D'água.
Efeitos do PSP
Versão
usada PSPX5
Plugins
Plugin penta.com \
jeans...
Plugin Xero\ Porcelain \Clarity.
Plugin
MuRa's Meister\ Perspective Tiling.
Plugin
Nik Software\ Color EfexPro 3.0 \ Bi-Color filters .
Tutorial
_ Roteiro
1-Abra a
imagem (nomeada ) "Bordado Primaveril" anexada entre os
materiais.
Edit Copy na
imagem foto Isaura em formato JPG .
Select
all \ Edit Paste Into Selection. Selections \
Select none .
Adjust \Blur
\Radial Blur.
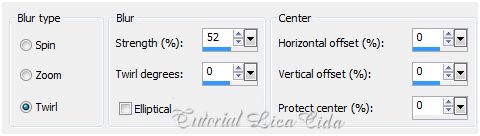 Plugin
penta.com \ jeans... 62\4 ( default ).
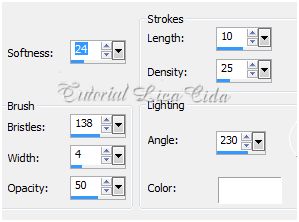
Effects \ Art
Media Effects \ Brush Strokes.
 2-Edit
Copy no back formado.
Selections \Load\Save
Selection \ Load Selection From Alpha Channel \
Selection#1.
New
Layer. Edit \ Paste Into Selection.
Selections\ Modify\ Select Selection
Borders:
 New
layer. Pintar de preto .
Selections\ Modify\ Select Selection
Borders:
 New
layer. Pintar com a Pattern Gold (22) . Angle =0
\ Scale=100.
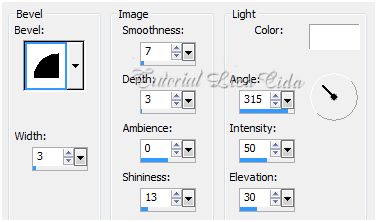
Effects \ 3D Effects \ Inner Bevel.
 Selections \ Select
none. Layer\Arrange \ Move
Down.
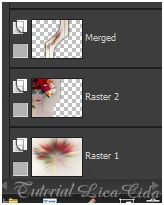
Tirar a visibilidade da Raster 1. Layer\
Merge\ Merge Visible.
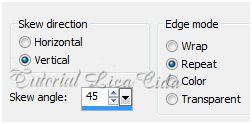
Effects\
Geometric Effects\ Skew.
 Effects\
Distortion Effects\ Pinch. S= (%)100 .
Layer \
Duplicate.
Repetir :
Effects\ Distortion Effects\ Pinch. S= (%)100.
Layer\ Merge \ Merge Down .
Effects \ 3D
Effects \ Drop Shadow: 0\ 0\ 80 \ 40,00
. Color=#000000 .
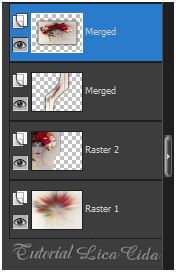
3-Abrir a
visibilidade da Raster1 e ativar a layer .
Edit Copy
na imagem foto Isaura em formato JPG\ Paste As New
Layer .
Effects \ Image Effects
Offset. H= (menos) -
318 \ V= 0.
Apagar a parte inferior da imagem sob o
efeito.
 Plugin
Xero\ Porcelain ( Default ) .
Opacity
55%.
Plugin
Xero\Clarity ( Default ) .
4-Ativar a Layer
Merged .
Selections
\Load\Save Selection \ Load Selection From Alpha Channel \
Selection#2.
New
layer\ Paste Into Selection.
Selections\ Modify\ Select Selection
Borders:
New
layer. Pintar de preto .
Selections\ Modify\ Select Selection Borders:
New
layer. Pintar com a Pattern Gold (22) . Angle =0
\ Scale=100.
Effects \ 3D Effects \ Inner Bevel (
mesmos valores usados acima ). Selections \ Select
none.
Layer \
Arrange\ Move Down.
Tirar a
visibilidade das três ultimas layers.
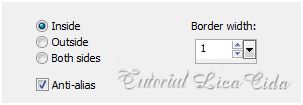
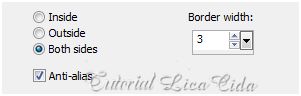
  5-Image / Add Borders / 1 pxl symmetric
marcado.Color= #000000.
6-Image / Add Borders / 15 pxls symmetric
marcado.Color= #ffffff. Selecionar com a Ferramenta Magic Wand ( Default )
. Edit \ Paste Into Selection.
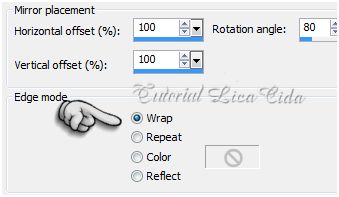
Effects \ Reflection Effects \ Rotating Mirror:
 Effects \ 3D Effects \ Inner Bevel ( mesmos valores
usados acima ) .
Selections \Invert.
Effects \ 3D Effects \ Drop Shadow:
0\ 0\ 80 \ 40,00 . Color=#000000 .
Selections \ Select none.
Image / Add Borders / 1 pxl symmetric
marcado.Color= #000000.
7-Repetir o ítem 6 usando 30 pxls em Add Borders.
8-Image / Add Borders / 45 pxls symmetric
marcado.Color= #ffffff. Selecionar com a Ferramenta Magic Wand
( Default). Edit \ Paste Into Selection.
Effects \ Reflection Effects \ Rotating Mirror:
 Effects \ 3D Effects \ Inner Bevel ( repetir valores
usados acima ) .
Selections \Invert.
Effects \ 3D Effects \ Drop Shadow:
0\ 0\ 80 \ 40,00 . Color=#000000 .
Selections \ Select none. Selecionar com a Ferramenta Magic Wand ( default) algumas partes
lisas desta borda e aplicar:
 Effects \ Art
Media Effects \ Brush Strokes ( mesmos valores usados acima) .
Selections \ Select none.
9-Layer\
Duplicate. Resize 90%.
Effects \ Image Effects
Offset. H= 0 \ V=
20. Na layer original Background . Plugin MuRa's
Meister/Perspective Tiling.
 Selecione com
a Ferramenta Magic Wand ( Default ) a parte superior (
a transparente ) .
Selections\ Modify\ Feather \ 50 . Delete para suavizar o efeito \quatro a cinco vezes. Selections \Select none.
10-New Layer. Arrange \ Send to Botton . Pintar com a cor #1c2d37. Plugin
penta.com \ jeans... 31\9.
Effects \Illumination Effects \ Preset
Illumination\ Lights\ 2bllc.
11- Layer\Duplicate.
Aplicar o Plugin Nik Software\ Color EfexPro 3.0 \
Bi-Color filters . ( nas melhores configurações para as cores usadas
).
 12-Edit Copy no tube 874_
mulher_marapontes\ Paste As New Layer. Posicione .
13-Edit Copy nos tubes pétalas
calguispetales25012012 \ Paste As New Layer. Use a gosto.
14-Image / Add Borders / 1 pxl symmetric
marcado.Color= #000000.
Aplicar a Marca D'agua.
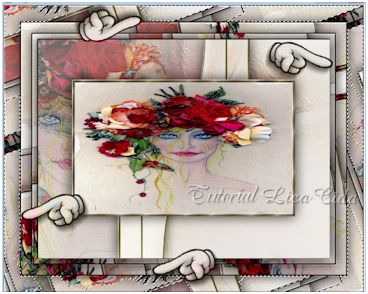
Assine e salve.
Espero que gostem.
Aparecida /
licacida, Setembro de 2013.
Rio de Janeiro_Brasil

|