|
|
|
|
|
Tag "Roses For A
Lady"
'''Dedico carinhosamente este tutorial
a querida amiga Marilene Daius'''
Preset Illumination\ Lights
\ Preset_Lights_lcroses (guardar em sua pasta de Presets My PSP
Files).
Tubes: TalaNat_Ledi-138-22-06-2013 \
TalaNat-Vaze-33-11-23-2013 \ rosa vermelha ( arquivo
net).
Background\ backlcroses
\colorido_rb2\
colorida4-rb.
Mask : 20\20
Marca
D'água. Efeitos do PSP.
Versão usada
PSPX5
Plugins
Plugin FMTT\ Blend
Emboss.
Plugin / Filter Factory Gallery V _Inside
Out .
Plugin / Xero/ Porcelain.
Plugin Nik Software/ Color EfexPro 3.0
Tutorial _Roteiro 1- Abrir o backlcroses de 1024 x 600
pxls, ativar a visibilidade das layers. Layer\ Merge \ Merge
Visible.
2- Layer /Duplicate. Tirar a
visibilidade da ( Cópia) Copy of Merged / Ativar Layer (Original
) Merged.
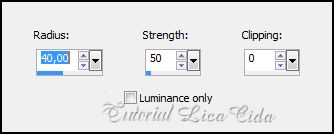
_ Adjust /Blur /Radial
Blur.
 _Layer Duplicate. Image\ Flip. Blend
Mode=Soft Ligh.
_Layer\ Merge\ Merge Down. Emboss3 \
Repete.
_Adjust / Sharpness/ Unsharp
Mask.
 3-Tirar a visibilidade da Layer
Merged ( Original ) . Ativar Copy of Merged. ( Cópia
).
_Adjust / Add/ Remove Noise/ JPEG Artifact Removal. Maximum \ 100. _Plugin FMTT\ Blend
Emboss.
_ Edit copy.
4-Plugin / Filter Factory Gallery V _Inside
Out _255 .
_Image / Resize
80%
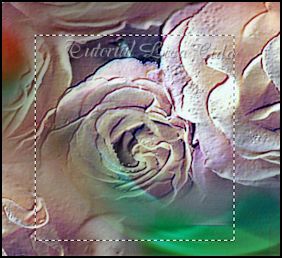
5- Selecionar o retângulo formado.
New Layer.
Edit Paste Into Selection / Select
none.
6-Aplicar a Mask 20/20. Adjust
/ Sharpness / Sharpen More.
_Layer / Merge / Merge
Group.
_Repetir ítem 6.
7-Plugin / Xero/ Porcelain _Default .
_Layer Duplicate.
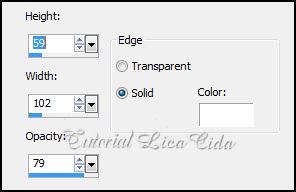
8-Effects / Image Effects / Seamless
Tiling / Default.
_Resize 80%. Emboss 6.
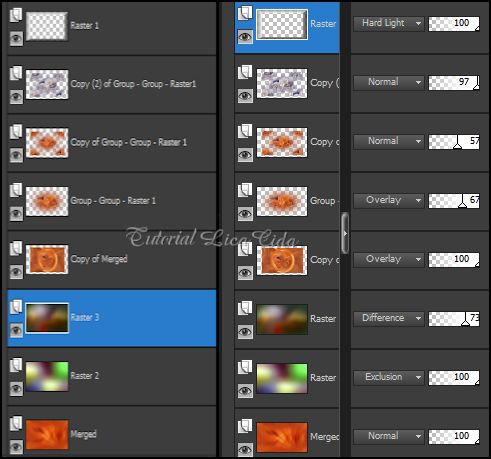
_Layers_
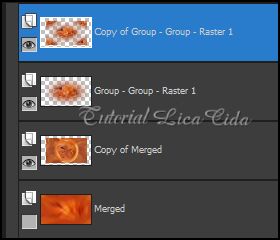 _Trabalhando a profundidade da Tag\ Blends
e Opacitys_ 9-Duplicar a layer. ( Copy of Group - Group
- Raster1 )
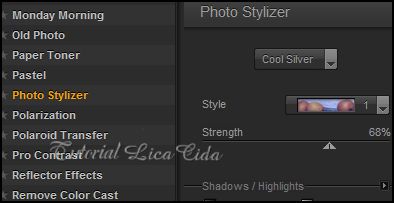
_Plugin Nik Software/ Color EfexPro 3.0
\ Photo Stylizer \ Cool Silver S=1 \ S=68%. ( veja print
abaixo).
 10-New Layer ( Raster1
) \ Abrir a visibilidade da Layer Merged.
_ Effects\ 3D Effects\ Buttonize (
Raster1).
 11-Ativar a layer Merged. New
Layer.
_Select all / Edit Copy no colorido-rb2
\ Edit Paste Into Selection .
12-New
Layer.
_Edit Copy no colorido-rb4 \ Edit Paste
Into Selection .
Select
none.
_ Layers_
 13-Aplicar o efeito ligthlcroses nas layers
onde aparecem rosas ( 4 layers) .
14- Selecionar uma parte do seu agrado .
Edit \ Copy . Edit \ Paste As New Image.
 _Aplicar a Mask 20/20. Adjust
/ Sharpness / Sharpen More.
_Layer / Merge / Merge
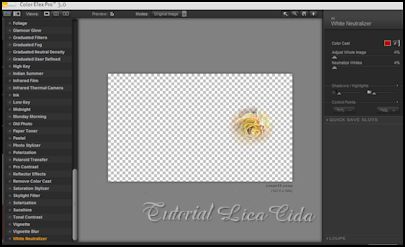
Group. 15- Nas rosinhas, aplicar:
_Plugin Nik Software \ Color EfexPro 3.0\
Whithe Neutralizer \ Color _ cores a gosto. A=4% \
N=4%.
 _Edit Copy nas rosinhas \ Paste As New Layer
. Usar em quantidade \ tamanho e cores a
gosto.
PS_Cobrir a marca deixada pelo uso dos
blends .
16-Layer\ Merge \ Merge Visible. Edit
Copy.
_Image / Add Border / 50 pxl symmetric
marcado. Cor=# ffffff. Selecione .
_Edit Paste Into Selection .
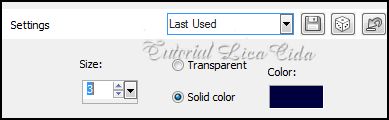
17-Effects\ 3D Effects\ Chisel _
Color=#000040.
 _Plugin Graphics Plus\ Cross Shadow _
Default.
_Select
none.
18-Edit
Copy nos tubes escolhidos / Paste As New Layer .
19-Image / Add Border / 1 pxl symmetric
marcado.Cor=# 000000.
Aplicar a Marca
D'agua.
Assine e salve.
Espero que
gostem. Aparecida / Licacida, Julho de 2013.
Rio de Janeiro_Brasil   |