|
|
|
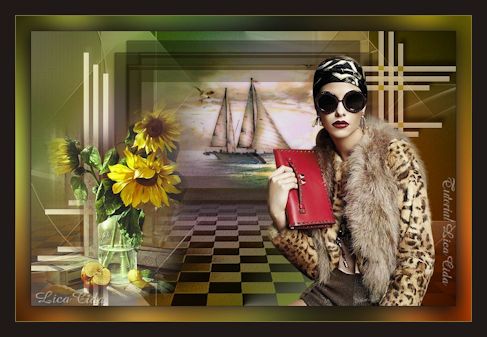
Tag "
Girassóis"
**Dedico a querida amiga Suely , montou\ abriu
meu blog . Obrigada
Su.
Tubes:chrismist_martybellhomewardbound\Misted_Sunflower_Bouquet_RM
\ SvB (763) Beauty \( detalhes )
calguisgoossens24022012.
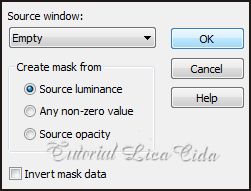
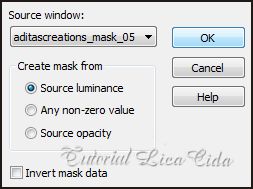
Mask :
Empty\ aditascreations_mask_05
Enfeite
camerontags
Back:
BACK9-RB
Marca
D'água. Efeitos
do PSP.
Versão
usada PSPX5
Plugin
Plugin
Mura's Seamless \ Mirror Diagonal.
Plugin
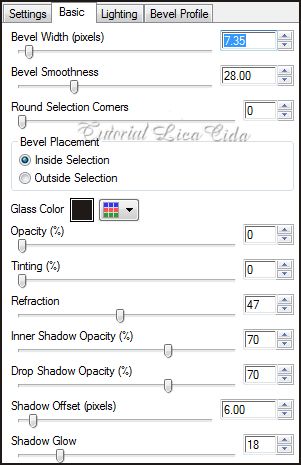
Alien Skin Eye Candy 5 : Impact \ Glass.
Plugin VanDerLee\ UnPlugged-X.
Plugin
Graphics Pluss\ Cross Shadow.
Tutorial
_Roteiro
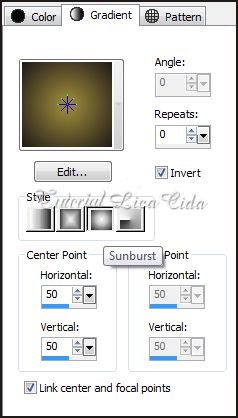
1- Abrir
uma nova imagem transparente 850x550. Pintar com o gradiente formado pelas
cores: #1f1918 e #a2903c .
Configurar Sunburst: / Repeats 0. Invert Marcado. H=50\
V=50.
2-Layers\ New Raster Layer. Pintar com o gradiente formado no ítem 1 , invert desmarcado. 3-- Layers\ New Mask Layer\ From Image . Invert mask data desmarcado.
4-Adjust \ Add\ Remove Noise\ JPEG Artifact Removal. Maximum \ 89. Emboss3. Layer \ Merge \ Merge Group. 5-Blend Mode= Multiply. Layer Duplicate. Layer\ Merge\ Merge Visible. 6-Layers\ New Raster Layer. Pintar com a cor clara #a2903c. 7-Layers\ New Mask Layer\ From Image . Invert mask data desmarcado.
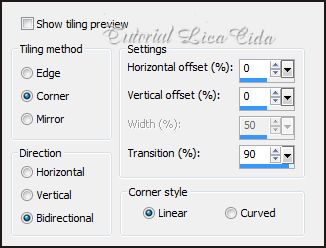
8-Emboss3. Layer / Merge / Merge Group. 9-Duplica a layer. Effects/ Image Effects/ Seamless Tiling:
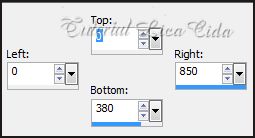
10-Layer\ Merge \ Merge Dow. Ativar a ferramenta Selection \Rectangle . Ou tecla S. Em Custom selection configurar .
11- Layers\ New Raster Layer. Pintar com o gradiente formado no ítem 1. Selections \ Select none. 12- Plugin Mura's Seamless \ Mirror Diagonal 216. Resize 120 % ( duas vezes ). 13-Plugin Alien Skin Eye Candy 5 : Impact \ Glass. Color=#1f1918.
14-Effects \ Image Effects \Offset: H=
0 V= 82. Custom e Transparent marcados. Com a
Ferramenta Magic Wand ((Tolerance 20)) selecionar o
retângulo.
15-Selections\ Modify\ Contract\ 30 .
Delete . Selections \ Select none.
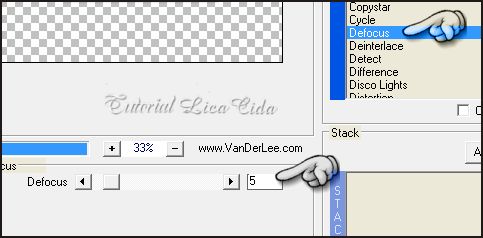
16-Plugin VanDerLee\
UnPlugged-X.
 17-Edit Copy no
tube chrismist_martybellhomewardbound\ Paste As New Layer. Layer\
Arrange \ Move Down. Posicione.
18-Ativar a Raster1. Edit
Copy no enfeite camerontags ( usei a cópia ) \ Paste As New Layer.
19--Effects \ Image Effects \Offset:
H= (menos) -347 \ V= ( menos) -.30. Custom e
Transparent marcados.
20-Layer\ Duplicate. Image \Mirror.
Image \Flip.
21-New Layer. Arrange \ Send to
Botton . Select all \ Edit Copy no BACK9-RB\ Edit Paste
Into Selection . Selections \ Select none.
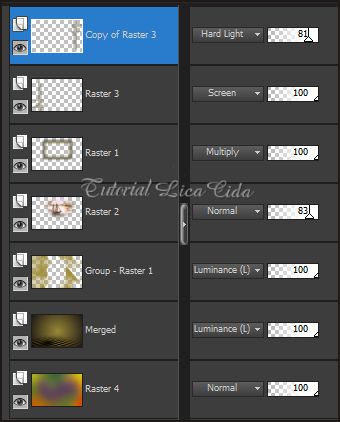
Layers \ Blends \ Opacits
 22-Edit Copy nos tubes escolhidos
\\ Misted_Sunflower_Bouquet_RM e SvB (763)
Beauty // Paste As New Layer. Posicione.
23-Image \Add
Borders \ 1pxl symmetric marcado.Color=#1f1918 ( cor
escura).
24-Image \ Add Borders \ 30pxls
symmetric marcado.Color=#ffffff.
25-Selecione essa borda com a Ferramenta Magic Wand.
Edit Copy no BACK9-RB\ Edit Paste Into
Selection
.
26-Adjust\ Blur\
Gaussian Blur 49.
Selections
\Invert.
Effects \ 3D effects \ Drop
Shadow: 0\0\80\50,00 Color=000000 ( aplicar duas
vezes).
27-Selections \Invert. Plugin Graphics Pluss\
Cross Shadow . Default .Selections \ Select
none.
28-Image \ Add Borders \ 1pxl
symmetric marcado.Color=#a2903c ( cor
clara).
29-Image \ Add Borders \ 30pxls
symmetric marcado.Color=#1f1918 ( cor
escura).
30-Select all \Selections\ Modify\ Contract\
30 . Effects \ 3D effects \ Drop
Shadow: 0\0\80\50,00 Color=000000 (
aplicar duas vezes). Selections \ Select
none. Aplicar a Marca
D'agua.
Assine e salve em
JPG.
Espero que gostem
.
Rio de
Janeiro , Setembro de 2013.
Aparecida/Licacida
Brasil.
  |