|
Femme Urbaine
MATERIAL AQUI
Seleção: femmeurbaine_ by lc. Salvar a seleção na pasta Selection do
PSP.
Tube Callitubes-3154mulheres\ 121PaisagemByPqnaAlice
Callitubes-277flores \Callitubes-314flores
Masks: !b\ !!!!.mask.ket-fadesuave.
Decor_By lc : decocentral-lc \decofinal-lc
Obrigada!!!.
(Agradeço)
Marca D'água .
Efeitos do PSP.
PLUGINS
Plugin Mura's Seamless \ Emboss at Alpha
Carolaine & Sensibility \ CS-LDots
Plugin VM Stylize \Motion Trail Wild
Plugin Nick Software
Tutorial
1 - Abra o material no PSP, duplique e feche o original.
Escolher duas cores para trabalhar.
Foreground #2e1e10.
Background #c19c5d.
2-Abra uma transparencia de 1024 x 600. Pintar com a cor do
foreground #2e1e10.
3-Layers \ New Raster Layer.
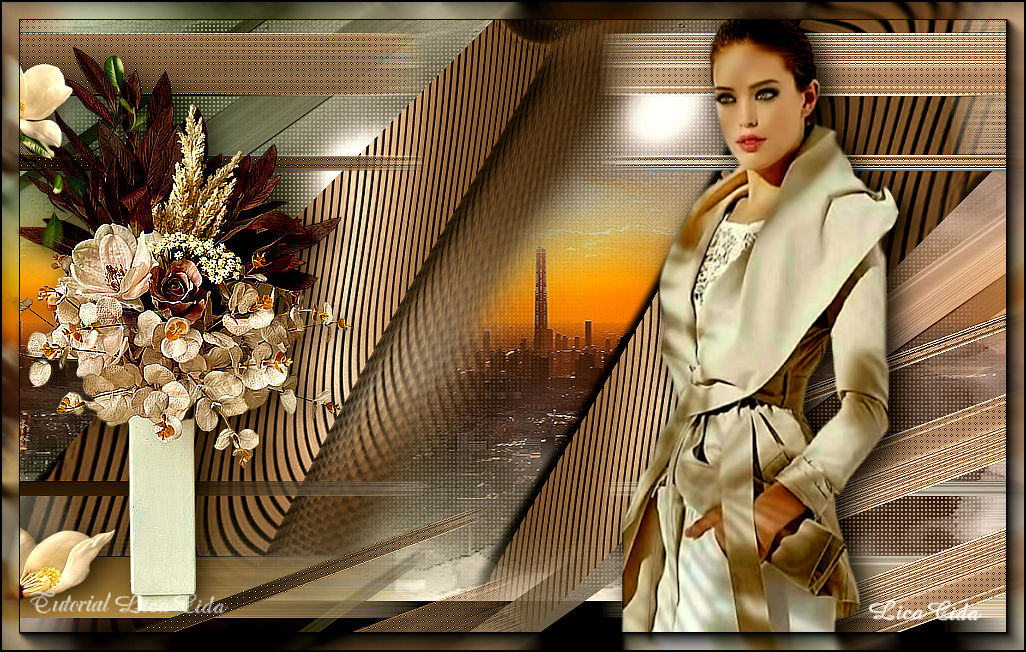
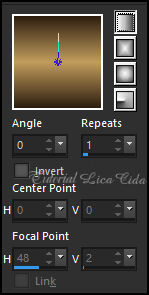
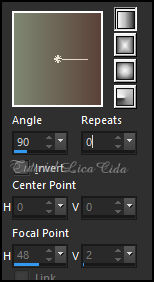
Pintar com o gradiente Radial, Angle 250, Repeats 15. CP=0\50,
formado pelas cores em uso.
Adjust \ Blur \ Gaussian Blur... R=22,00
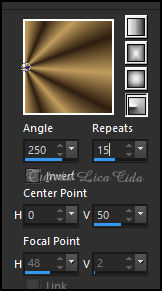
4-Adjust \ Add/Remove \ Add Noise.
Layers Duplicate\ Fechar a Layer original (
raster2).
Vamos trabalhar na cópia.
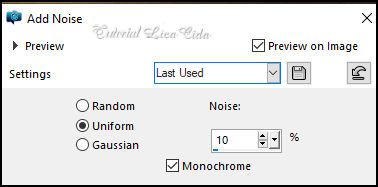
5-Layers \ New Mask Layer \ From Image: !b
Effects\ Edge Effects\ Enhance. Layers \ Merge \
Merge Group.
Plugin Mura's Seamless \ Emboss at Alpha: Default.
6- Image\ Canvas Size 1024x 650. Bottom 50.
Effects \ 3D Effects \ Drop Shadow: 1, 1, 100, 1, color background
#c19c5d.
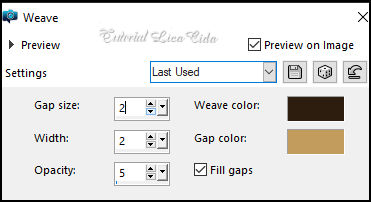
7-Effects\ Texture Effects\ Weave ( cores em uso).
Layers \ New Raster Layer.
8- Selections \ Load/Save Selections \ Load Selection From Disk:
femmeurbaine_ by lc.
9-Pintar com o gradiente Linear, Angle 0, Repeats 1. Formado pelas
cores em uso.
Selections \ Select None.
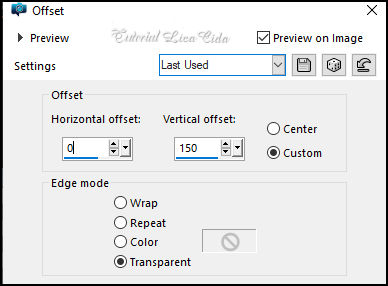
10- Effects\ Image Effects\Offset.
Effects \ 3D Effects \ Drop Shadow: 1, 1, 100, 1,
color # 000000.
Layers Duplicate\Image Mirror Horizontal.
Layers\ Merge\ Merge Down.
11-Plugin VM Stylize \Motion Trail Wild _Default( O efeito
hospeda-se em outros plugins)
Layers Duplicate\Image Mirror Vertical.
12-Raster3.
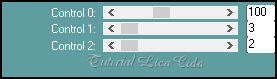
Effects \ Plugins \ Carolaine & Sensibility \ CS-LDots.
Effects\ Edge Effects\ Enhance.
13-Copy of raster3 _Layers Duplicate
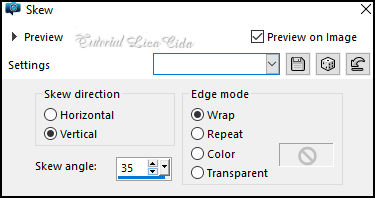
Effects\ Geometric Effects\ Skew.
Effects \ 3D Effects \ Drop Shadow: 1, 1, 100, 1,
color # 000000.
Estão assim as layers
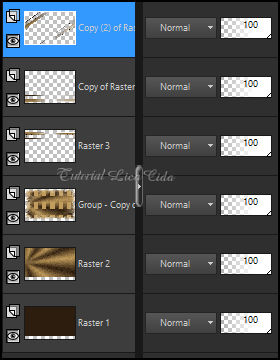
14-Layers \ New Raster Layer ( layer do topo).
Escolha duas cores contrastantes para formar um back. Usei para o
foreground #7e8772 , para o background #5b423a.
Formar um gradiente Linear, Angle 90, Repeats 0. Pintar essa layer.
Layers \ Properties_ Blend Mode Color ( L ).
Obs _Fique a vontade para mudar os Blends de acordo com as cores que
estiver usando.
15- Abrir e ativar a Raster2 .
Layers Duplicate. Plugin VM Stylize \Motion Trail Wild _Default.
16-Effects\ Geometric Effects\ Skew.
(print ítem 13)
17-Plugin Nick Software\ Color EfexPro 3.0\Bi-Color Filters . Color
Set _Moss2_ Default.
Layers \ Properties_ Blend Mode Overley.
18- Layer do topo.
Layers \ New Raster Layer. Effects\ Artistic Effects \ Balls and
Bubbles.
Shape
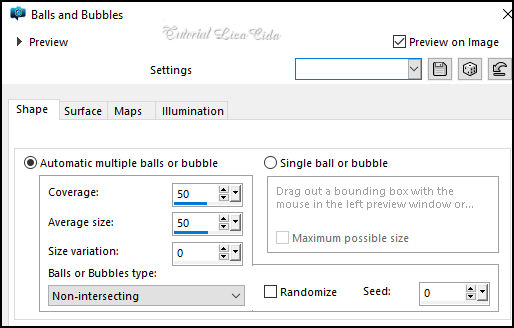
Layers \ Properties_ Blend Mode Screen.
19-Edit \ Copy no Tube 121PaisagemByPqnaAlice.
Edit \ Paste a New Layer.
20- Effects \ Image Effects \ Seamless Tiling. Side by side.
Usar a ferramente pick para centralizar sua paisagem( se necessario)
21-Edit \ Copy no decocentral-lc
Edit \ Paste a New Layer.
obs_Raster3 e sua cópia : Layers \Arrange\Bring to Top .
Usar a !!!!.mask.ket-fadesuave, onde indico para suavizar o efeito.
Layers \ Merge \ Merge Group.
22-Edit \ Copy no decofinal-lc
Edit \ Paste a New Layer.
23-Edit \ Copy no Callitubes-314flores.
Edit \ Paste a New Layer. Posicionar a gosto. Uso opcional.
24-Edit \ Copy Callitubes-277flores .
Edit \ Paste a New Layer. Posicionar.
Aplique Drop Shadow como desejar.
25-Edit \ Copy Callitubes-3154mulheres
Edit \ Paste a New Layer. Posicionar.
Aplique Drop Shadow como desejar
26-Layers \ Merge \ Merge Visibile.
27-Effects \ Plugin \ AAA Filters \ Custom \ Landscape: Default.
28 - Effects \ Plugin \ AAA Frames \Foto Frame. Width 18, demais
valores Default
Aplicar a marca d'água.
Assine e salve.
File \ Export \ JPEG Optimizer.
Aparecida, julho de 2023,

:::...VOLTAR...::: |