"color Cubes"
Material Aqui
Tubes : SuizaBella_Ref_AG-002703\SuizaBella_Ref_AG-001939-11.
Deco:
decoarquivo_net\ decocolorcubes_1lc\decocolorcubes_2lc\
decocentro_lc\decolateral_lc.
Mask:NarahsMasks_1663.
(Agradeço)
Plugins
Unlimited 2 \Kang 2
Unlimited 2\ Buttons&Frames
Plugin
Flaming Pear
Plugin
Carolaine and Sensibility
Tutorial
Configurar:
Foreground
#202523\ Background #605c5d.
1-Abrir uma nova
imagem transparente de 1000 x 700.
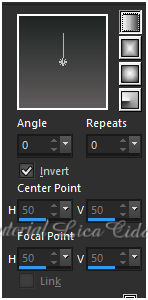
Preencher com o
gradiente Linear , Angle 0 \ Repeats 0\ Invert marcado.Formado pelas
cores acima.
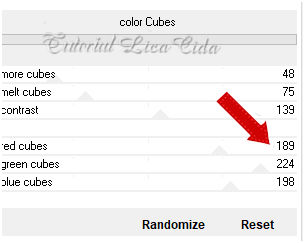
2-Unlimited 2 \Kang 2_ color Cubes.
As cores aparecerão de acordo com as usadas \
modifique a gosto ( aqui diminui um pouco o tom)
3-Effects \ Image Effects \ Seamless Tiling:
Side by side.
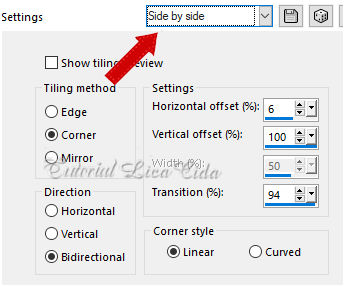
_Adjust \ Blur \ Motion Blur: 300,00 \100
(repetir) .
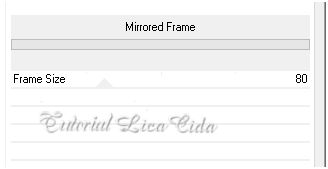
4- Unlimited 2\
Buttons&Frames_Mirrored Frame.
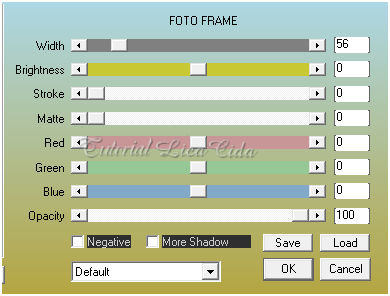
5-Plugin AAAFrames_ Foto Frame.
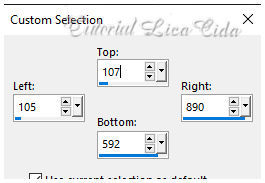
6- Seleção Personalizada ( tecleS) .
_Adjust\ Blur \Gaussian Blur _R: 90,00.
_Effects\3D Effects\ Drop Shadow 0\ 0\ 80\
40,00 . Color=#000000.
_Invert \
Promote Selection to Layer .
Selections \
Select None.
7-Effects \Geometric Effects\ Skew. 20
\Vertical\ Transparent.
_Layers Duplicate\ Image Mirror
Horizontal.
Layers\ Merge Down.
8-Effects\Distortion Effects\ Polar
Coordinates_ Polar to Rectangular.
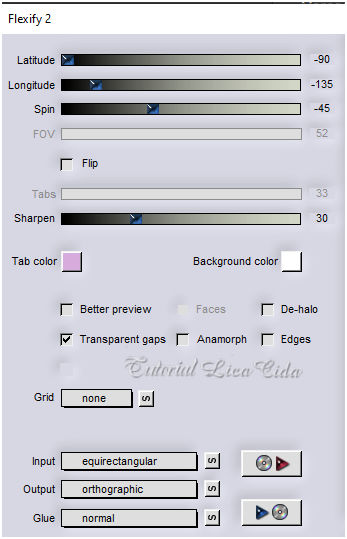
9-Plugin Flaming Pear_ Flexify 2.
10-New Layer.
_Preencher com a color background #605c5d.
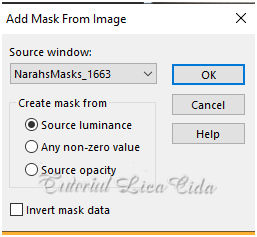
Aplicar a NarahsMasks_1663.
Effects\ Edge Effects\ Enhance.
Layer\Merge \Group.
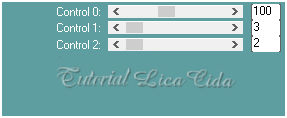
*Plugin \ MuRa's
Seamless \ Emboss at Alpha _ DEFAULT.
11-Plugin Flaming
Pear_ Flexify 2.(print ítem 9).
12- Repetir na
mesma layer o Plugin Flaming Pear_ Flexify 2 .(print ítem 9).
13- Plugin Carolaine and Sensibility \
CS-LDots.
Effects\ Edge Effects\
Enhance.
_Blend Mode Screen \ Enhance.
14-Raster1. New layer .
_Selections \Select All .Edit Copy no decoarquivo_net \
Edit Paste Into Selection .
Selections\ Select none.
15-Edit Copy no decocolorcubes_1lc \Paste As
New Layer.
_Blend Mode Screen . Usar a ferramenta Pick
para acertar a altura ( veja modelo )
16-Edit Copy no decocolorcubes_2lc \Paste
As New Layer.
_Blend Mode Screen .
17-Edit Copy no decocentro_lc\Paste As
New Layer.
Layers\ Arrange\ Bring to Top.
18-Edit Copy no
decolateral_lc\Paste As New Layer.
19-Effects\ Image Effects\ Offset.
-436
\ 0 ( custom e transparentes marcados).
20-Effects
\Reflection Effects \ Rotating Mirror .
0\180 _Reflect.
*Usar o shadow nos efeitos que desejar:
_Effects\3D Effects\ Drop Shadow 0\ 0\ 80\
40,00 . Color=#000000.
Layers\Merge\ Merge Visible.
21-Adjust\Brightness and Contrast_ 8\ 10.
22-Image Canvas Size\1000 x 800_Bottom100.
Layers Duplicate.
23- Plugin MuRa's Meister \ Perspective Tiling.
Height 15 ( demais valores iguais).
24-Effects \Reflection Effects \ Rotating Mirror .
0\180 _Reflect.
Emboss3.
*Com a Ferramenta Magic Wand \ Feather 60 \ Clique na
parte transparente . Deletar ( duas
vezes _ para suavizar o efeito. ).
Selections \ Select none.
Borders
_Image \ Add Borders \ 1 pxl color
=Foreground #202523.
_Image \ Add Borders \ 1 pxl color
=Background #605c5d.
_Selections \ Select All.
_Image \ Add Borders \ 45 pxls
color=Foreground #202523.
_Effects\3D Effects\ Drop Shadow 0\ 0\ 80\ 40,00 . Color=#000000.
_Image \ Add
Borders \ 1 pxl color =Background #605c5d.
_Selections \ Select All.
_Effects\3D Effects\ Drop Shadow 0\
0\ 80\ 40,00 . Color=#000000.
_Image \ Add Borders \ 1 pxl color =Background #605c5d.
_Image \ Add Borders \ 45 pxls color=Foreground #202523.
_Effects\3D Effects\ Drop Shadow 0\
0\ 80\ 40,00 . Color=#000000.
Selections \Select none.
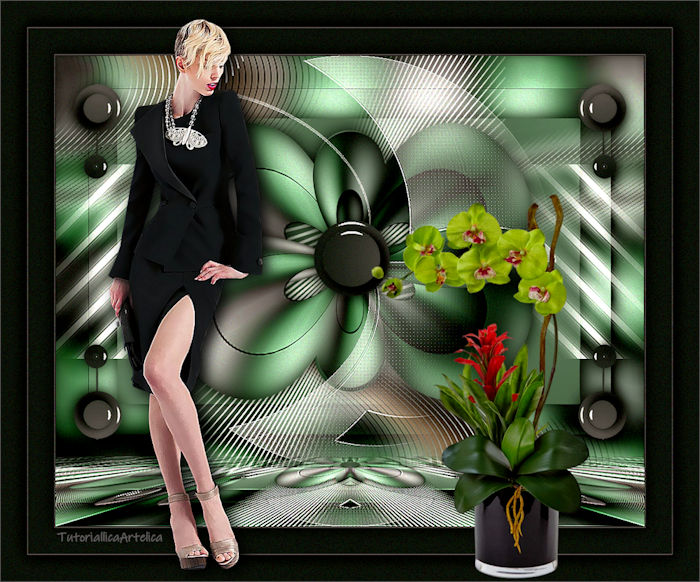
25-Edit Copy no SuizaBella_Ref_AG-002703\ Paste As New Layer.
Posicione.
26-Edit Copy no SuizaBella_Ref_AG-001939-11\ Paste As New Layer.
Posicione
27-AAA Filters\ Custom_Landscape ( default)
AAA Filters\ Custom_Grain( default )
(OPCIONAL)
_Image \ Add Borders \ 1
pxl color =Background #605c5d.
Resize _Width 1000 pxls.
Aplicar a Marca D'agua.
Assine e salve.
Aparecida \ licacida , outubro
de 2021.
Espero
que gostem.
Obrigada!