|
Preset harmony _mp \ do Eye Candy 5/Impact/Glass.
(Dar duplo clic sobre o preset para importar-lo ao
Plugin).
Seleção: sellilas_lc.PspSelection.
( Salve em sua pasta de seleções My PSP Files ) .
Tubes
: KaD_Woman_134 \AS Tube deco2 \Bloem 11 Pink (1)
Deco:deco_lilás_lc
\ deco_lilás_1lc \ deco_lilás_2lc.
Mask :
Mask_GB_119a\ Narah_mask_Abstract204.
(Agradeço)
Marca D'água .
Efeitos do PSP.
Versão usada PSPX9.
Plugins
Plugin Alien Skin Eye Candy 5 : Impact.
Plugin FMTT
Plugin Nick Software
Tutorial _Roteiro
Configurar:
#4f3b3d( usar no foreground) #cfbfc1 ( usar no background )
.
1- Abrir nova imagem transparente de 1000 x 700.
_Preencher com o gradiente
formado pelas cores acima. Configurar Linear . Angle 0 \
Repeats 1. Invert desmarcado.
2-New
Layer.
Preencher
com a color #ffffff.
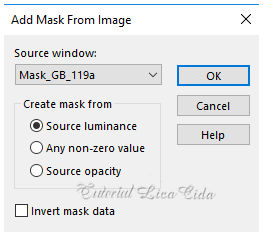
_Aplicar a Mask _GB_119a.
Effects\ Edge Effects\
Enhance.
Layer\Merge \Group.
*Plugin Alien Skin Eye
Candy 5 : Impact\ Perspective Shadow_Blurry.
3-Selections \Load \ Save Selection \Load Selection
From Disk \ Load \sellilas.PspSelection.
Delete
4-Plugin Alien Skin Eye Candy
5 : Impact\ Glass _harmony.
Selections \Select none.
5-Edit Copy no
deco_lilás_lc\ Paste As New Layer.
6-Effects\ Image Effects\ Offset.
310\ ( menos ) - 88 ( custom e transparentes marcados).
*Plugin Alien Skin Eye Candy 5 : Impact\ Perspective
Shadow_Blurry.
7-New
Layer.
Preencher
com a color #1e0a0d (escolha uma cor mais escura que a usada no
foreground)
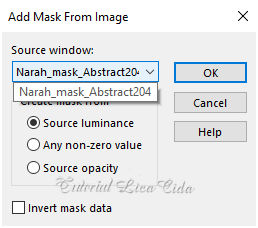
_Aplicar a
Narah_ mask _Abstract204.
Effects\ Edge Effects\ Enhance.
Layer\Merge \Group.
*Plugin Alien Skin Eye
Candy 5 : Impact\ Perspective Shadow_Blurry.
8-Edit Copy no deco_lilás_1lc\ Paste As
New Layer.
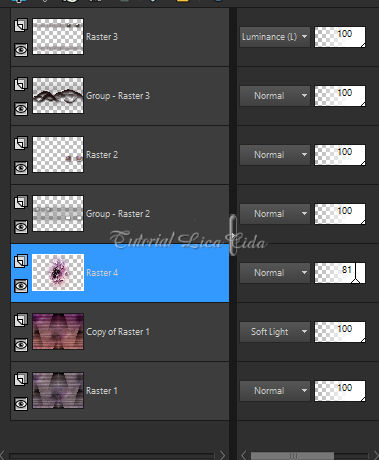
Blend Mode Luminance (L).
9-Edit Copy no
deco_lilás_2lc\ Paste As New Layer.
10-Effects\ Image Effects\ Offset.
288 \ 236 ( custom e
transparentes marcados).
*Plugin Alien
Skin Eye Candy 5 : Impact\ Perspective
Shadow_Blurry.
Layers\ Merge
\Down.
11- Ativar a raster 1.
_Selections \Select All .Edit Copy no Bloem 11 Pink
(1) \ Edit Paste Into Selection .
Selections\ Select
none.
12-Effects\ Image Effects\ Seamless
Tiling:Default_ Transition(%): 100.
_Adjust\ Blur\ Gaussian Blur. R:22,00´
13-Adjust\ Add _Remove Noise\ Add
Noise... 8 % \ Uniform\ Mono marcado.
_Plugin
FMTT\ Blend Emboss.
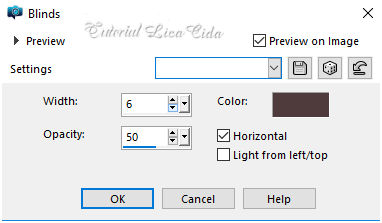
14-Effects\ Texture Effects\ Blinds.
Color=
#1e0a0d.
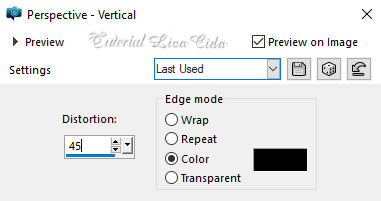
15 - Effects\ Geometric Effects\ Perspective -Vertical.
16-Effects\ Image Effects\
Seamless Tiling: Default_Transition(%): 100.
Layers Duplicate
17-Plugin Nick Software\ Color
EfexPro 3.0\Bi-Color Filters . Color Set _Violet\Pink1_ Default.
Blend Mode Soft Light
18-Edit Copy no Tube Bloem 11 Pink (1)\ Paste As
New Layer.
_Plugin \ MuRa'Seamless\ Emboss
at Alpha_Default.
_Repetir ´ítem 18 ( opcional )
Layers\ Blends\ Opacitys
19_Borders
Image \ Add Borders \ 1 pxl color
= #1e0a0d.
Selections \ Select All.
Image \
Add Borders \ 45 pxl color =#ffffff
_Effects\3D Effects\ Drop
Shadow 0\ 0\ 80\ 40,00 . Color=#000000.
Selections \Select none.
Image \ Add Borders \ 1 pxl color = #1e0a0d.
Image \ Add Borders \ 25 pxl
color =#ffffff
20- Edit Copy no KaD_Woman_134\
Paste As New Layer.
Posicione
21- Edit Copy no AS Tube deco2\
Paste As New Layer.
Resize e posicionamento.
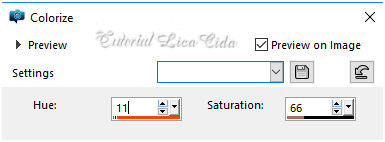
_Colorize a gosto.
Resize _Width 1000 pxls.
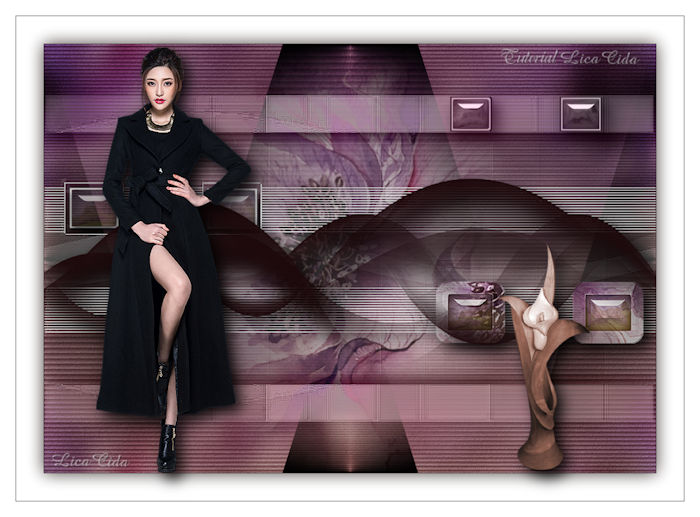
Aplicar a Marca D'agua.
Assine e salve.
Aparecida \ licacida , março
de 2021.
Espero
que gostem.
Obrigada!
|