
|
|
|
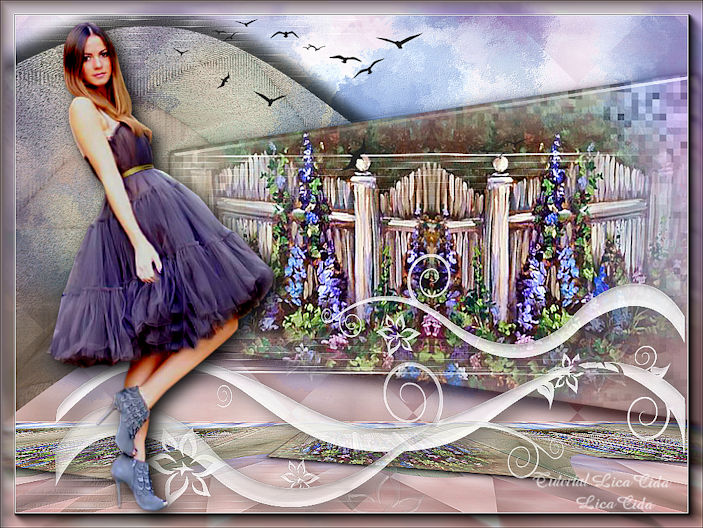
"Simple Inspiration"
Background: JHanna_392
background
Tubes
: 5465-luzcristina \ 5135-luzcristina \ Nubes en capa \ aves-arquivonet
.
Elemento :elementoinspirationmp.
Masks: smArt_Mask_35 p\ deco.
(Agradeço)
Marca
D'água . Efeitos do PSP.
Versão
usada PSPX9
Plugins
Plugin
Mehdi
FFG\
G
Plugin
Richard Rosenman
Plugin Eye Candy 5
Impact
Plugin MuRa's Meister.
Tutorial _Roteiro
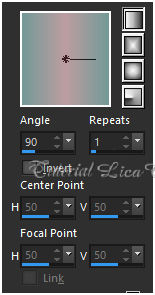
1- Abrir nova imagem transparente de 1000 x
700 pxls. Preencher com o
gradiente formado pelas cores #739996 ( usar no
foreground ) e #bd9da1 ( usar no
background) Configurar Linear . Angle 90 \Repeats 1.
Invert desmarcado.
 2-Layers \ New
layer.
Selections \Select All
.Edit Copy no grafico JHanna_392 background \ Edit Paste
Into Selection .
Selections\ Select
none.
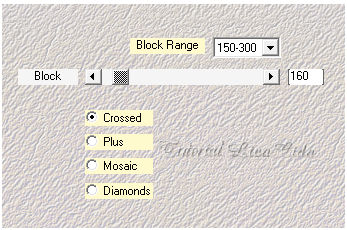
3- Plugin Mehdi \
Sorting Tiles.
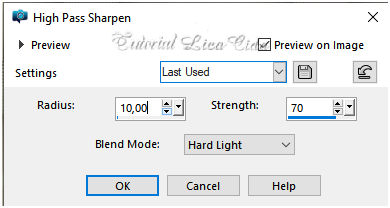
 4-Ajuste \ Sharpness \ High
Pass Sharpen.
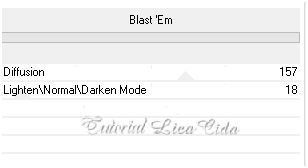
 5- FFG\ G_Blast
'Em.
_ Resize 80%
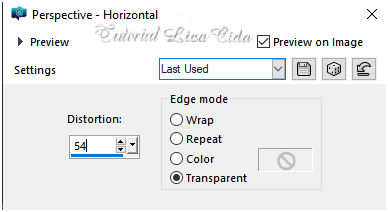
6-Effects \Geometric Effects\
Perspective
-Horizontal.
 Objects\ Align\
Left.
Layers Duplicate \ Image Mirror
Horizontal.
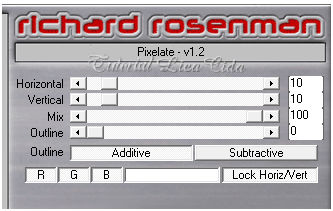
7-Plugin Richard
Rosenman\Pixelate.
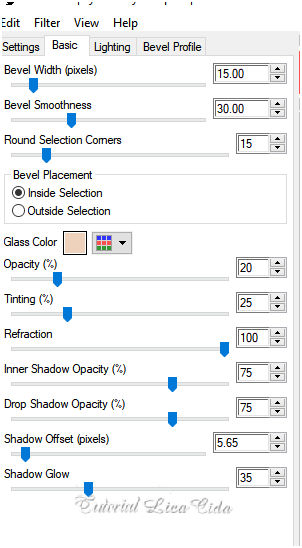
 8-Plugin Eye Candy 5 Impact \ Glass .
Basic ( #eed2bc
)
 _Selections \Select All . Float\ Defloat.
9-Layers \ New
layer.
Edit
Copy no 5135-luzcristina \ Edit Paste Into Selection .
Selections\ Select
none.
_Ajuste \ Sharpness \ High
Pass
Sharpen.
( print ítem 4
)
_Adjust\ Sharpness\ Sharpen
More.
10-Copy of
Raster2.
*Plugin Alien Skin Eye Candy 5 : Impact\
Perspective Shadow_Blurry.
11- Raster2
.
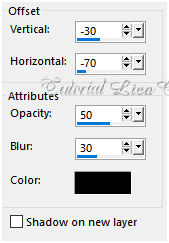
Effects\3D Effects\
Drop Shadow.
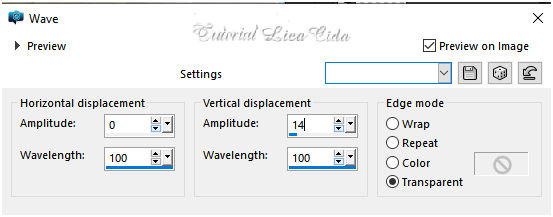
12-Effects\ Distortion
Effects\
Wave.
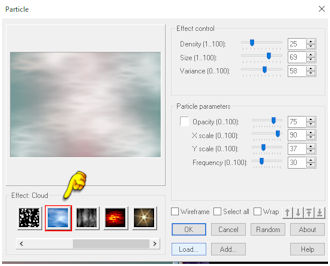
 13-Raster1.
Plugin Ulead Effects\
Particle_Default.
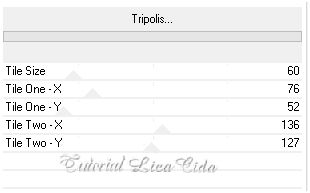
 14- Plugin VM Instant
Art\Tipolis...
 _Effects
\Reflection Effects \ Rotating
Mirror .
0\0_Reflect.
_ Emboss3
15-Image\ Canvas Size
1000 x 750 _Bottom 50.
Duplicar a
layer.
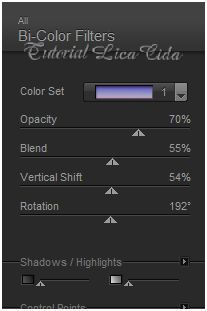
16-Plugin Nick Software\ Color EfexPro 3.0\Bi-Color
Filters.
Color Set _ Violet \Pink1
.
Blend
Mode=Multiply
 17-Edit Copy
no Nubes en capa ( raster1 )\ Paste As New
Layer.
Objects\ Align\
Top.
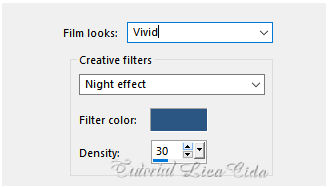
18-Effects\ Photo Effects\
Film and
Filters...
 19-
Layer superior \ raster 3. Edit \ Copy Special \ Copy
Merged . Edit Paste a New Layer .
(a layer descerá um pouco, deixar como
está)
20- Plugin MuRa's Meister \
Perspective Tiling . Height 20.
Layers\ Arrange Move Down ( aplicar quatro
vezes )\
_Adjust\ Sharpness\ Sharpen
More. Layers\ Blends\
Opacitys. 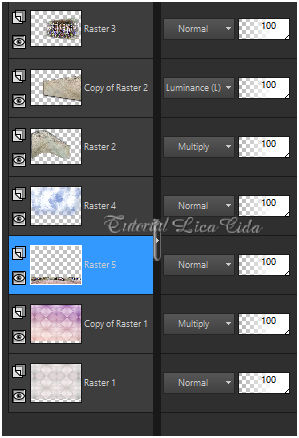 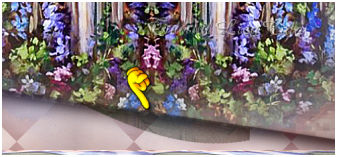 *Apagar as sobras do efeito
_raster2. *Apagar as sobras do efeito
_raster2.21-
Layer
superior_Raster3.
Edit
Copy no elementoinspiration
\Paste As New
Layer.
22-Edit Copy no aves-arquivonet
\Paste As New
Layer.
Posicione a
gosto.
23-Edit Copy no deco feito com a Mask _raster1
(smArt_Mask_35) \Paste As New
Layer.
Usar a gosto.
Opcional.
24-Image \ Add
Borders \ 1 pxl color =
foreground .
_Image \ Add
Borders \ 1pxl color =
background.
25-Plugin AAAFrames \ Foto
Frame.
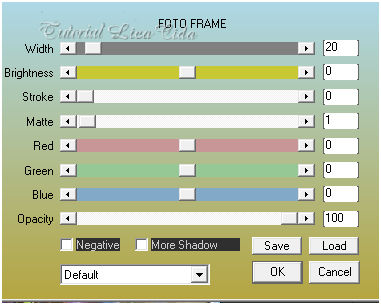 _Plugin
AAA Filters\ Custom_Sharp ( Default).
Opcional.
26-Edit Copy no 5465-luzcristina \Paste As
New
Layer.
Posicione
. Aplicar
a Marca D'agua.
Assine
e salve. Aparecida \ licacida , novembro de
2020.
26
Espero que gostem.
Obrigada!
  |