
|
|
|
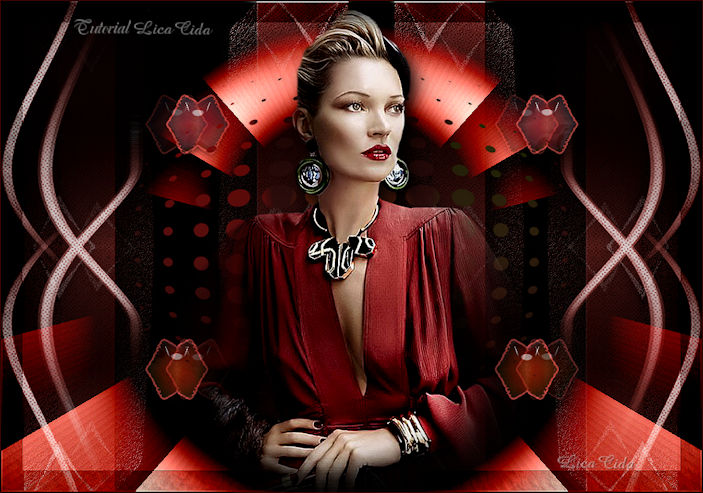
"Rose More" Nossa querida Poeta!
Preset harmony _mp \ do Eye
Candy 5/Impact/Glass.
(Dar duplo clic sobre o preset para
importar-lo ao Plugin).
Script: circulo1_mp ( Guardar em sua pasta de
Scripts Restricted )
_caso
não rode seu script, segue anexado o efeito. Preset
Illumination\Lights_lc10_mp( Guardar em sua pasta de Presets My PSP
Files).
Tubes
: 5077-luzristina
Mask: Narah_mask_0597.
Deco:decolc \ script ( efeito)
(Agradeço)
Marca
D'água . Efeitos do PSP.
Versão usada PSPX8.
Plugins
Plugin Italian Editors Generatore.
Plugin Simple.
Plugin
Alien Skin Eye Candy 5.
Tutorial _Roteiro
1-Abrir nova imagem transparente de 1000 x 700.
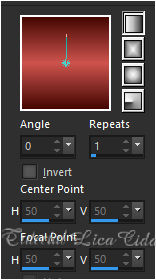
Preencher com o
gradiente formado pelas cores #450803( usar no foreground
) e #cd534d usar no background) Configurar Linear
. Angle 0 \ Repeats 1. Invert desmarcado.
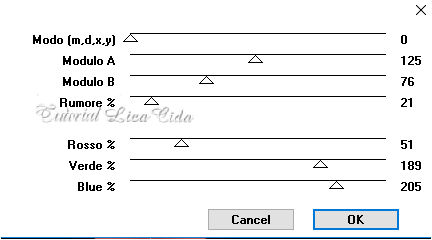
 2-Plugin Italian Editors Generatore\ Pattern
Piramide.
 Layers Duplicate.
_Tirar a visibilidade da layer raster1.
3-Plugin Simple \ Top Left Mirror.
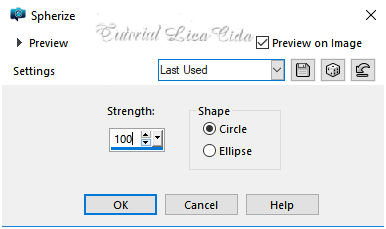
4- Effects\ Geometric Effects\ Spherize.
 5- Plugin Simple \ Center Tile.
_ Com a Ferramenta Magic Wand _Default, selecione como
modelo.
 DELETE. INVERT.
6-Plugin Alien Skin Eye Candy 5: Impact\
Glass... Setting\ use Setting\ harmony .
7-Selections \Modify \Select Selection Borders...
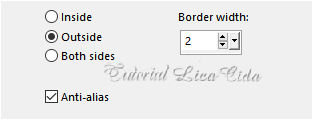 _New
Layers.
Preencher com a cor usada no background (#cd534d
).
Selections\ Select none.
_Layers\Merge\ Merge Down.
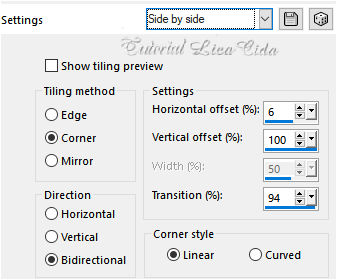
8-Effects \ Image Effects \
Seamless Tiling _Side by
side.
 _Voltar a visibilidade da layer
raster1.
9-Edit Copy no decolc\ Paste As New
Layer.
Layers Duplicate ( realçar o efeito )
_Layers\Merge\ Merge Down.
Blend Mode=Screen.
( raster2 )
10-New Layers.
Preencher com o gradiente formado no ítem 1.
Aplicar a Narah_mask_0597.
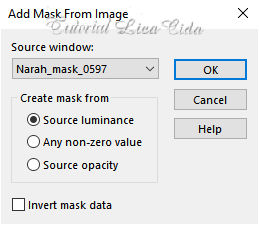 Layers\ Merge Group.
Resize 80%.
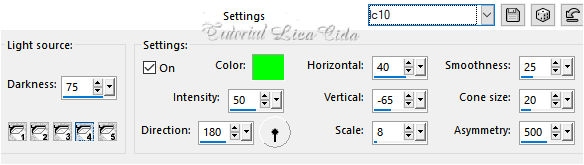
11-Effects\ Illumination Effects\ Preset
Illumination\ Lights\ lc10.
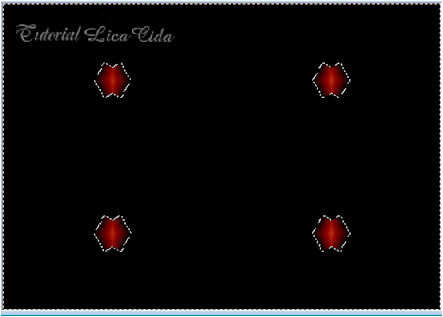
 12-New Layers.
Correr o Script
circulo1.
 *Procurar o Script
circulo1.
*Clique para corrê-lo em Run Selected
Script.
( caso não rode seu script, segue
anexado o efeito).
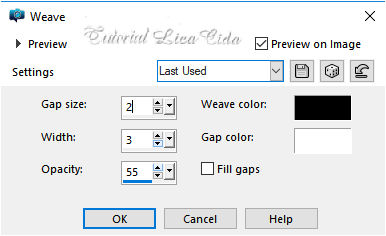
13-Effects\ Texture Effects\
Wave.
 14-Image\ Free
Rotate.
 _Objects\ Align\
Left. Layers Duplicate. Image\ Mirror
Horizontal.
_Layers\Merge\ Merge Down.
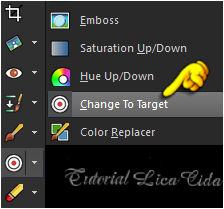
15-Usar a Ferramenta Change To Target, Size100, dar
um colorize com o gradiente formado no
ítem1.
Blende Mode=Screen. Opacity
entre
80%\85%.
 Layers\ Blends\ Opacitys
( use a gosto)
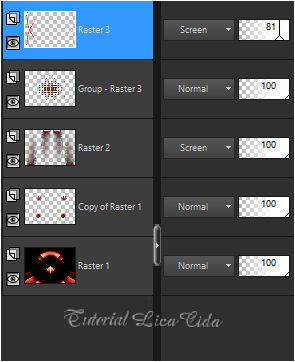 *Image \ Add Borders \ 1 pxl color
foreground
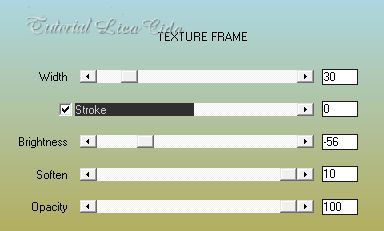
#450803. 16-Plugin AAA Frames \ Texture Frame.
 17-Edit Copy no tube 5077-luzristina \
Paste As New Layer.
Opcional:
Plugin Alien Skin Eye Candy 5 : Impact\ Perspective
Shadow_Blurry.
Posicione a
gosto. Aplicar
a Marca D'agua.
Assine
e salve. Aparecida \ licacida , março de 2020.
05
Espero que gostem.
Obrigada!
  |