|
|
|
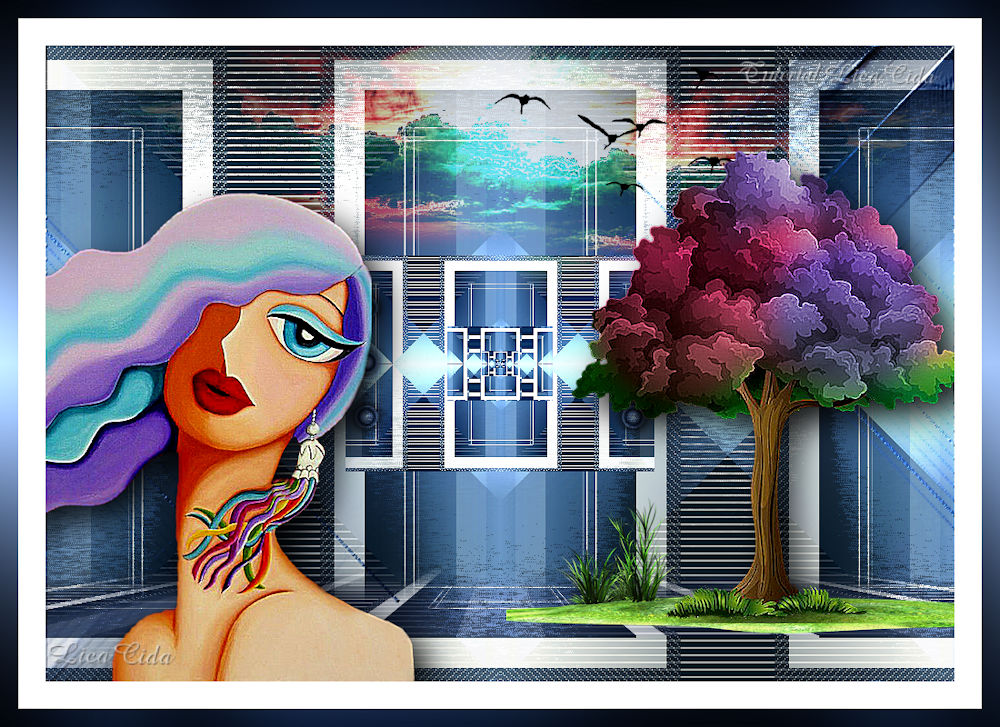
" Colofur Blue "
Preset
Illumination\Lights_lc14mp( Guardar em sua pasta de Presets My PSP
Files). Mask:
creation.tine_masque334
Deco: deco1lc \
deco2.
Tubes
: 5410-luzcristina \ 5415-luzcristina
\nicole-paysage5-2020.
Aves:
aveselement (27).
Arquivo net:
horizon_grass_lands_stock_png_by_madetobeunique-d485c45.
(Agradeço)
Marca
D'água . Efeitos do PSP.
Versão usada PSPX9.
Plugins
Plugin
Richard Rosenman.
&<Bkg Designer sf10I>.
Plugin MuRa'S Meister .
Tutorial _Roteiro
Configurar
Foreground #0a162c \ Background
#7d97bf
1-Abrir uma nova imagem de 900 x 600 .
Preencher com
o
gradiente formado pelas cores acima.
Configurar Linear . Angle 0\ Repeats 1. Invert desmarcado.
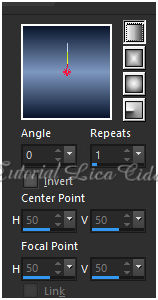
*Image add borderes 50
pxls\ ( color #ffffff
).
2-Plugin Richard Rosenman\
Solid Border.
Color=background.
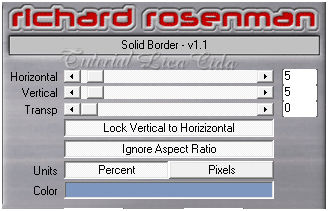 _ Selecionar esta borda ( Color=background )com a
ferramenta Magic Wand_Default.
_Preencher com o gradiente formado no ítem1.
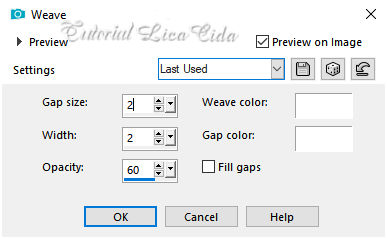
3-Effects\ Texture Effects\ Weave.
 Selections\ Select none.
4-Selections\ Selection All. Selections \Modify
\Contract... 100pxls.
5-Selections \Modify \Select
Selection Borders...
 New Layer
.
Preencher color = #ffffff . Selections\ Select none.
6- Plugin Unlimited 2 &<Bkg
Designer sf10I>.
 _Plugin \
MuRa'Seamless\ Emboss at Alpha_Default (
repetir).
Blend
Mode=Screen.
Layers\
Merge Down.
7-Plugin Simple \ Pizza
Slice
Mirror.
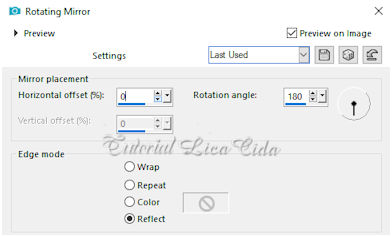
8-Effects \ Reflection
Effects \ Rotating Mirror
...
 9-Plugin Graphics Plus\Vertical
Mirror_Default ( 128-0 )
.
10-Effects\ Image Effects\ Seamless
Tiling:
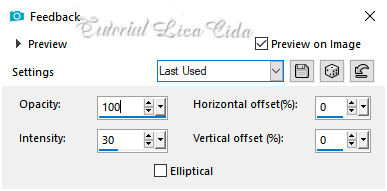
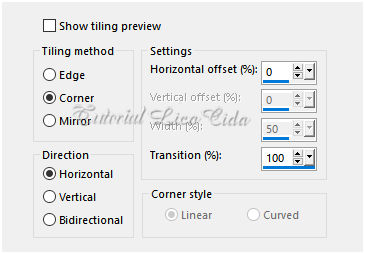 11-Effects \ Reflection
Effects\Feedback.
 12- New Layers.
Preencher com o gradiente formado no ítem 1.
Aplicar a Mask
creation.tine_masque334.
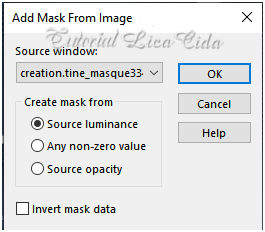 Layer\Merge \Group.
_Plugin \
MuRa'Seamless\ Emboss at
Alpha_Default.
( aplicar duas vezes
)
Blend Mode=Hard
Light. 13- Edit Copy no deco1lc\ Paste
As New
Layer.
14- Edit Copy no deco2\ Paste As
New
Layer.
Blend Mode= Overley
15-Ativar a layer inferior
_background.
Selecão Personalizada ( tecle
S).
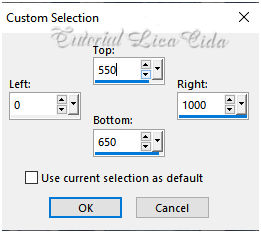 Promoted Selection to
Layer.
16-Plugin MuRa's Meister \
Perspective
Tiling_Default.
*Com a Ferramenta Magic Wand \ Feather 60 \ Clique na parte transparente . Deletar ( quatro-cinco \ vezes_ para suavizar o efeito ). Selections \ Select none.
Layers\ Blends\
Opacitys
(Use a gosto
)
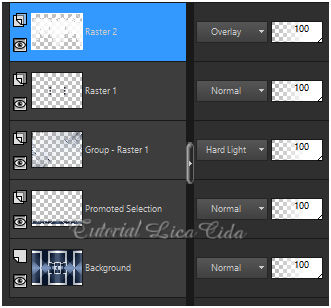 17-Ativar a raster 2, a layer superior.
Edit Copy no nicole-paysage5-2020 \
Paste As New Layer.
Posicione e use a gosto.
18-Effects\ Illumination Effects\ Preset Illumination\ Lights\
lc14.
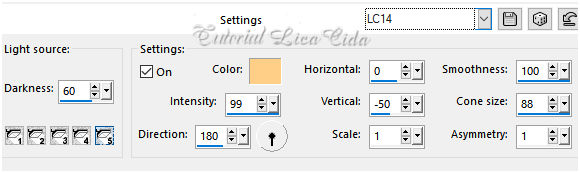 Blend Mode= Lighten \ Opacity 75%.
19- Edit Copy no aveselement (27)\Paste
As New Layer.
20-Edit Copy no
horizon_grass_lands_stock_png_by_madetobeunique-d485c45\Paste As New
Layer.
Use como modelo.
21-Edit Copy no tube 5415-luzcristina\Paste
As New Layer.
Raster5 _Use como modelo.
22-Edit Copy no tube
5410-luzcristina\Paste As New Layer.
Resize
80%. Posicione.
*Plugin
Alien Skin Eye Candy 5 : Impact\ Perspective
Shadow_Blurry.
( usar
onde achar
necessário)
*Image add borderes 50
pxls\ ( color #ffffff
).
23-Plugin Richard Rosenman\
Solid Border.
Color=background ( print ítem
2)
_ Selecionar esta borda ( Color=background
)com a ferramenta Magic Wand_Default.
_Preencher
com o gradiente formado no ítem1.
_Plugin Graphics Plus\ Cross
Shadow_Default. _ Resize \ Width 1000
pxls.
Aplicar
a Marca D'agua.
Assine e
salve. Aparecida \ licacida , junho de 2020.
12
Espero que gostem.
Obrigada!   |