 |
|
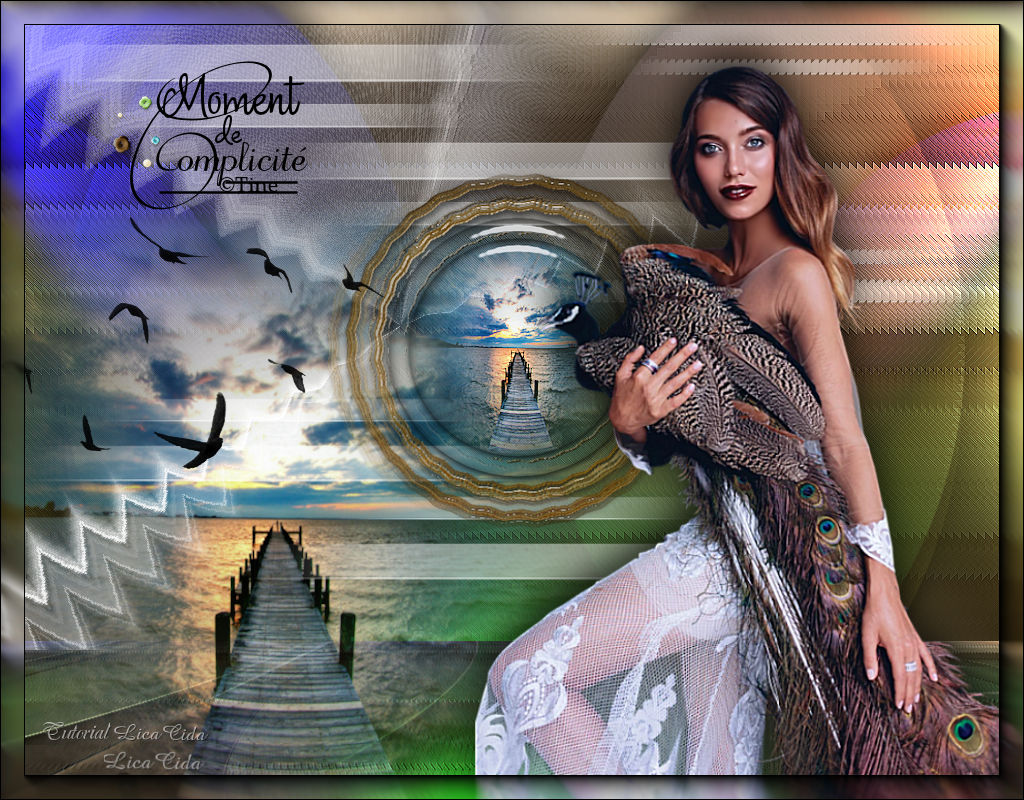
"Moment de Complicité " Aqui
Preset Illumination\Lights_monique \ mp (
Guardar em sua pasta de Presets My PSP Files).
Seleções: selcircle1lc.PspSelection. selcircle2lc.PspSelection.
( Salve em sua pasta de seleções My PSP Files ) .
Tubes: 8_Femmes_Page7_Animabelle\ Scenry_ponton_CibiBijoux
Decor:decor_nmcriacoes_14\decor_nmcriacoes_16.
Decor:decorlc1\decorlc1-b\decor lc2
Brushes: Birds_Brushes_by_Esmeralda_stock_3
Wordart: mini_wordart2.
(Agradeço)
Marca D'água . Efeitos do PSP.
Versão usada PSPX8.
Plugins
Plugin
Simple
FFG\D
Plugin Mehdi
Plugin\ RCS Filter Pak 1.0.
Plugin
Tutorial
_Roteiro Foreground
#d2c7b8 \ Background #463b2c.
1-Abrir uma nova imagem
transparente de 1024 x 700 pxls. Preencher com
o
gradiente formado pelas cores acima .
Configurar Linear. Angle 0 e Repeats 5. Invert desmarcado.
 Adjust \ Blur\ Gaussian Blur ...
R=28,00.
Adjust\ Add/ Remove Noise \ JPEG
Artifactal Removal... ( Maximum\ C=79) .
Plugin FMTT\ Saturation Emboss_
Default. 2- Plugin Simple\ Pizza Slice
Mirror.
Effects \Reflection
Effects \ Rotating Mirror . H = 0 \
R= 180 \ Repeat.
3-FFG\D_Vertigo. Default
(21).
Emboss3 4-Plugin Mehdi \ Sorting
Tile
 5-Plugin\ RCS Filter Pak
1.0.
 Layer Duplicate\ Image Mirror
Vertical.
Blend Mode=Overley\ Opacity
50%.
Layer\ Merge\ Merge Dow.
6-Plugin \
Effects\ Edge
Effects\ Enhance .7-Selections \Load \
Save Selection \ Load Selection From Disk \ Load
\selcircle2lc.PspSelection.
 Promote Selection to
Layer.
Selections\ Select
none.
8-Effects \ Image
Effects \ Seamless Tiling .
 Effects \ 3D Effects \ Drop Shadow -12\-2\76\
48,86
. Color=#000000.
Positivo
12\2\76\48,86.Color=#000000.
9- Selections
\Load \ Save Selection \ Load Selection From Disk \ Load
\selcircle1lc.PspSelection.
 10-Nova Layer.
Edit
Copy no misted Scenry_ponton_CibiBijoux \ Edit
Paste Into Selection . Selections\ Select none.
Adjust\ Sharpness \ Sharpen
More.
11-Plugin Alien Skin Eye Candy 5:
Impact\ Glass... Settings :CLEAR.
*Basic : usar as configurações e marcar Outside Selection.
*Repetir Basic : usar as configurações e marcar Inside Selection.
Selections\ Select none. 12-Edit Copy no decor_nmcriacoes_14 ( raster2) \ Paste As New Layer . Layer\ Merge\
Down. Resize 70%
13- Ativar a layer Promoted Selection . Effects\ Illumination Effects\ Preset Illumination\ Lights\ monique.
Image \Mirror Horizontal. Layer Duplicate.
14- Image\
Canvas Sise.
1024 x
800_ Bottom: 100.
15-Plugin MuRa's Meister \ Perspective Tiling.
Emboss3. 16-Nova Layer\ Arrange \ Send to Bottom. Preencher com o
gradiente formado pelas cores acima .
Configurar Linear. Angle 0 e Repeats 0. Invert
marcado.
 17- Ativar a Layer onde usei
o Perspective Tiling _ Copy of Promoted Selection.
Nova
layer.
Select All. Edit
Copy no misted Scenry_ponton_CibiBijoux \ Edit Paste
Into Selection .
Selections\ Select
none. Resize 80%
( use a
gosto).
Adjust\ Sharpness \ Sharpen
More.
Layers \ blends\
opacitys
 18-Ativar a layer Promoted Selection.
Edit Copy no decor lc2 \ Paste As
New Layer .
Blend Mode=Soft Light.
Opacity a gosto. ( raster5)
19-Ativar a Raster4 (
misted).
Edit Copy no decor lc1 \ Paste As
New Layer .
_ Effects\ Image
Effects\ Offset.
 Layer Duplicate.
_ Effects\ Image
Effects\ Offset.
 20-Edit Copy no decorlc1-b \ Paste
As New Layer .
_Effects\ Image
Effects\ Offset.
 21-Edit Copy no
decor_nmcriacoes_16 \Paste As New Layer .
Objects\ Align\ Top.
Objects\ Align\ Left.
Effects\ Edge Effects\
Enhance.
22-Edit Copy no
Birds_Brushes_by_Esmeralda_stock_3\Paste As New Layer
.
Posicione.
23-Edit Copy no
mini_wordart2\ Paste As New Layer .
Posicione como
modelo.
24-Ativar a layer superior.
Edit Copy no tube
8_Femmes_Page7_Animabelle\ Paste As New Layer .
Resize e posicionamento a
gosto.
layer\ merge
visible.
25- Plugin AAA Frames / Foto Frame_Default .
Width25.
Aplicar a Marca D'agua.
Assine e salve
jpg. Aparecida \ licacida , maio de
2019.
Espero que gostem.
Obrigada!
  |