|
|
|
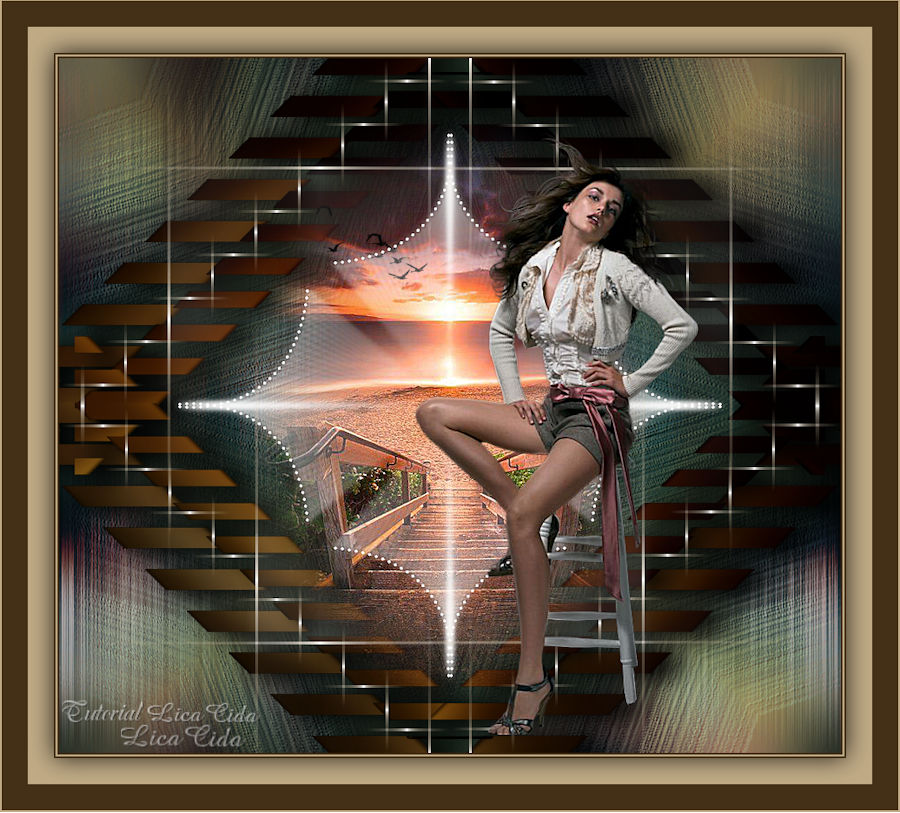
"Estrella"
Com Carinho!
Tubes: malackatube u0385\SvB Zee 47 misted\
Brushes :bird_brushes_II_by_lpdragonfly_5
Deco:delicatemp (mp)
(Agradeço)
Marca D'água
. Efeitos do PSP.
Versão usada
PSPX8.
Plugins
Plugin dsb flux.
Plugin Mehdi.
Filters
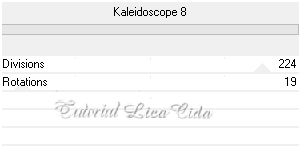
Unlimited 2 _
&<BKg Kaleidoscope>.
Plugin Nick
Software.
Plugin Alien Skin Eye Candy
5: Impact.
Tutorial
_Roteiro
Foreground
1-Abrir
uma nova imagem transparente de 900 x 800 pxls.
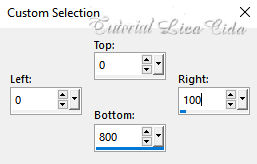
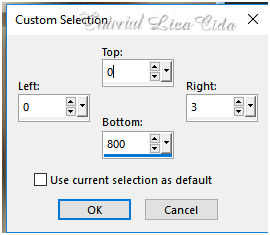
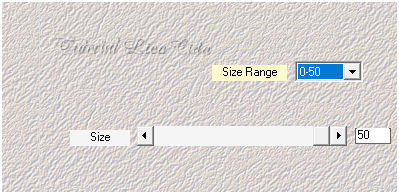
_Seleção Personalizada (
tecleS).
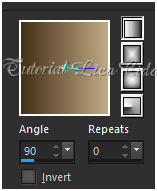
_Preencher com o gradiente formado pelas cores acima .Configurar Linear.
Angle 90 \Repeats 0. Invert
desmarcado.
 2- Edit Copy no
tube malackatube u0385 \ Edit Paste Into Selection .
3- Adjust\ Blur\ Gaussian Blur ... R : 28,00.
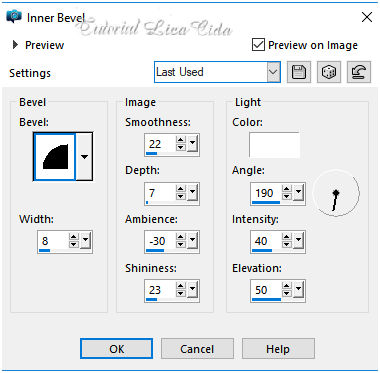
4-Effects \ 3D Effects \ Inner Bevel.
 Selections\ Select
none.
5- Selecionar a
borracha ( eraser )
 Configurar :
 Aplicar na seleção como
modelo.
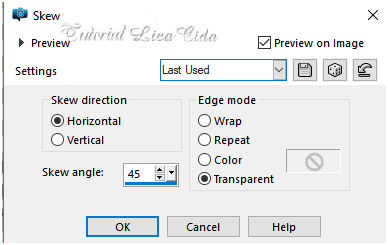
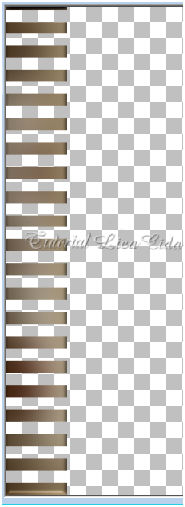 6- Effects\ Geometric
Effects \Skew.
 _Layer \ Duplicate. Image
Mirror Horizontal.
Layer\ Merge\
Down.
_Layer \ Duplicate. Image
Mirror Vertical.
Layer\ Merge\
Down.
_Image\ Resize 120%
 7-Nova layer\ Send to Bottom.
Preencher com o gradiente Sunburst , usar
as mesmas cores acima.
Repeats \0. Invert marcado. CP=H e V\50.
FP=H e V \50.
 8-Select All. Edit Copy no
tube malackatube u0385 \ Edit Paste Into Selection . Selections\
Select none.
_Effects \ Image Effects \
Seamless Tiling \ Default.
9-Adjust\ Blur\ Gaussian Blur ... R :
28,00.
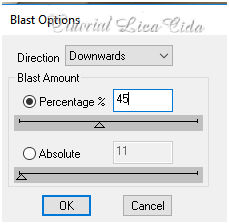
10-Plugin dsb flux\ Blast.
 11- Ativar a raster1.
Nova Layer.
_Seleção Personalizada ( tecle
S).
 _Preencher color #ffffff.
Selections\ Select none.
12- Effects\ Geometric Effects
\Skew.
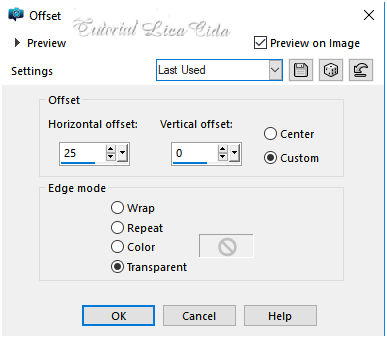
 *Effects\ Image Effects\
Offset...
 _Layer \ Duplicate. Image
Mirror Horizontal.
Layer\ Merge\
Down. _Layer \ Duplicate. Image
Mirror Vertical.
Layer\ Merge\
Down.
_Layer \
Duplicate.
13-Layer
original_Raster3.
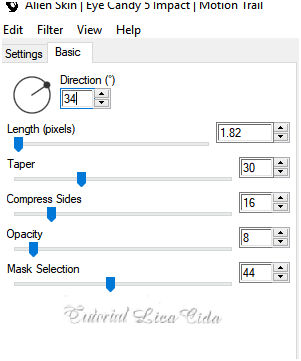
_Plugin Alien Skin Eye Candy
5: Impact\ Motion Trail...
 14-Plugin Mehdi
\Weaver.
 15-Na sua cópia: Copy of
Raster3.
Plugin Mehdi \Weaver.
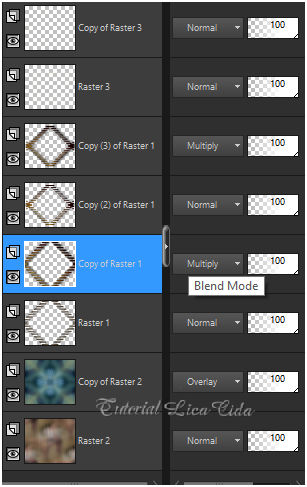
 16-Ativar a Raster2. Layer \
Duplicate.
Na layer duplicada.
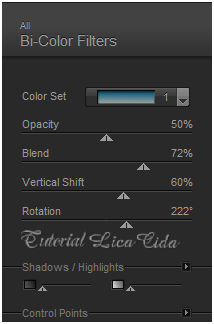
Plugin Nick Software\ Color EfexPro
3.0\Bi-Color Filters . Cool \ Warm .1
 17-Filters Unlimited
2
_&<BKg Kaleidoscope>.
 Emboss3. Blende
Mode=Overley.
18- Ativar a Raster1. Layer \
Duplicate.
Na layer duplicada.
Plugin Nick Software\ Color EfexPro
3.0\Bi-Color Filters . Brown1.
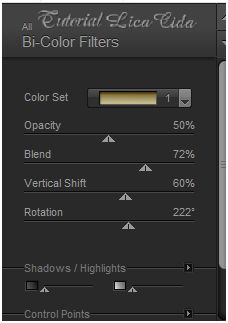 Blende
Mode=Multiply.
_Layer
Duplicate \ Resize 80%.
Layer Duplicate (
repita)
Mudar:
Blende Mode= Normal \copy
(2)of raster1.
_ Effects \ 3D Effects \ Drop Shadow 3\20\85\
40,68
. Color=#000000.
usar nas
layers:
copy of
raster1\ copy(3)of
raster1.
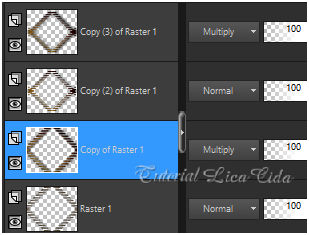 as layers
, opacitys, blends, estão
assim.
use a
gosto.
 19-Ativar a copy
(3) of raster1.
_Edit Copy no SvB Zee 47
misted \ Paste As New Layer .
_ Adjust\ Sharpness \ Sharpen
More.
20-Edit Copy no
bird_brushes_II_by_lpdragonfly_5 \ Paste As New Layer.
Posicione.
21-Edit Copy no delicatemp \ Paste As New Layer.
22-Ativar a layer superior.
Edit Copy no malackatube
u0385 \ Paste As New Layer. Posicione.
_ Adjust\ Sharpness \ Sharpen
More.
*Layer\Merge
Visible.
23-Image add
borderes 2 pxls color= ( fore )\ Image add borderes 2 pxl color=(
back).
Image add
borderes 2 pxls color=( fore )
Selections\ Select
All.
Image add
borderes 30 pxls color= ( back).
_ Effects \ 3D
Effects \ Drop Shadow 0\ 0\ 80\ 40,00. Color=#000000.
Selections\ Select none.
Image add
borderes 30 pxls color= ( fore )
Image add
borderes 2 pxl color=( back).
Image\ Resize
Width 900pxls .
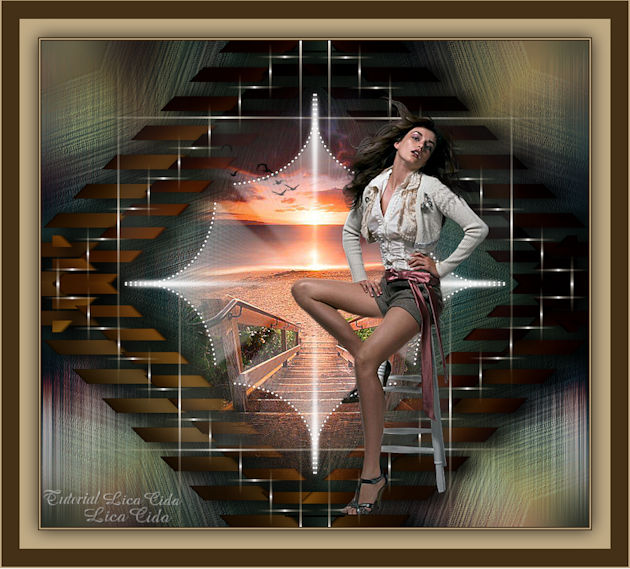
Aplicar a Marca D'agua.
Assine e salve
jpg. Aparecida \ licacida , março de
2019.
Espero que gostem.
Obrigada!
  |